How-To Dye Hair From Black To Brown With Blow Out Styling
- Posted on 11 July, 2022
- HD Lace Wig
- By Anonymous
***ON THE ROAD TO 2,000 SUBSCRIBERS DONT BE AFRAID TO BE APART OF LALA’S WORLD ***
Thank you for watching this review/tutorial! Hit that like button if I put you on to anything new. Ofc subscribe we upload weekly over here ;-*
♡
♡
♡
IG- https://www.instagram.com/lala.shanell...
♡
Tik Tok-https://vm.tiktok.com/ZM8C5MX7n/
♡
Business Inquiries [email protected]
♡
***Products used affiliate link***
Exact hair -https://amzn.to/3yp1VnS
Ebin hair tint-https://amzn.to/3vTVyZI
Ebin lace spray-https://amzn.to/39rqIiA
Ruby Kisses-https://amzn.to/3O995mt
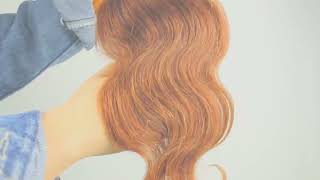
So today, i'm here to revamp an old wig, because we reduce reuse and recycle and everybody got money, they'd be spending 100, plus some wigs every time like no. So this is one of my older wigs that was sent to me um. I did dyed a different color put some roller sets in it and did kind of like a a rosette look. Today it is giving - and it is so cute - i'm going to show everything in the video from the dyeing to how i curled it and also the takedown and the install, but you guys like i am living right now. Like look i'm living, it looks so cute like. I definitely recommend if you have an old wig to try out this hairstyle or even if you have a new wig to try this hairstyle and then also the color for the summer. Well so says me, i don't know, but the color for the summer is this like honey brown or even like a honey blonde hair. So definitely try to look for those hair colors for this summer as well, even if you're doing synthetic or human hair. It'S up to you, but overall you guys the style i mean i'm not gon na lie. It takes a little bit more work than my other styles, just because of the prepping process, but i look so good like not to be cocky or anything. But i look so good, like i can't wait to step out and, like turn, heads and you should want to do the same thing too. So if you want to get this, look, especially for the summertime, continue watching bye hi, you guys thank you for continuing to watch so right now. What i'm doing is i'm just showing the old wig. It'S definitely giving stale you're going to want to use whichever bleach you have. I have the quick, blue and you're going to want to use either 20 or 40 developer. It really doesn't matter, and you want to make a concoction where you can basically use the whole thing to paste over the hair um. I don't show it here because i did show me making a bleach bath, but that didn't do the trick. You want to actually be able to get a comb and put the bleach from the root to the tip. All the way through and comb it through just so everywhere is saturated with bleach. So after you comb through the bleach and you let it sit for about 30 minutes to an hour, what you're going to want to do is separate the baby hairs from the actual hairs that you're going to want to lay and curl um. I just used a wax stick just to hold everything in place and then, on top of the wax stick you're going to want to use a hot comb just to basically solidify everything. You'Re going to need to do this on a wig head, so get whatever big head that you have and make it do what they do. As you guys see, i'm using foam, but foam is not the best. You can use anything that you have look at how it's looking beautiful, definitely a necessary step for, if you wanted to lay like scalp me me i'll, give you oh anything you want from me. You need anything you so desire. Anything is all day long after you section out the baby hairs. What you're going to want to do is part the hair down the middle. I was trying to get rid of that part that already came on the wig that i plugged into place. So that's why? I parted the hair down the middle and then i'm going to just begin curling the hair back and away from my face, so it can get a nice fluffy. Curl um go. So what you see me doing here is basically what i do throughout my whole head. Um that little section in the front is the section that i'm going to use to guide me straight down the middle of the wig and i'm gon na just curl every piece of hair backwards. So it can give a nice fluffy effect and then i'm gon na do the same things to the side, which i'll also show you in an upcoming clip. Is foreign daddy see it's very self-explanatory? The only thing is that it is tedious, because it's extra time that you have to stay and curl the hair, so you don't want to pick up too much hair because you want the curls to look good, so section out the hair accordingly to the curlers. Now you need a forward feeling, so this is the next day, and this is basically how it looks as you guys can see. Um i just did the purple roller straight down the middle, and then i did the rollers straight down the side. Um, you want to make sure you roll the fits the length of hair - that's important, because you don't want it to be too small or too big, because it's not gon na work um. I did install it with the roller still on the wig, just because it was easier for me and i did all the sectioning and parting before. Of course, i'm gon na use the even lace tint just to make the lace a little bit darker and then i'm going to use bold hold to hold the front of the wig. I don't recommend bold hold because after i use that my forehead was extremely irritated. Just use the even lace glue if you want to glue to make it stick down and look a little bit better because that bowl hold, i don't think it's good for skin a sensitive skin had that i don't know what happened to them with security, so i Used about two layers of boldhole, you want to make sure that it dries clear, because if it doesn't, then it's going to look white under the lid so just give it time. Let it dry i'm going to use that comb just to basically set it in place and hold the lace in place with the glue and then on the sides. You know i use my handy dandy, even lace spray to hold it down. So all of this stuff that i use i'm gon na link down below, but i use the even lace braid you want to wait until it gets a little bit tacky so dry, it a little bit and then stick the lace in it. I use that on the side, because it's just less um glue going on my edges and i like to keep my edges intact. That'S like my real hair is more important than the wigs and that's how it should be for everybody installing here my specimens down. So after you blow dry it you are going to want to put on an elastic band just to make sure everything is held in place. I leave on the elastic band for probably like 10 to 15 minutes, just to make sure that lace is melted onto my skin, and i think after that, like i just removed the curlers from my hair. While the elastic band was still on because the baby hairs was already separated, so all i had to really do was just focus on the curlers baby is hey, so that was my happy dance. Because did you see how it came out like i didn't? Even do anything to it, but it's already flipped to the side and giving life right now so yeah. I was mad hype, can't even front i'm taking off the elastic band now and i'm basically going to clean up whatever is a little bit hard and crusty. Because of the lace spray with a q-tip that has alcohol in it, so that's like a golden tip that i don't see any of the girls doing, but you can use a q-tip with a little bit of alcohol in it just to clean up any spray or Glue, that's on the actual hair, because you're going to want to mold the hair into place, how you want to mold it you don't want it to be freezed into place. So just like y'all! I really am a beginner at wigs too, and the ear tabs are the hardest part in my opinion, so i did use a little bit of bold hole just to glue that part that lifted up in place. Um honestly with wigs, is a learner's dual process. So, if you're looking at something you're like you know what i wanted to lay a little bit flatter, i wanted to do this or i want to do that. You can always go back and redo these steps, because why not like you have the time you feel me now look at it, it's laying perfectly and i'm going to go back with the q-tip and keep cleaning around my edges. Whatever is freezed into place all night and by the way i don't do this um, don't you just say say uh so with the edges, you want to flip it up when you curl it, and then you want to use a little bit of black gossipy glue. Just to slick it into place after you curl it honestly, it does the work on its own. The godzilli is only for the top to hold it in place. You don't want to bring it down to the end of the hair, because then it's just gon na mess up the fluffy baby hair look is so this lace was definitely giving gray, which it did the first time i installed it. So you just want to use a little bit of your booby kisses and then just put that on the lace. Of course, you want your ruby kisses to be darker than your skin tone, so it helps with the blending so yeah a little bit of that goes. A long way so with any washer set, you do want to wrap the hair after i forgot to use oil, but i did use it in the beginning and um. How i look in the beginning is what i looked like after i took off the silk scarf. I just wanted to say, though, thank you guys, thank you so much for like liking and commenting and subscribing i'm at 1500, which is crazy. The new goal, though, is 2500 by the end of the year, and i know with you guys help i can do it. I love you guys so much and i'm so grateful, but thank you guys for watching once again. Bye,


Comments
xo.cahtlinn: Girl I thought this was your hair in the thumbnail and when I clicked the video I got confused , this color is gorgeous on you and you did a great job with the install!!
Shuky Arije: Yasss road to 2.5k ❤️
Life with Leah: Makeup tutorial