Wig Transformation Fron Yellow Blonde To Platinum Blonde | Aliexpress Wig Install| Vnveronica
- Posted on 03 December, 2021
- HD Lace Wig
- By Anonymous
GET THE WIG HERE: Let's shop together on AliExpress with new user coupons
Your C$ 6.56 in coupons are here!
https://a.aliexpress.com/_mKglLzC
DISCOUNT CODES
1. TTDEYE CONTACT LENSES use code "vnveronica" save more 10% off https://ttdeye.com?aff=32981
2. SHOP AT MISSEEDESIRE: https://www.misseedesire.com/ DISCOUT CODE: VN25 GET 25%
3.OTAKU CONTACT LENSES : save VN25 GET 10% https://www.billionairebeauties.com/pa...
4. GET THE JEWELRY HERE: use code VN25 https://www.instagram.com/belizzadesir...
MORE VIDEOS TO WATCH:
1. 2021 MAKEUP VANITY TOUR
https://www.youtube.com/watch?v=t1luCu...
2. BIGGINERS FRIENDLY DEEP SIDE PART SLEEK PONYTAIL
https://www.youtube.com/watch?v=bX3sdF...
3. HOW TO: INSTALL DEEP WAVE FRONTAL WIG
https://www.youtube.com/watch?v=eVXQPu...
1.MASSIVE AMAZON HAUL
https://www.youtube.com/watch?v=Pgw3bj...
2. INSTALL DEEP WAVE FRONTAL WIG
https://www.youtube.com/watch?v=eVXQPu...
3. SHEIN MAKE ME DO THIS TRENDY SUMMER 2021 HAUL
https://www.youtube.com/watch?v=E3DHun...
FOLLOW ME ON:
Instagram: https://www.instagram.com/brenda_ncha...
Facebook: https://www.facebook.com/
Snapchat: Brendan Chama
poshmark.ca/closet/vnveronica25
Email to [email protected] for any collaboration or any business opportunities xoxoxo
Hey guys! my name is Veronica and for today video I'm sharing with you guys this amazing mix color brown Curly bod wig from Luvm3 hair . I hope you guys like it please subscribe for more videos, comment down below and don't forgot to click the notification bell beside the subscribe bottom. xoxo
#aliexpresshair #frontalinstall #hairreview
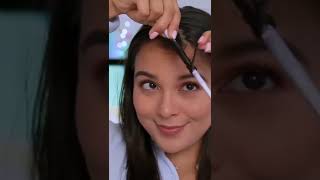
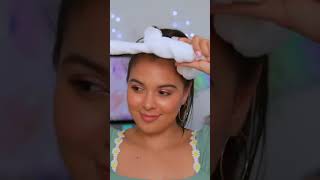
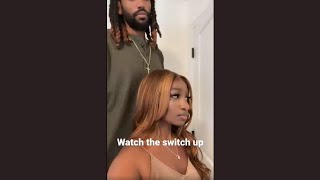
So, hey guys, it's your girl, veronica here and let's just go ahead and start with the video so for today, video i'm going to be using this wig from long thick hair store on aliexpress. The lace of this week is 13 times 4 and this is a human hair. So this is a 613 lace frontal, and this is a 22 inches width. So, as you guys can see, uh the wig come with three comb, two on the side and one on the back as well with an elastic bang that you can secure your wig with. So the first thing that i'm gon na do i'm gon na start by washing the wig, as you guys can see right now, i'm just making sure that the wig is wet and the reason why i'm washing the wig is because i wanted to get rid of This yellow color that the wig came with so the wig looks more kind of like yellow undertone, and i didn't want that. I wanted the wig to look more uh toned down. So that's why i'm using a purple shampoo and also if you would like to achieve kind of like icy kind of color. You can also let your purple shampoo sit longer, but that was in my case. That'S why i didn't let it sit longer and i wash it right away, but i'm gon na go ahead finish towards the wig, as you guys can see right now. I'M just erasing the wig, as you guys can see, and the color looked much better. So you guys can see the different from the beginning and why the wig looks right now. It'S look more like the color that i wanted to go with. It'S have a little more of icy color underneath than on the top of the wig. So after washing the wig with the purple shampoo, i went ahead and put conditioner and let the wheat dry by itself and basically that's all i did to the week. I didn't do anything else and after that now i'm gon na go ahead and i'm gon na start installing the wig and, as you guys can see, i'm already have my wig cap on. So if you guys would like to see the process of this, i'm gon na link few videos down below. So i'm gon na start by using my tinted lace, uh products and i'm gon na put this all over the wig, basically where the wig half lace. So after that, i'm going to go ahead and i'm going to put the wig on my head, as you guys can see, i really love how this color come out. I think let's look much better than what it was looking at the beginning. So now i'm going to go ahead and place the weight exactly where i want it. It'S really important that you measure your weight or you practice with your weight before you glue it down. That'S where you can exactly know where you want your wig, so yeah as you guys, can see, i'm still using my hot comb to lay down any hair that i have and then i'm gon na go ahead and put the wig in a small bun. As you guys, gon na see on the video, i don't know if you guys can tell, but the hairline of the wig looks uh different than what i saw you guys at the beginning. And that's because i kind of like plugged the wig a little bit. But not too much because you cannot go too far with it because of the way that the wig is constructed. So i kind of like plug it a little bit to have a clean hairline, and now i'm just cutting any extra lace that i may have on the side, especially on my ears. After that, i'm going to go ahead and i'm also going to make another card on the front part of my wig. I usually work on section every time i install my wig, but seeing i already know where my wig go. It'S kind of like not necessary. So if you're a beginner, i recommend you to cut your wig on section and that way you can also putting down on sections. So now i'm going to go ahead and put a really nice layer of glue, i'm using the same glue that i use all the time i'm going to leave it down below and also i'm going to leave all the product i'm gon na, be using on this Video down below so please make sure that you check out the description bar and also subscribe to my youtube channel. Have a subscriber yet like this video comment down below and please make sure that you click notification bell to be notified. Every single time that i upload a new video on my youtube channel, so i'm gon na wait until the glue uh get dry, as you guys can see, and after i'm gon na start realizing that the glue is getting dry. I'M gon na go ahead and put down the glue, so i'm not gon na press the glue down. I'M just gon na place it on top of the glue. So after having the secure that the uh, the wig is exactly where i want it is when i'm gon na start pressing down as you guys can see. So you have to make sure that you don't press that, because with this glue, if you press it down, it's going to be another mission to take it out. So make sure that you put on top of the glue first and then after that you can press that, just if the wig is exactly where you want it. So i'm gon na continue to press it down, as you guys can see, and then i'm gon na use this scarf and i'm gon na secure the wig and i'm gon na leave it there for about 20 to 10 minutes. And then i'm gon na go ahead and i'm gon na um take it out after 20 or 10 minutes. So and then i'm gon na go ahead and i'm gon na cut the extra lace that i have in front of the wig and i'm using my brows or face razor and also uh. I use my scissors, but i think this time i use more the eraser than scissors so yeah. You guys gon na see that on the video, so i'm gon na finish to cut that lace, as you guys can see, and this time i'm going really close to the wig and yeah. Basically, that's what i'm doing now, cutting the extra lace that i have on the front of my wig. I love using bro brows eraser because it gives you like that zigzag motion that you we always looking for so after that i'm gon na use my glue again to glue down any extra head that is didn't glue down at the beginning and basically that's what i'm Doing right now fixing any uh imperfection that i may have gluing down anything that is didn't glue down and i'm gon na do that on both sides, as you guys can see, making sure that the wig looks nice and glued down nicely and all of that so Far, i love the glue. I love the color and everything looks nice for my eyes. So i don't know what you guys think so, after that i'm gon na go ahead and use, my god should be freezing spray and i'm gon na spray. The glue again to have an extra secure and then, after that, i'm gon na go with my scarf again and secure the wig one more time, and for this time i'm going to leave a little bit longer until i'm going to finish to uh a style. The wigs so now i'm going to go ahead and i'm going to put my hair on the middle as you guys can see. The only way that you can wear this wig is by doing a metal part. So there is no way that you can do a side part or anything like that. It'S a metal part or a ponytail or a bun. So those are the only two options that you have. So i'm also gon na make sure that i take some pieces of hair in front to make the line more visible and then i'm gon na go ahead and keep using my hot comb to lay down the hair and make the hair looks nicely. So, basically, that's what i'm doing right now. After all of that, i decided that i'm going to cut some pieces of hair in front, so you guys know that i love having my hair in different dimensions. So that's why i always cut the front part of my hair, so i'm not a hairdresser or anything like that. I'M just cutting the way that i feel like it's gon na look good and then i section the hair in two and then i'm gon na start by working on one section: i'm gon na curl the hair, as you guys, can see i'm using my curling iron That i got i think from. Sadly, if i'm not wrong so yeah, i think i got it from sally or from winners. I think one of those places so but it's been a really long time since i got it so i still work good. I still achieve the looks that i always looking for so i'm safe. So now i'm gon na finish to curl the hair, as you guys can see, i don't use any technique or anything to core the hair. I haven't put any oil on the hair, i'm just going to focus on curling the hair and using my bobby pins to secure the hair, as you guys can see. The reason why i'm doing that is because, while i'm going to be dressing up and doing my makeup, the curls gon na cool down a little bit and does that way, it's gon na be easy to work with it. So that's why i always use this method. So yeah, i'm just gon na keep curling the hair, as you guys can see so far. I like this color, i don't know what you guys think, please. Let me know in the comment below what you guys think about this color. I was thinking of dying. This hair uh, like gray or something like that - i don't know what you guys think about it. Let me know if you guys would like to see how i bleach or dye this hair on gray, so yeah, i'm gon na finish to do that and after that, i'm gon na go ahead and change. Put some makeup on and now i'm looking more presentable than before, so now, i'm gon na go ahead and finish to take out the bobby pins and yeah. Basically, this is how the hair looks like the hair got. The heat very well and i love the density of the hairline - is so beautiful. The hair is soft, so i'm gon na finish to brush down the hair with my brush and also with my fingers. I love going with my fingers. I think i, like the looks when you use your finger better than anything else, and then i'm gon na cut any other pieces that i feel like. I want to cut down so yeah. Basically, that's all about this hair and then i'm gon na use my hot comb to keep styling the hair and keep making the hair looks good. Basically, that's all about today, video, please. Let me know down what you guys think and also please make sure that you subscribe to my youtube channel and thank you so much for watching and i hope to see you guys on my next video bye um. You

Comments
Martine Abraham: You really know good to slay a lace front wig