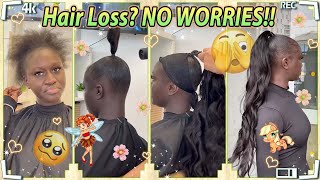
Headband Wig To Baseball Cap Wig! Diy Human Hair Wig Hat Tutorial! Affordable & Easy!Throw On & Go!
- Posted on 02 October, 2020
- Headband Wig
- By Anonymous
Hey my YouTube Divas! I will show you how to make a quick and easy Wig hat! Did I mention it’s affordable! I made this wig hat using EVERYTHING I already had laying around the house so this unit was free! Yes sis I said free! I did not have to purchase any items at all. You can just Throw this hat on and go!!!! ♀️
My Instagram link
https://www.instagram.com/slaydivala/
Let’s help support each other! Subscribe to my channel and Follow me on Instagram! Please Post your YouTube and/or instagram in my comments as I would love to support you as well! This video is NOT sponsored and I paid for this wig with my own money.
#wighat #hatwig #capwig #wigcap
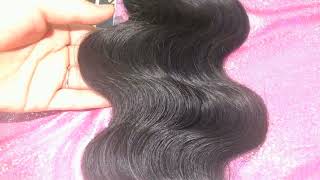
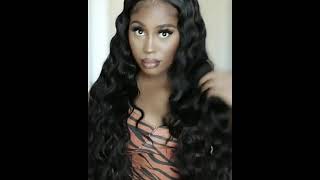
So for this project, you'll need hair bundles. One to two bundles is more than enough: a glue gun, glue, sticks and a head of your choice. I prefer baseball style heads and we can go ahead and get started. What you'll need to do is flip your head. Inside out and put it on your mannequin's head, if you're wondering what that white stuff is on the cap, that is hard glue from a previous wig that i made. I just removed the tracks out for this one and i'm going to redo it this time with a body wave hair at first i use short curly hair and what you do is fairly easy. You will go ahead and measure your tracks from side to side from the front of the head to the back of the head and insert your glue and stick it onto the head. This is very quick and easy and great for bad hair days. This is literally a throw on and go wig now. I do not suggest that you will need to put any tracks on the adjustable straps in the back of the cap, just because i usually have to adjust my straps all of the time. So if you glue tracks on there, then you won't be able to adjust the cap, but if you feel like you do not need to adjust your cap or you just want to glue the tracks on the adjustable straps, you definitely can i just don't also what We'Ll do here is with this wig. It can become very inexpensive. Most of the items you probably already have laying around in your house anyway, and if you do need to buy bundles, you only need two at the most and you can find some pretty good quality. Bundles fairly cheap on amazon, if you need to, i just used some bundles that i already had laying around the house that i use from previous wigs. Well, i'm sorry that i did not use from previous wigs that i made and i had a few loose tracks around the house and that's just what i used um, but the bundles that i am using did come from amazon as well um. So amazon do have some good quality hair. If you do search around, you will be able to find some good ones. After that i would say i wouldn't go, buy top of the lime bundles for this. If you need to remake the hat, you can always redo it. If you need to like, i did, or you can buy new hat, you don't have to take the tracks off of this one like i did. I don't know if this ratchet or not, but if it is i'm sorry, i just didn't, have another hat at the time that i could use so and i just wanted to update it wig instead of using the short curly hair. So i just took the tracks off this one and reused: the head save a little money. I guess if you want to um so here, i'm showing you where now i'm above the adjustable straps. So i no longer need to cut the tracks right there, where at the end of the adjustable straps, so the tracks will now be longer because i don't have to go over the adjustable straps anymore. So there you go. If you take a look at that yeah. So that's that's pretty much it there! So going it's pretty much repetitive after this. That'S why i did speed up the video you're. Just gon na go from one side of the the hat to the other side, and that is it i'm telling you all. This is so easy. It takes maybe 40 minutes to an hour. It shouldn't take no longer than an hour to do something like this um to me. I just love it. It'S literally throw on and go and they're easy to make. I wouldn't personally pay anyone to um for a hat wig, because they're so easy and inexpensive to make. But if you want to, there are a lot of people who do sell, hat wigs, especially on amazon. I do think amazon has more synthetic wigs, wig heads my. I prefer human hair so that i can curl it if i want to which, at the end of this video you will see, and i will show you how i did end up - curling the hair towards the end. I just like curls, i'm not really a straight hair girl. I love curls, so i like to be able to curl it up when i want to. I like big curls loose curls waves. All of that i don't really wear my hair straighten, not too often, but anyway, amazon do have some. If you would like to buy them, they they mostly from what i've seen they range from, maybe 40 to 60 dollars. Some i saw i did see a few for 25, which were um like the real cheap synthetic hair. But if you already have these items laying around in your house hey, why not just go ahead and just make your own. You probably will come out cheaper anyway, because you don't have to buy anything after that um, you can put as much hairs on the head. If you want to um, i usually stop at the x on my head, which i will show you in the video somewhere here. Um there's an x on the top of all of my hats that i purchased there's the x at the top um and that's usually where i stop it. It'S just kind of a mark for me to know that's just how much hair i like on there, but if you would like to go all the way up to the rim of the head, you surely can it'll just be more hair for you, it'll make it Thicker for you, if you want it thicker and you can customize it, how you want to make it thicker or thinner, either way is fine and there we go, i'm pointing at the x right there on the head. That is where i stop it. That'S where i end my track set and i'll go ahead, and i'm almost through here so i'll go ahead and show you next what products i do use when i get ready to curl my hair and also, if you guys, like my videos, please go ahead and Comment and subscribe and like my video, if you like them, i'm working on trying to bring good quality videos right now, i'm recording off my iphone. That'S all i have, and i have a small ring light here - um and i'm just working with what i get right. Now i don't want to spend too much money on these items if i don't have to um until you know, i get better at recording and yeah that'll be that on that for right now, um also, let's see so i'm almost through laying the tracks on the Cap uh, the next portions of the video i will be trying on the wig cap and also curling the hair, so i'll show you all how i do that towards the end of the video we're getting closest we're almost there um also excuse my mannequin head. Y'All. Look, i make a lot of wigs, so it looks a little beat up and dirty and ratchet looking. But i promise you: it's just product build up gel harem, hair, mousse water, glue, everything that you use with a wig um, so i'm probably gon na buy me a new one. There'S really nothing wrong with it. Maybe i can try to clean it clean it up. A little bit, but that's all that's on it - is product, but listen, sis if you thought the headband wig was quick and easy baby. This is even easier. I'M talking about. I don't have to lay down my edges with any gel or anything. I don't have to glue this on. I don't have to find a cute headband. I literally just throw this on and go. I do curl my wigs um, so i guess that will take some time, but the good thing is with my curls. They usually last four to five days so once i curl it once the next four to five days, i'm literally just throwing this wig on and going out the house and running those errands. But if you like straight hair, you don't even have to curl it. You can get you some good straight hair and literally throw this wig on, go, run them errands and come on back to the house and go from there if you want to - or you can just wear it around the house. If you want to on a bad hair day, it's up to you, it's really really easy. It'S really really quick, really simple! It'S one of those wigs like i said about the headband wig. You need at least one in your stash. Just one sis, just one just have you one head wig and one of those headband wigs and you won't have any more bad hair days. I promise you sis. I promise you that, but anyway you all. I will be trying on this wig at the end here. Um, as you can see, and i'm curling it, i'm gon na insert a picture too at the end of the video. Thank you all so much for watching divas enjoy and if you made one of these head wigs, let me know how it turned out. Did you like it? Was it easy to make? Did you have any problems? I would love for you to share it in the comment section. So hit me up in the comments, and let me know thank you so so you
Comments
J B: Look, we in a pandemic, and 2021 is already a mess. You were are not rachet. You are being resourceful! Thanks for the tutorial.
Teresa Kennemore: I absolutely love it, I just made me one ❤
Cynthia Ronces: Absolutely love it! Been wearing wigs for a while and wanted to make a hat wig for vacation but had no idea where to start. Just made mine today with one of my favorite hats and I am IN LOVE! Thank you!!
18missem: This is amazing!!! I also love that you got straight to it, n let us watch you as you narrated. I honestly couldn't tell you used your phone! The lighting was good too! Plus, your wig head looks a lot better than most. So you don't have to apologize! We all know how it is anyway! Keep up the great work, n thanks for sharing your creativity with us! ❤️ #newsubbie
Sophia Jones: Love it. Bout to do the same with my cap. Growing out my hair from a short cut.
Dmarie Lewis: Thank you for this video, trying to create a few of these for my best friend that has to start chemotherapy I will be using your method thanks so much
Tashia Denise: I've watched your video like 5x while I'm doing one for myself.. thanks!!
Dana Long: i love this. you made it look so easy....
Mistress See: Hey Babe I'm loving this the only thing you never have to do is apologize for being you! Thanks so much!
Olympia Shelton: Looks good I've got to try it.
Vickie Burrell: I love your video, it was quick & simple except...you showed the product you sprayed & rub on the hair to fast. I would like to know what to use on the hair, I'm a newbie to this process. I like the way you did the band in the back. I've seen other videos where they outlined the band. Your technique is a lot easier. Thank you!!!
Gist With Merry: Nice one I will definitely try it
D Glorious: The sistas are so creative. You're very talented.
Anita De La Cruz: No shade! Save those coints! Nice job!
Asia H.: Thank you
Mz. D: I Really like this...
Gessika: I made a crochet braid one
Mike 2.0: She good