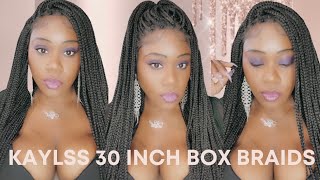
Beginner Friendly Diy Wrap Hair Band Braided Wig
- Posted on 17 October, 2021
- Headband Wig
- By Anonymous
Shop tools on Amazon
1.Brass ventilating needle set
2. Two holder brass ventilating needle set
3. Full lace net
4. Canvas block head
5. Wig stand
6. Tiny crochet pin
7. Styrofoam
8.frontal lace
9. 1yard Swiss lace
10. Coloured tape
Hey guys welcome back to another amazing diy video group tutorial, so for this tutorial i'll be using this fabric for making the band um it's a stretchy fabric. You can use any kind of fabric you have or for this one i'm using a stretchy fabric, because this is what i have so next i'll be using my table to measure the circumference of my hair. So i got 22 inches at the second friends of my head, but i'm going to be reducing to 19 inches because i'm using a stretchy fabric, but if you're using a normal fabric that is not stretchy, you can measure the exact second frames of your head. So i'm also going to be adding extra 23 inches because i want an extra fabric to be able to wrap the band around my head, so you're going to see the reason why i'm doing this later on. So next i'm going to cut out the 42 inches length that i measured. This is going to serve as the length of the band hello, so on the other side of the fabric, i'm going to be measuring four inches. So i later on realized that this wasn't a good idea that four inches was too short, because i wanted this to serve as the width of the band. So i noticed that the band was not as wide as i would have wanted it to be, because i used 4 inches, so you can use 6 inches or 18 inches for this. So this is what it looks like after cutting and i wasn't really good with the cutting. So it wasn't straight, but you can use something to mark out the part you want to cut out, so you can get a straight cut. So next i'm going to bend over the four inches side. So this is where i realized that the four inches length was too short. Hence, i'm advising you guys to either use eight inches or six inches if you want it to be wider, so i'm just basically using my office pin to pin both ends together, so i can sew and you want to ensure you're working on a straight line. So next up, i'm just preparing my um sewing thread, so i can start sewing. Let'S go! Oh so so after sewing, i'm just going to cut off the excess fabric, and you want to be very careful. So you don't cut your sewing and you have to start again, so i'm done trimming the ends and i'm just going to turn the fabric over. So i have the other parts that is neat. So next i'm going to throw the band into two equal parts. Just so i get the midpoints, then i'm also going to divide the 19 inches that i'm using as the circumference of my head into two making it 9.5. So i'm going to measure 9.5 from the midpoint of the hairband. So this is just basically to help me know where to fix the braids so, and i know where to start you know, adding the braids and where to stop adding the braids. So i'm just going to take a safety pin to um secure this side. So i get to know where the 9.5 inches on each side ends, so the braids are going to be in between the two pins on each side. So next up i'm going to prepare my braids and to do this first, i'm just basically um wrapping. My sewing thread around my chair. You can use anything around the house that you can use so i'm just using my chair and i'm just wrapping the sewing thread around it to get something to braid on, so you can play around with the size and length of the braids. It'S all depends on how you want it to come out, so you can, you know, divide your braiding hair into longer or shorter lengths, depending on how long you want it to be, and the amount of braiding hair you'll be using also depends on how thick or How thin you want the braids to be so so i'm done preparing my braids and i'm just going to start sewing them on the hairband. So i pinned the um hairband to the mannequin head. So it's easier for me to sew the braids on and i started from one side of where the safety pin is and just basically pinned it and started sewing from there. So till i get to the other side of the safety pin. So so also you want to ensure that you're only picking one side of the band and not the two sides, and you want to also ensure that the braids are closely spaced. So so, oh so so guys, i'm done sewing all the braids on the band from the um from the first safety pin to the other safety pin, and this is what's looking like so far, so i'm going to trim and dip it in hot water and i'm Also going to be doing an installation video to show you guys what it looks like on me. So if you find this video helpful, please don't forget to give it a thumbs up and leave your comments in the comment section below thanks for watching and please subscribe to my channel for more amazing content. Bye. You


Comments
A Life Remembered: what a great concept! thank you for sharing. I am looking forward to trying it though I worry about how secure it will be on the head. I am thinking that a velcro wig grip underneath could help with that. your thoughts? also, please share how secure it is. again, thank you.
mitchelle Ofori: The measurements here and there is my problem