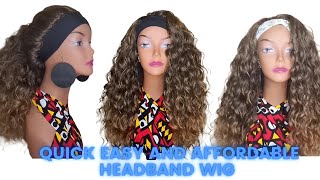
Only $5 Silk Press Crochet Headband Wig *No Cornrows* (Twa) | Xpression Kanekalon Braiding Hair 2021
- Posted on 25 February, 2021
- Headband Wig
- By Anonymous
instagram https://www.instagram.com/pamylasworld...
my links https://msha.ke/pamylasworld/
TIMESTAMPS
0:00 the intro
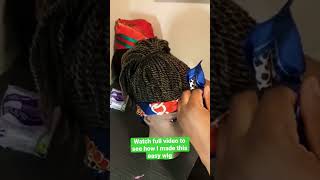
0:34 How to make a crochet wig
4:17 Styling braided texture
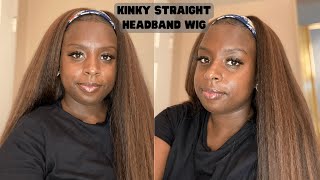
5:58 How to safely straighten kanekalon hair
9:55 Styling Silk Press w/ Headband & Styling Options
12:41 Outro commentary
ALL PRODUCTS MENTIONED ARE AVAILABLE AT BEAUTY SUPPLY STORE:
X-pression kanekalon braiding hair, color 4 (82”)
**1 pack of hair for braided texture, 2 packs for silk press look
Crochet hook, mesh netted wig cap
Flexi rods/rollers, headbands
style factor edge booster, kiss x saweetie edge fixer glued max hold
Foaming mousse, loose powder
Wig grip band (edge saver)
Turbanettes link
*(The exact pack I bought is currently unavailable but there’s plenty of similar one’s to choose from on the website)
https://www.amazon.com/gp/product/B07J...
baby tress edge styler **WoC OWNED BUSINESS**
RECENT UPDATE: 20% OFF DISCOUNT CODE (PAMYLA20) - code is automatically during check out when link is used.
https://tinyurl.com/4bbt87ry
(Hey y'all! This link is an affiliate code that also allows me to make a small commission if used. It is a recent partnership between the brand and I that was made official months after sharing this video. Just wanted to let y'all know in case you are interested!! :) Thank you!
#kanekalon #braidinghair #silkpress
MUSIC:
[Intro song] - Listen to "Zodiac Killer" on Spotify:
https://open.spotify.com/track/2BMffj…
Follow Khalil?:
https://soundcloud.com/still_jerkin
https://instagram.com/khalilsbible/
"Zodiac Killer" by Khalil? prod. Dior Knight (slowed)
Plundering - Adagio
https://www.youtube.com/watch?v=Q7K0Ct...
Music by frumhere - the place we go. - https://thmatc.co/?l=F0EB42DD
Take Me - Julian Avila
https://www.youtube.com/watch?v=9JOsn0...
Music by Chinsaku - Moonset - https://thmatc.co/?l=BDDAF568
FTC: This video is not sponsored, but I wish it was.
Thanks for watching! xoxo
Is hey you guys welcome back to my channel. I am not here to waste your time with this one we are going to get right into the video. I already know, y'all want to know how we turn some kanekalon braiding hair into silky straight tangle, free. What braiding hair tangle free i let's get into it. The hair i'm using is 100 kanekalon from expression is an 82 inches, i'm not even sure if they have any other inches. But you could easily find this at your local beauty supply store and, as you notice, there might be a rubber band, we're going to go ahead and cut that, so we can have double the hair. So that way, you only need one pack, because this hair is very very thick, so you want to go in with a pretty decent size, not too big, not too small, and you will need a crochet hook for this. Of course, i am going in looping. Just a couple of holes in the back since um the hair is thicker, so i can spread it out more evenly and once i pull that through all you're going to do is double knot it so it secures it nice and tight. It'S super super easy y'all. That'S it like that, is it you just keep doing this put on a movie put on some netflix. Your favorite tv show watch it in the back. This really does not take any time at all. It'S so easy to do so, showing you guys the process again. Just going in and like i said, i do in the back, go through a couple loops and spread it out more, a bit more distance in the back. Just because, if you are keeping the hair thicker in its more natural state, then you can get away with it. You can use a lot less hair. All you need is one pack like i said and spread it out, and the hair is so thick that it will cover the space. You also want to make sure that, as you're going through, you are cutting the tangles or dealing with the tangles at the end. So that as you're knotting it it's not getting wrapped up within the knot, the ends, so i am using a super cheap um. Netted cap, it came with a wig that i had and i just never threw it out um, because you know innovation. We could reuse these. So instead, i just kind of crossed through the crochet hook in that center part and connected both sides and put hair through it, and that's how i dealt with that problem. A lot of the netted caps do come with holes or some of them don't. So it's really, you know, whichever one you get all the things that are in this video i already had in the house that that's how we finesse them period. So you know you just you figure it out as you go along, and that is what i did. Y'All, it's so funny because this idea all started when i was at target with my cousin mask on, of course, because we are still very much in that pandemic and she had on a headband wig and it looked really cute. So later that night i was gon na go and i was gon na drop a little coin on it and i said pam before we do this. I think we can finesse and and look look at us look at us who would have thought huh. Not me. The point that i'm saying is all you need is the crochet hook, the netted cap and braiding hair, and you might already have one out of the three you might have all three like. I already did y'all it is so easy and so simple to just mess period period. Very important note in between you always want to continually try on the wig so that you know see. Look at that. Look how much i was missing y'all. So i had to go back in, i had to humble myself and finesse a little bit. You know add in some more and if you are keeping the braiding hair in its natural state, meaning you're keeping it thick you're, not straightening it again. This is about where you can stop um, because the hair is so thick. All the pieces that are out of the braid are what i went back in and added after i saw that quite a bit was missing and yeah. This is listen, i'm showing all the ends in its natural state. A mess. Yes, but you know i'm a keeper, i'm gon na keep it a hundred job but keep it a buck um. So we're gon na take care of that real quick. But first i am going to prep the front of my hair with a bit of edge control, so i'm just gon na speed through this. If you are going for the more fuller look, you definitely definitely want to brush your hair. That is one of the most key steps in this whole process is getting a kind of soft-ish bristle brush nothing. You know in between. You, don't want the hard hard ones, but you don't want something. That'S soft, so it's not going to do anything and brushing brushing brushing that hair. It'S going to make it look a lot, fuller, a lot thicker and it's going to keep the hair really really soft and, of course, help with the tangles. So you want to make sure that you are going over getting both sides of the hair that is so important doing. This also really improves the look of the ends. They end up. Looking a lot more natural, of course, they do still need a a cute. Little trim, but they do look. You know the way that the the ends are shaped. They look a lot more natural to keep this diy crochet headband wig in place all day. You can use a wig grip or you can always secure it with some bobby pins. Next, i'm taking a bit of foaming mousse and this again is really um just a step for, if you're, keeping the hair thicker and it's yakky kind of straight texture, hair. If you are going to go ahead and go for the silk press, look, then you don't need to do all this. You could skip this step. These are the final results for the yaki straight kind of look. I think it's super cute, but if you are interested to know how to get your braiding hair looking silky straight baby, all you need is a paddle brush, make sure it's a good one, because you really really need to make sure the hair is tangle, free, tangle, Free you're gon na brush brush brush brush a lot, and then you need a blow dryer. I set my blow dryer on high heat and i brushed through constantly, as i was blow drying and y'all, it's really really cool if you haven't done it before. It'S amazing, like you, watch it in real time, and this only takes a couple seconds by the way. Don'T you know, don't leave the heat on your hair for too too long, but you can watch it in real time change from like the braiding hair texture and get silky smooth, it's really really cool to watch but yeah. You just want to repeat this over and over again and look how glossy and straight and shiny the hair is looking. If y'all like the gloss, you could keep it, but i'm about to get rid of it at least some of it. So i am taking some setting powder now. If you have baby powder or really any kind of powder, i mean don't, let's not get too crazy, but you know any kind of general powder. Baby powder is what's most often used. That will definitely help to get rid of some of the shine. I don't recommend using setting power, not because it doesn't work, but just because you know don't you want to use your setting powder on your face right. I know i felt like i was wasting my money a little bit, but it's okay, it's okay, because i help with the shot but go for some baby powder. Please y'all check check this out check out this comparison, though, and, like i said, both sides are very beautiful, uh, it's totally up to personal preference, but it's just amazing how that blow dryer, really i mean it did the dang thing. Did it not impressive? So a way, a technique that i found that was easier going through was to keep the brush in one hand, as i was going and then the blow dryer in the other, and please please pay particular attention to the ends of the hair, because if you keep, If you keep the top silky straight and then the ends like kind of just neglect them, that's where you're gon na find a whole lot of the tangles at. So if you are going to end up straightening the hair, then i would recommend using two packs because, as you can see now all of the hair that was being covered originally, since it's much flatter i can see you know a lot more of the scalp will Be exposed a lot more than netting, so i'm gon na have to go back and re-add in um, more crochet hooks of hair. So that is just something that you should know. If you are going to straighten it, then you need to add in more hair. So this is how it's looking now i did go back and add in a bit more hair, there's still probably some more hair that i will end up. Adding in the ends are looking much better. Now that it's straightened, i was able to get a better cut on it yeah. This is how it's looking in comparison. I'M definitely shocked at how straight the blow dryer alone did get it. That'S the difference so far and i will update y'all when it's completed. Hey you guys so quick update um as i am filling in the hair, since it's straighter. All of this needs to be filled out because it is going to leave kind of awkward spaced gaps since the hair is so flat and straight um. If you're keeping it more and it's the braiding hairs natural state, then you don't need to do this because it is much thicker and it will cover up a lot of the space. But if you were going to go for the silk pressed look, then all this needs to be covered, i'm keeping more of a middle part going. That'S why mine is here um. If you're going to choose to just brush it all back, then you should be fine but definitely focus on the center. So you want something similar to this as far as that center part goes because you don't want the knots to be very apparent in your hair. So you want to kind of cluster them, so they're less visible, all right, so i am starting with my wig grip already on, so i am going to go ahead and refresh these edges because i've had them in for three or four days now. I don't think they look that bad for, like four day old edges, if y'all are interested to know how i am able to go three or four days with and keep my edges stuck and laid um. Definitely let me know because that video could be coming to you very soon now, when you blow dry the hair, it does get rid of most of the tangles, but you still want to keep in mind that this hair is synthetic, so don't be playing around it Too much and expect it to act like human hair. You know what i mean, but still for five dollars. I will never buy another synthetic wig again, i'm using kiss to refresh my edges just because it dries very fast and i'm not trying to like reinvent them. You know i'm just trying to get them to lay down again, so i think that this is a good option. Y'All, i'm not saying that they look perfect, but keep in mind three or four days. That'S pretty good! That'S all i'm saying! Oh, why she's so tangled back there? That was weird and let me show y'all how the back is looking, i'm still seriously impressed at how straight just a blow dryer alone got the hair. Now i kind of like the blunt cut look, but i know that's not for everyone. So if you are interested in bumping the ends, you can always roll the hair in some flexi rods and then dip them in hot water. That'S pretty standard, or now i haven't tried this out, but another idea is, you could use some rollers and then use the same blow. Dryer heat setting just for a little bit to blow dry, the hair and then that should in theory hold the curl. I might do that, but for today i'm good with the blunt cut. So this is a pretty standard, headband um, but it does cover any of the the crossovers, the opening where the knots were tied. If that is at all a concern to you or you, maybe you just don't have enough hair to really fill in that area, something that i love are turbinettes. I will link them down below, but the size of a turbonet is typically bigger than that of a regular sized headband. You can find them on amazon for a pack of like 10.. You can also always sew on a scarf or a bandana. You know. That'S a cute look not with this outfit though, but that's cute, all right y'all. So that's it! That'S the video! That'S the tutorial! Thank you so much for watching. I truly do appreciate it. It means so much to me, maybe the next time before you're, about to go out and buy a synthetic wig. You think, can i finesse this with some braiding hair, because y'all the answer very well could be yes and not to mention you could always use some crochet braiding hair. You know the curly like deep waves. Y'All could have a hole. This is a wig. I got over a year ago, and i was today years old when i realized i could have made this by myself for so much cheaper. Nearly for free, really, and also i mean. Let me know if y'all want to see me like you know, do a curly, crochet wig. Let me know so i really do appreciate you guys for watching this video. Thank you so much, and i will see you in the next one i hope you'll. Try it out too soon. Bye, guys,

Comments
pamyla’s world 🪐: Thank you so much for watching!! Please let me know what types of other videos you'd like to see from me :) Stay safe <3i
Jode Pal: You finessed this look! It’s the versatility for me! I’d love to see you slay your edges and make more affordable wigs!
Sharon Luquis: Give it up for Pamyla, she did DAT...Pamyla your face is so beat in this video...Maybe one day you can apply your makeup for us fans... I would love to see your makeup application techniques and color choices for black women...As always thank you for sharing your black girl magic!! Love ya :) ...Sharon
Zoe Amira: something hot for the summertime for sure!!! this is the diy we all need
Jaelyn Nyleaj: Super cute!
Ney Rose: That intro ATE !
OLAYOLYA: