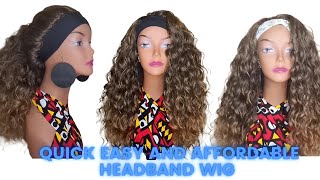
Natural & Beginner Friendly Headband Wig Bob | Ft. Luvmehair
- Posted on 01 June, 2021
- Headband Wig
- By Anonymous
Hello Beauties!
Thank you for taking the time out of your day to read my description box. Below I will list information on products used in this video tutorial and links to other videos of mine related to this one.
If you like my content, make sure to SUBSCRIBE to my channel and hit that bell so you get notified when I upload my next video.
LUVME HAIR Headband wig unit details are below ⤵️✨
-------------------------------------------------
Direct wig link: https://bit.ly/2RZB2pA
Wig information: Headband Wig Bob
Inches: 12 inches
--------------
Let’s KEEP IN TOUCH ⤵️
MY WEBSITE: http://www.biancacharisma.com (Launching June 2020)
MY INSTAGRAM: http://www.instagram.com/biancacharism...
MY FACEBOOK: http://www.facebook.com/biancacharisma...
MY EMAIL: [email protected]
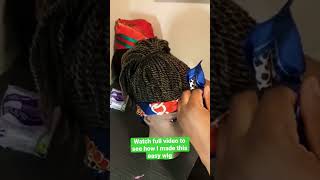
Hey guys, hey ladies biafra, charisma here and today, i'm so excited because i'm going to be telling you guys about this hair. This is a headband, wig and y'all know. The headband wig is like the trend right now, um, usually trends. For me, i don't really love trends, but this trend. I really love because i just needed something that was basically going to be easy for me to install and also look natural um. You guys know that sometimes like lace, frontals and closures - and you know like making everything look natural when it comes to your edges, can be really tricky when you are a beginner wearing a wig, especially in the summer. You are not trying to look crazy, you're, not trying to have like detectable lace, and you know like it can be really tricky when you are trying to deal with wigs and you don't really know fully, you know what you're doing so. I feel like if you want to try a beginner wig. These headband wigs are just like perfect for beginners um. I have not been wearing wigs that much for for months, actually i've just kind of been rocking my real hair, but once um once love me here and like a few other companies reached out to me about the head man wig, i'm like okay, i'm gon na Give it a try - and i really like it - this is the um headband wig from love me wig, the bob um. I chose to get it in a 12 inch. It comes in a 14 inch as well. It came to me in this love me, hair box, which i always love, because i keep my lovely hair wigs and i actually like keep these boxes, and i keep all my specific wigs in the box that they came in. So i'm going to do a quick kind of um unboxing to show you guys what what came in this box, so i already took the stuff out what they sent me um. You know their packaging is always cute. They sent me this cute little. It'S kind of like an iridescent makeup bag. It says, love me, hair on it and inside they gave me some bobby pins, which you will see um how i use the bobby pins. Once i show you how i applied this wig, they gave me um. You know the little edge brush with a little comb on the end super cute, just what i needed. They gave me some um. What are these called a wig cap? They sent this, which is like an adjustable band. I'M not sure why! Well, maybe if you, if you know how to sew, you can sew this and make it tighter um, but they did include this. If you don't want to use this or don't know how to use this for the headband wig, you can always save this for another wig. If you decide to create your own, then you can always sew this into any wig and it'll help your wig adjust and fit to your head. They sent me tweezers now. You know you don't need tweezers for this, because it's no lace, but you know you need tweezers for your eyebrows, so you can use it for that um or another wig that you might have. They also sent the little love me clip, which i love. These little love me clips. They are so cute. They sent me this little like it's like a little scarf. A little edge scarf. So you'll also see me use this once i show you how to apply this wig. They also sent me this, so they put the wig in here, but they also sent me these headbands, so they sent me yellow. They sent me pink, which i love, this color pink. They sent me like this. It'S kind of like a brownish beige-ish, grayish color. They sent this gray color here and then they sent me this one, which i really like this neon color one before i start the video tutorial it's gon na be really fast to show you how i apply it. It goes on so quick um. My hair is straightened right now. You can also do this on natural hair. You just want to make sure your natural hair is as flat as possible under the wig. Let me give you guys a quick 360 view, so you can see the length you can see. The movements super cute, my review, is, i love the wig. I think you should try it if you want to try it make sure to click the link in my description box, so you can go straight to the website and you know: buy your wig get 12 inch or get 14 inch, whichever you feel works best for You but other than that, let's start the video, and i will see you guys later so i have two braids um. I didn't even do a part down the middle. I kind of just separated my hair into two and then i did two braids. My hair is straight, so you can do it in any state that you want your hair to be. I i just thought my hair being straight would make it be extra flat, so i took those two braids use, the bobby pins that love me. Hair gave me, and i bobby pinned both of those braids to either side of my head. So then, what i'm doing i put the wig cap on comb, the hair out on the wig and then i'm going to apply this wig. So the wig comes with several clips. You want to put the clips first after you do the clips um. You know make sure that the clips are secure, so i usually clip the back and then i clip the front and then i clip the sides so make sure your hair is make sure your wig is nice and secure to your hair and then, after that, what You want to do is you're going to be using the adjustable straps and you're going to be taking the adjustable straps and you're going to be basically connecting it in the back. It'S velcro so you're just going to velcro it to the back of your head. Just to make sure that it is extra secure on your head, so i've wore this headband wig multiple times since i've got it and it's been very secure on my head, so pull it back or adjust it. However, you want so you can see your edges or, if you don't want to see your edges, that's fine. You know where how you want to wear it and then i'm basically just flat ironing my wig, making sure that i have a little bit of a bump. Not too much of a bump and my hair is pretty nice and even and straightened with a little bump at the ends. So next thing that what next thing that you're going to do now, i basically did my edges off camera. I'M just showing you how you can use the little edge scarf that they gave me. So i put that on. Let my edges set and then i'm going to take it off and put on my actual headband that they gave me. So i'm just going to start with the yellow. As you can see, my hair or my edges are swooped and ready to go. Here'S how the yellow looks super cute and then the brown beige, color extra cute and then i'm going to show you guys once again. The the pink one actually um the multi-color one comes next, but yes, the pink one, the multi-color one, which is like one of my favorites and then this one is the gray one. So that's pretty much it thanks for watching guys i'll see you in my next one

Comments
Chelly: Good job lady it looks very nice on you