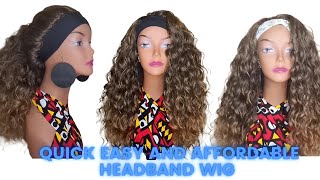
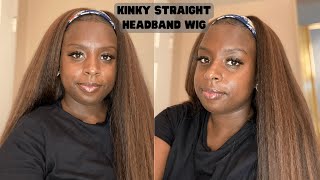
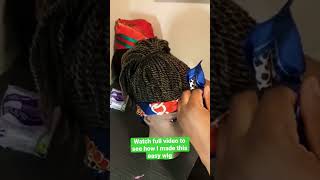
Diy Headband Wig With Fringe Tutorial ||Crochet Method
- Posted on 29 August, 2021
- Headband Wig
- By Anonymous
DIY Headband Wig with Fringe Tutorial ||Crochet Method
Thanks to @Ivonmelda for creating this hairstyle
Link to her channel https://youtu.be/LEO13CYM-t8
Hey loves,
Welcome back again to yet another hair tutorial
On how to make this nice headband wig with fringe using crochet method
As i said in the video I’m going to give this hair out to 3 supportive subscribers
Make sure to always come back to watch my videos because the giveaway will be in one of the videos ♀️
I hope you find it helpful
Subscribe to my channel for me great content
Follow me on Instagram @ www.instagram.com/maameabena__cc
Items used:
Mannequin head
Headband
Thread and needle
Kinky hair(one pack)
Wig net
Push pins and t pins
Clip ins
#headbandwig #diyheadband
Hey guys welcome back to yet another tutorial. My name is mommy abner. If today's your first time stopping by you are most definitely welcome and you're a returning subscriber, thank you for always coming through for me in this video, we'll be doing this nice easy crochet headband week, and this is me showing you the products that i'll be needing For the tutorial i'll list, everything in the description so make sure you check it out. First things: first, i'm going to place my mesh cap on the mannequin, and this is me trying to adjust it and make it fit properly on the mannequin head and then i'm going to use some push pins to help me make the recaps stay in place on The mannequin head, because we don't want it to move whilst we are working next, is to put our headband on our wig, and this is the type of headbang that i'm using guys by the way this video was inspired by yvonne melda. I don't know if i mentioned your name right but girl you are so talented. You are so good. I was inspired to do this tutorial by hair i'll leave her channel handle to this particular video in the description guys make sure you go check it out. So here i'm attaching my headband to my wig cap. This is not to make it move on around whilst i'm crocheting and also make the headband more stevie on the head. When i place it on my head, so i'm going to sew this all around like all around the headband and we are going to start crocheting our hair before we start crocheting. This is how the hair came in the pack. This is kinky a natural twist in 20 inches, i separated the hair and i took off the rubber band, and this is the length now with this video. We are going to divide it into three sections, because we don't want our um hair to be that long. So if you want it too long, you can leave it like that and crochet, but i wanted mine short, so i cut the hair into three pieces and that is what we are going to be using to crochet our hair. There you go. I have all my three sections done now. We are going to start crochet, i'm going to take smaller sections like this and then, with the help of my crochet hook, i'm going to open my latch hook and then slide it through about four or five holes, because, as you can see, my stocking cap came With a tiny, tiny, tiny hose so um, if i'm going to crochet every single single hole, then i bet you. We wouldn't finish this tutorial and it's going to take like more hair, which i don't want that i placed my latch hook into about four to five holes and then i attached my kinky hair and i crocheted it in by doing crochet. I don't really have to explain it to you guys, because i have a lot of tutorial on this channel on how to do crochet. But if this is your first time, don't worry, it's really simple watch how i'm doing it. I slide my latch hook through about four to five holes in the mesh cap and then i attach my hair to it. I close the latch and then pull it through to make a single knot. This is a kinky hair. You don't have to make three or four knots: it won't move anywhere, just one nut and you're good to go at this point, because the holes were really tiny in this mesh cap. I had to switch crochet pins because that one wasn't really helping. So i switched to this smaller crochet pin and it was so so so perfect, so i'm going to crochet all the way to the top and when i get to the front i'll, come back and tell you how to do that side as well, make sure you Watch the end to see the final outcome, as you can see, i'm done with the back, and now we are starting with the front side. This is where we are going to make our band. I didn't stop or change the process or procedure by any means. I'M going to repeat the same process here, as you may see in the front, my mesh cap is quite different. This type of mesh cap is used to make um crochet wig with invisible patterns or, if you want to make closure side. That is when you use this, but this is what i had lying around and that is what i use you can use dome cap. You can use any other type of mesh card for this tutorial if you have this tool, fine, because that is what i had, and that is what i used i'm going to crochet it to where the headband ends, and that is it. We are going to stop right there, and here we are all done with the wig, but we can't wear it now. We have to do some few works to wait before we wear it, but this is how the wig turned out after i crocheted my kinky hair. I used just the pack of the kinky hair, for this tutorial next step is to cut off the excess mesh around the headband, because you don't want to wait, and this thing will be hanging around your neck, like people will be asking, is something wrong with this Girl we are going to cut the essence nuts off before we went the week and once that was done, this is how the week the inside of the wig is so neat and perfect. Next is to attach some clippings on the hair. This is to make the hair more secured on our head so that in case the wind blow or someone touches our head, it won't fall. So i'm going to secure it with some clippings guys. If you watch my previous tutorial, i did make an announcement that i was going to do a giveaway with some wig caps. So all the recaps that i'm going to do about three of them, i'm going to give them out as giveaway, and this hair happens to be one of them yay so make sure you watch the video cause. You don't know when i'm going to announce the giveaway. You don't know when um yeah, i'm super excited about this one. I also added more clippings to the back to make it more secure as well. I added about two clippings to the back for demonstration purpose once that was done, i'm going to place it on my head, for you guys to see how um it will look on you in case you are lucky to win this recap. You will know how to wear it. I'M going to place my clippings at the back of my head, like push it in the back of my head and then i'm going to push the hair forward and then do the same with the clippings that i placed at the bank area and that's it. You can style it anyhow, you want, you can make it fluffy, you can make it flat. Anyhow, you want girl, you can do it, and this is the end of the tutorial. Thank you so much for watching bye,

Comments
Stella Yankson: Nice
Christy Funke: I love dis am doing it tomorrow
Anniebae08🦋: Very nice
itsLoveLeeTv: ❤️❤️❤️❤️❤️
EPIC IT WAS: