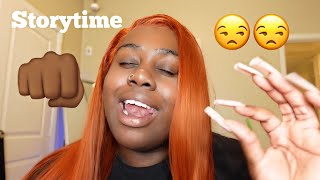
How To D.I.Y. Headband Wig With Dome Cap | Mayvenn Hair | Brazilian Deep Wave | Missuniquebeautii
- Posted on 26 August, 2020
- Headband Wig
- By Anonymous
#headbandwig #headbandwigwithdomecap #deepwavehair
In this video, I will be showing how to create your own headband wig from scratch. The length of theses bundles is 2-26 inch, 1-24 inch, and 1-22 inch bundle. The link to purchase this hair is down below. This hair is definitely more manageable than kinky curly hair and could still be considered high maintenance depending on the care. I did do a little ombre on the ends of this hair and the bleach did amazing on this hair. Stay tuned for more ways on how to style this wig. Comment down below and let me know if you want me to show more quick styles that can be achieved with this wig.
Follow Me On Instagram@: https://www.instagram.com/missuniquebe...
Follow My Business Instagram@: https://www.instagram.com/missuniquebe...
Shop My Website https://pressedbymissuniquebeautii.com...
Discount Code: YouTube25 for 25% off the Entire Website!
Shop for your favorite beauty essentials! Press-on Nails, Lip Gloss, Mink Eyelashes & MORE!
I also make and sell Headband Wigs, Half Wigs (without the headband) Lace Closure Wigs, Frontal Wigs, & Drawstring Ponytails. If you are interested in having me make a wig or drawstring ponytail for you, please send me an email at [email protected]. SERIOUS INQUIRIES ONLY!
Items Used:
Deep Wave Bundles https://msuniquebeauty.mayvenn.com/pro...
Dome Cap https://www.amazon.com/gp/product/B010...
Headband
Needle & Thread
Mannequin Head https://www.amazon.com/gp/product/B071...
Scissors
Wig Cap (optional)
Cute Headbands That I Purchased!
https://www.amazon.com/gp/product/B08H...
https://www.amazon.com/gp/product/B01F...
https://www.amazon.com/gp/product/B07S...
https://www.amazon.com/gp/product/B07Q...
https://www.amazon.com/gp/product/B07W...
https://www.amazon.com/gp/product/B081...
Equipment Used:
Cannon SL2 https://www.amazon.com/gp/product/B071...
Neewer Back Drop Kit https://www.amazon.com/gp/product/B07P...
Ring Light https://www.amazon.com/gp/product/B08D...
Rose Gold Backdrop https://www.amazon.com/gp/product/B01C...
Instagram: @MissUniqueBeautiiLLC, @MissUniqueBeautii
Facebook: @pressedbymissuniquebeautii
Website: pressedbymissuniquebeautii.com
E-mail: [email protected]
[ Woman, ], Hey my beauties: it's Miss Unique Beauty in a building. And I'm back with another video.. So today, I'm here to show you guys how to make a Headband Wig With a Dome Cap.. Now the items you're gon na need is obviously a dome cap. You'Re also gon na need a weaving cap, a headband of your choice.. I found this headband at my beauty supply store and I also picked up a few extras., Also your needle and thread and a pair of scissors., And of course, you can't forget your mannequin head.. Now, in this video today I will be using four bundles of my deep wave hair from my website pressed by missuniquebeauty.com.. I will leave the link to this hair in the description box. Below. ( upbeat music, instrumentals ), So the first thing I'm gon na do is add my weaving cap.. Now. The reason why I'm using a weaving cap is just to prevent me from sewing onto the hair on the mannequin head.. Then I'm gon na place. My dome cap over the weaving cap., The next thing I'm going to do is place my headband onto my mannequin head. (, upbeat music, instrumentals ). Now, if you're, using a headband that has wording on it like mine, does you wan na make sure that you flip your headband inside out, so that in the end, when you flip your headband back over, your wording will be facing the right direction.? Next, I'm just taking some push pins, so I can position the headband exactly where I want it, just so that it won't move., (, upbeat music, instrumentals ). Now I'm gon na take my needle and thread and sew the edge of the headband to the edge of the dome cap, all the way around. ( upbeat music, instrumentals ). Once I reach the back middle section of my dome cap, I cut my needle and thread.. Then I begin to sew from the other side of my dome cap all the way around the back.. I do this just to make sure that the headband is even on both sides. ( upbeat, music, instrumentals ). This is what your headband should look like once it's completely sewn all the way: around. ( upbeat, music, instrumentals, ) Next thing, I'm gon na to take my first bundle, which is in the line 26 inches, and I'm going to sew this in a U shaped pattern At the bottom of the dome, cap. ( upbeat music, instrumentals ), Now that I've reached the end of this first row, all I'm gon na do is flip my track over. I am not going to cut my tracks. I do not cut my tracks., I'm gon na flip it over and I'm gon na leave two finger widths apart from each track., ( upbeat, music, instrumentals ) Right here, I'm just showing you guys how far apart I place my tracks.. It is exactly two finger widths. Apart from each other., Now I'm going to flip my track over again and do the same thing. Space. My tracks, two finger widths apart from each other, once again. (, upbeat, music, instrumentals, ) Right here, I'm just measuring.. Once again, It is exactly two finger width apart from each other., I'm going to continue to sew until I finish this entire row. ( upbeat, music, instrumentals ), I'm just making sure once again that my tracks are still continuing to be two finger widths apart from each Other. Now I'm done sewing in my first 26 inch bundle., I'm gon na go ahead and sew in my second 26 inch bundle doing the same thing that I did at the first one and I'll be right back.. Now this is what two bundles is looking like. ( upbeat music, instrumentals ). Now the next bundle we're going to be sewing in is the 24 inch bundle.. This bundle, I will not be sewing in a U shape. Pattern. I'll be sewing straight across horizontally. ( upbeat, music, instrumentals ). Once I reach the end of each row, I'm going to continue to flip the tracks. Over. ( upbeat music, instrumentals ), I'm gon na continue to sewing on this 24 inch bundle and then I'll be right. Back. ( upbeat music, instrumentals ), Now I've completely sewn in all three bundles, and I'm now on my last bundle.. My last bundle is a 22 inch bundle and I will continue to sew straight across horizontally, just like the 24 inch bundle., I'm gon na finish sewing the 22 inch bundle off camera and then I'll be right back with the finished results.. Now this is what your wig should look like once you've completed sewing in all your bundles., The last track at the top. I actually sewed it from temple to temple just to cover up the tracks on the sides. ( upbeat music, instrumentals ), Now you're going to flip your headband up over the front of the wig, and this is what your headband wig should look. Like. ( upbeat music, instrumentals ) Right here. I'M gon na show you guys what the headband wig looks like once all of the hair is pulled. Up. (, upbeat music, instrumentals ). So today I was able to show you guys how to make your own headband wig from scratch.. I really hope you guys enjoyed this video comment down below any questions that you may have like this video and don't forget to subscribe. Bye, my beauties


Comments
Genia Renae: This Is A Perfect Explanation Of How To Construct This Type Of Unit I Love It & Thank You !
Kanyin’s Tv: For everyone worrying about your future and plans , here’s a quick verse - “For I know the plans I have for you,” declares the Lord, “plans to prosper you and not to harm you, plans to give you hope and a future.” Jeremiah 29:11 Don’t give up on God, cause he won’t give up on you. He is working in so many different ways. Don’t forget that you are loved and Jesus is coming soon ❤️❤️
Kali with a K: This is the best headband wig tutorial I’ve seen! Trying today
Tammy Renee: This was a perfect explanation!
Shay Williams: Man you did that so gracefully and beautifully ... Thank you Thank you Thank you..... Have a blessed day
Tenisha Humphrey: Thank you for the amazing tutorial. I will definitely start creating headband wigs for my clients
Sachie Kind: This was absolutely brilliant and an excellent explanation!! Hope this gets the views it deserves
slim jim: I like your video the second u started talking......I love when the person just goes RIGHT into the reason for us watchingkeep it up
anjanette cleggs: Definitely was a very detailed perfect explanation. Hardest part in some videos is figuring out the crown of the head. But you explained it perfectly. Thank you
Anuoluwapo Akande: Your video seems so explanatory and I love the outcome, I have watched so many tutorials on how to make head band wig, and I saw that most people cut out the excess cap, and even at the end they cut it into 2 and use this loop and hook to make it firm on the head. Do you recommend such method as well or the method you just showed us on your channel is the best. Thank you
Danielle’s Day: Hi, do you sew through the elastic part of the dome cap when sewing down the headband and the tracks? Or just through top layer of fabric? Thank you!
It's The Undisputed Sag Boo: This is soo beautiful can't wait to try! I have a synthethic headband wig that will arrive tomorrow, it looks similar but this ish is LiT!! ❤
London: Omg!!! The method and the way you explained was so seamless. I’m definitely going to try. Thank you for the video ❤️
Denise A: This is the best tutorial I have ever seen ❤️❤️❤️❤️
Patricia Heard-Hopson: Thank You! That was super easy and you did a great job
kallahari: I already was wondering why women would buy a headband wig for $200-300 while you can make one yourself. Very Good job !!!
lovinglife: This is the BEST tutorial I have seen. Looks so natural and professional. You just saved me a lotttt of money! Buying some hair tomorrowwww! God bless you, girl!
Miss Dai: Thank you!!! Simply beautiful!
Li Laconia: Omg this is so bomb thank you for this can’t wait to try it on my channel new subbie
LaTanya Brown: This video should have way more ’s. The unit was perfectly constructed. Nice job, sis. Do you make custom units?
Cynthia Odera: Thanks so much, just bought a dome with cap for making my first headband wig.
Mz. Gee: Very good instruction! Precise and to the point I'm sure I can do this now after watching your tutorial. But I have one question- Can you make a braided hair headband wig using this same method??
Stacey Allen: Thanks so much for this tutorial, making one today.
Felony Girl: Perfect! I love it!!
AllThingsTreasure: Love this video. All the others were using velcro which I can't find in my country. Soni will definitely make one today.
Julia Brown: You did a BEAUTIFUL great job on it it so creative. I love it. ✌
Flinabin: You explain so well !! Thank you !
tia smith: Perfect, I love it! Doing mine soon
Stefanie Mitchell: Love it!!! Does it fit all head sizes or do you have to measure?
Comstance Jemkins: Phenomenal job Sis ... Super Simple Thank you sooooo much for sharing your Wisdom with the masses ❤
ANN STAR: GREAT JOB, LOOKS FABULOUS❤️❤️❤️
Dianne and Gabby Podcast: This was a great tutorial.
SHAR: Well done tutorial!! Thanks for sharing
Karen Hull: You are AWESOME...great tutorial!! Im definitely using your method. One question: what if i want to change out the headband??
L’ Dougoux: You made that look so simple.. I got to try this today..looking for a headband right now!!.. thanks
Evelyn Tubbs: Love it!
Sharron Johnson: Thanks so much, I can't wait to make mine
Elise Robinson: U did amazing job explaining this as every one has already commented but once again thank u for this looks super easy !
Beautiful Warrior: THIS IS THE B E S T! HANDS DOWN! I’m actually working on one now, and am going to do this now! Thank you!
Denise Michaels: Love it!
YVONNE KADIRI: Perfect explanation.. thank you for this video. You just gained a new subscriber
Kate Mcmens: Thanks for sharing hun.......love your tutorial ❤️
Catrina Gay: Thank you for this❤️❤️❤️
Vanessa King: Excellent demonstration!
Destini W: Great explanation immediately subscribing!
T: I don't even wear wigs, but it it turned out very nice!
Hayden Edwards: Very neat work.
Denise A: Is it still two finger width when you sew the top part?
Mirriam Mbewe: Wow beautiful thank you
Margaret Sanders: I love the way u made ur headband wig,it's the best I have seen good job.
Juciara Santos: Oi, sou brasileira ( hi, you Brasil) amei( I love you)
Dini J: Beautiful job. I have a large head with long thick hair, do they sell the dome caps in different sizes?
RHONY _Jones: Great Job!!! I’m so glad I came across your video New Sub
Sunita Mok: So nice . going to try it. Thanks.
hillianthe bendt: Easiest explanation I saw so far
Hannah Akum: Thank you so much
Diane Reyes: Great Job Thanks for the Video
J Young: Love it
Tee Aye: Sis!!!!!!!
يوميات محمد ومريومة: عسووووووله اختى احسنتى النشر
Hayden Edwards: This is the best I ever seen made.
Elite Lois: I love ur explanations subscribe straight away
Juciara Santos: Love(amei)
DM 888: OMG!!!!! Thank you Sis!!!!!!
Hazel Grant: This is the best I hv seen luv it
Miss T N: You actually make me believe I can do it ♀️...but I just know I'll cursing and screaming with hair all over my house.
Blessgirl Shirl: Quick n easy ❤️ Thank you
CAPABLE OF GREATNESS: bigest guestion, as i am a visualised person. where do you stop doing the U partern... is it two inches above the ears before you start using the 'straight partern'
Catricia Ridley: Best tutorial...very detailed...new subby
Hot Mama Brown: ❤️❤️❤️
Melody Thomas:
Hayden Edwards: This will look good on me.am a woman of class and this is class.
Racquel Frost: Where did you get your headband from?
sandrafay334: Great video
Stacy Barker: Very informative veido
myfergz: U the bomb
L’ Dougoux: New sunny..starting my channel up now
kimberly Smith: Is This human hair I want to try this
NettaPrettyMeDuh: So how did it fit sis?
Jane Smith: Very smart
shay shay: @MissUniqueBeautii whereee did you get the head band ?????
AshleySings: Is this wig for sale