The Headband Wig | Beginner Friendly | Ft. Myfirstwig
- Posted on 19 September, 2020
- Headband Wig
- By Anonymous
--- ♡ Expand For Details & Links ♡ ---
The Headband Wig♡ Beginner Friendly ♡ Ft. MyFirstWig
♡ Wig in the video is: https://www.myfirstwig.com/headband-wi...
- BEGINNER FRIENDLY WIG
- THROW ON & GO
- SUPER NATURAL LOOK
- NO WORRIES ABOUT HAIRLINE ANYMORE
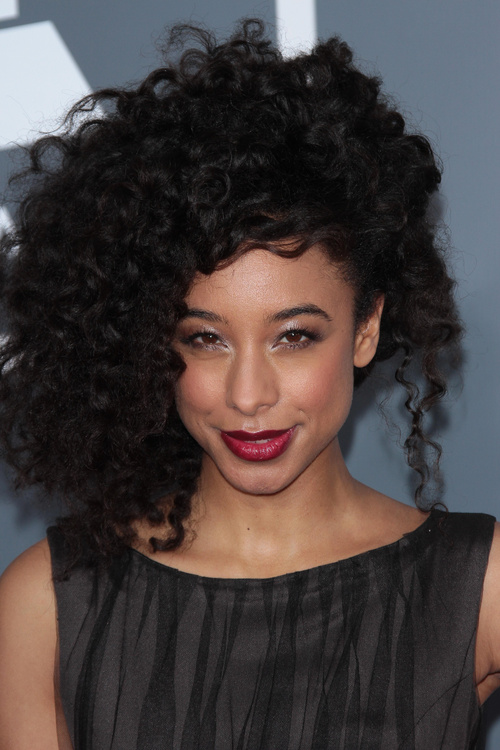
NATASHA - HUMAN HAIR CURLY HEADBAND WIG - HBW010
Hair Length: 18 inch
Hair Texture: silky
Cap Size: Size 1
♡Hair Link: https://www.myfirstwig.com/headband-wi...
Find More Wigs: https://www.myfirstwig.com/headband-wi...
♡ In comparison to my "wet look" on my real hair: https://www.youtube.com/watch?v=u_pjK6...
* Protective Styles For Wig Beginners *
Website Link: https://www.myfirstwig.com
Instagram: https://www.instagram.com/myfirstwig_c...
Facebook: https://www.facebook.com/myfirstwig
Xoxo,
Kaela
FTC: Sponsored x MyFirstWig
♡ Shop My Closet: https://poshmark.com/closet/okaekaela
--- ♡ Music Info ♡ ---
"Expensive Habits"
Instrumental by Homage
--- ♡ Connect With Me ♡ ---
MY Website: https://www.sassyokaekaela.com
Instagram:@ theokaekaela
WeHeartIt: @ theokaekaela
Twitter: @ iamkaelaaa (three A’s)
--- ♡ A Little More About Me ♡ ---
Name: Kaela M.
Age: 21
Location: Atlanta, Georgia now in College in Tallahassee, Florida
Ethnicity: African- American
Height: 4’11 (Yes, I’m petite lol)
Camera used in this video: Sony Cybershot HX80
Editing Software: iMovie
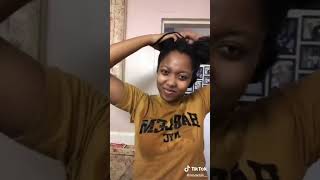
Oh, hey loves. Welcome back to another tutorial. Would you believe me if i told you this was a wig well, believe me, because this is literally an entire wig, not my wet! Look a wig, a headband wig to be exact, let's get into it all right. So, let's get into the contents of the box - and this is by my first wig - it came in a cute little box like this, along with a nice portable little wig stand and inside the box. Of course, the wig came in this cute little zipper pouch. Of course, mine is taking off because i'm wearing it, but it does come with the specifications on a sheet of paper inside and mine. Is the curly 18 inch silky texture with the cap size one and it came with a lot of other great things inside the box, along with two wig caps and three different um headbands, so you do get to choose which ones you want on their website and It also came with a little zipper pouch with a rat tail comb in it an edge brush, some bobby pins and a hair clip which i love, because i was not expecting all of that to come with this wig, so you're getting a full package with. So many things to go along with this convenient wig and this wig is literally for my lazy naturals. So the night before i decided to just put my hair into braids, because i don't really like to braid down my hair. I'M lazy like that, and it's just too much hair for me to really be braiding down, and i just suck at braiding down honestly. So this is how i knew this video was going to be a game changing for me, because if i was able to fit my thick two braids under this wig and make it you know, look legit y'all. You literally can do this. So all i did was just you know, take my hair down or whatever take some um waters. Spritzed it a little bit comb it out a little bit. I am going to re-moisturize it with some cream of nature, um curling cream, just to kind of make it a little bit more manageable and easy to put into braids, and also you know easier for me to slick down. I just find that if my hair is a little bit saturated with product or water, it's a lot easier for me to slick it down. I literally cannot do anything with it when it's dry and puffed out. So that's all i'm doing, and you know i usually do my little two french braids to the scalp. I decided not to do that and i'll show you why, with this being a headband wig, you want to make sure you are having that slick back pulled. Look especially around the parameter or the edges part of your hair, so i did take some eco styler gel again, just to you know, slick it down as much as possible and you're going to see. Me start my braid from the back instead of like i do. My french braids and i kind of brush in a back motion also just to kind of make that middle part not so visible again, because this is a headband wig. You want to be slicked back as soon as possible. So this is how i started my braid and i just braided, you know pretty tight and taut just to make sure that it's going to stay and be as flat as possible. Next, i just took some more water and some eco styler gel on the edge brush kind of brushed back that part a little bit more just to make it more seamless and laid down my edges and tied my hair down all right. So this is the next day with my makeup on and everything. So all i did was add some edge control and this is the argan oil kind of nature. Perfect edges extra firm hold okay, so you guys know about the extra hold and then right right about it's just like trash, but the firm hold is everything. So i added that, and also i really wanted to focus on brushing that middle part kind of, like you know back just so it won't be so visible when you put the headband on so i mean again with gel or the edge control, just kind of comb. Back - and this is why i didn't start the braid like right here, so it would be kind of free for me to comb up and push back. So i got that going and i'm going to take this clamp out just to show you guys my braids they're long they're thick, so we're going to try to do is make this as flat as possible, because i personally do not like to braid my hair down. As you can tell okay, so all i'm going to do is put a hair net over it. I know they gave me the brown stocking caps, but because this wig is literally like not a part visible or anything you're, literally, probably only showing your scalp. If anything, you don't really need it to be colored, so i'm just gon na put a regular black stocking cap on mine. Just looks like this, and i just kind of like to fold the braids up like this, so it can lay as flat as possible kind of push this back a little bit boom and now for the application. So this is how the wig stand looks when you put it together. I really really love that, because it's portable and it's small and compact, so this is how we're going to put the wig on. I have the wig cap size, one i honestly would have went up a little bit. If you have, you know super thick hair. All i simply did is ran some water through just to kind of get the curls kind of activated, but i'm going to show you guys how i'm going to style it on my head. So i like to start by putting it on my back and they do have combs in the inside one two, three four to be exact. I'M just gon na take that back comb make sure i insert it like that place. Those cones in where you want it to sit, and that adds security. So let's get this configurated, try not to add the top comb in just yet, because you want to be able to kind of slide that back to your liking and then now what we're going to do is you want to just grab that hair out the way? Now it does have adjustable straps in there if you want to make it as tight to your head as possible. I personally don't want to do that. My hair just fell out, but we're just going to move that hair out the way and we're going to be grabbing these straps all right so boom. This is how it looks without me even styling it just yet. I love how seamless this looks if you guys have seen my wet look, video. This looks as close to my hair as possible, like the curl pattern and everything even the length when it's in the way, like i'm going to link that up at the top and also in the description box below. So you guys can see my real hair in the wet look, so i wanted to get something that was going to make. You know, look as natural as possible. It'S quick! It'S easy! This is something to where you literally could just take it off at night. Go to bed, put it back on and be good to go so super convenient for my lazy naturals out there. So let's get ready to style it. So i mean, if you really wanted to just wear it simply like this. You really could, because the handbag on it is black, so just to show you guys again how it is in the back. I just have it adjusted together and it does kind of like allow you to pull as much as you want to make it as tall and tight as you want, which is perfect. Now i kind of have mine a little bit. You know flipped over. If you want to wear a straight back, you can. But honestly i like it like this. I just feel like from my face pretty good like this. So, like i said i already had it um wet. So it's a little damp right now, but all i'm going to do is just add a little bit more water into it. So i like to just get a demon like brush. You can use some foaming moves. You can use some leave-in conditioner for scent. You know something lightweight, don't want to be too heavy-handed with it, because i feel like this. Hair is super light but like the curls are defined and they're holding. So you don't really need like too too much and then i'm going to add some foaming mousse and mostly on the top too, because i just wanted to kind of mold and the way that i want to sit. I don't want any little flyaways and again i like i said i want to keep it on pretty much the top layer, so i'm not too crazy about making sure it's super duper saturated because we're going to comb this through and define it alright. So the key with styling these headbands, you want to make sure that they are covering that black part of the headband, that's on the actual wig, so just kind of setting it in place to where you can't see it and boom. So this is the gray all right. Next, i just have some simple flat headbands. If you don't really want that whole thick headband, look that will look just as good honestly, because the heaven that's already attached to the wig is already a simple black and flat headband. So i'm just going to show you guys the gray version all right now. This part i'm excited for, because i've been obsessed with these little padded headbands. So, let's see how this looks, it's pretty thick enough to hide the black part, which it definitely does, but i feel like with these padded headbands, it's all about how you like position it on your head. So let's see and i feel like they almost got to be like kind of slanted - i don't know, let me know if you guys are feeling this in the comments. All right, i don't know, let me know if you guys are feeling this in the comment section down below like i feel like it's cute. I don't know i feel like i would have to work with it all right and last but not least, let's test it out with some hats. So of course i have a family rattler hat because i'm a rattler girl, so i'm gon na try this on. First now, with these type of hats, the fitted hats i feel like you - want to be kind of careful with only because you know it, it can kind of give off the notion that you definitely have one wig, because it'll look a little bulky in the back. Let'S just give it a test, especially because i don't really have my hair braided down per se. I just have two thick um braids, so let's just try to adjust it as much as we can. I don't know if it's quick on a girl. You want some little hang time under your head. I guess you could do it, but i mean i feel like it looks a little too bulky in the back and kind of quite obvious that it's a wig, but i mean it could work if you guys are. Okay with it and then a more stylish hat, this is one of my favorite hats right now that i haven't really worn yet so i'm excited to see how i'm gon na style this, but this is a biker boy or a baker. Boy hat that says fashion on it. So let's see you guys know. I always say that these type of hats give me like janet jackson vibes, but this is cute. I love this all right. So that concludes this tutorial on my first wig headband wig definitely know what you guys think in the comment section down below about this. I love how simple and easy this is. This is definitely getting added to my stash, because i cannot believe how well it mimics. My hair texture, so just to show you guys up close again, it literally looks like it's mine like it's unbelievable now i did go back in off camera and define a little bit more just to show you guys, you can really get that wet. Look if you want to - or you can opt out and just do a super fluffy and voluminous look, but it's super duper easy to maintain. All i simply do at night is just take it off, because i just have my braids in under it and you're good to go. You know just keep the front portion gelled or slipped back, and you are fine like this is just super easy super convenient. It literally only takes 10 minutes to switch up the style with the headbands and get it defined and sitting to how you like. So again i will leave the details on this wig in the description box down below, for you guys to check out, and i will talk to you guys in my next video bye. You
Comments
Rachel Ezulike: Your natural hair and the wig are both beautiful!!
Radiant Moon: I can’t wait to receive mine and do a review! ❤️
Preci Evy: I have this one (shorter) and it was the best purchase ever! Loved your video.
Hello Kitty: I am definitely going to try this out! I have thick natural hair and most days I don’t want to mess with it ! Thank you for the video ✨
Gabby: Thanks for the info! You’re sweet and look cute in everything!!
DaTruth07: It's the Natural hair for Me!! Just so Beautiful, thick, and healthy! All I need is half of head of your hair and I would be good!! New Sub! ❤❤❤
Kristina Chambers: Love it. You should do trying different hairstyles for a week video
black beauty: OMG, you're so beautiful! ❤️
Desdemona Lamar: Yesssss!!! I've been searching and searching for the perfect headband wig to match my texture as well, and I think you've sold me. This is the EXACT texture/curl pattern I need! I'm a 3b/3c texture. I was about to settle for a different one that wasn't quite the same texture as my natural hair, but you uploaded this video just in time! How long did it take to receive it?
A.: your hair and the wig are so pretty! & so are you!!
Lourdes Reyes: I just got mine in the mail, the hair is nice and soft, I just wish I would have gotten a longer length. I got a curly one also, I highly recommend this wig from this company, the hair is really natural looking
Neya H: *GETTING THIS!! YESSS*
P.s ILYAG: thought this was your hair ❤️
Amanda Bryant: Cute! Thanks for the video and tips!
Hailey Marie grande: You have beaaaaauuuutiful hair
musicjunky: You're gorgeous
Sha'Tasha La'Trece: How do you prevent breakage from the clips if you wear the wig often?
Nnedi Samuels: Hi #OkaeKaela, Since it has been over six months. How is your “My first wig” looking, holding up curls,...? Thank you kindly
Embrace Naturals: I don’t even wear weaves.at all nor wigs. I will get my hair braided with weave every blue moon, that’s it. But I def wana try this wig because I know nothing about weaves and this is definitely beginner friendly
Erica Lyons: Why are you wearing a wig? Your hair is so beautiful and long.
celeste Mccormick: does the hair in the back get matted up ? that happens to me every time i get curly hair the back always gets matted up and it sheds
Shontay Harrell: Simple and cute.....I'm here for it
honey coco: What products work good on this hair
LadyinPink: Where did you get that hat from sis?!? I have to have it!!!
Your Channel: It looks. Rey natural and cute
Kthiggem1 Jackson: Soo pretty
Yolanda Santos: The orange doesn't look good
Ja'Nea Walker: Where’d you get the first headband from ? The crossed grey one. I bought a headband wig but need to buy nice headbands
Sarah: Has any purchased recently? Just ordered and received an email saying due to a procedure it will take 15-25 days! Was not told this before or at time of purchase or I probably would have purchased from somewhere else. Are wait times really that long? Not sure what the could be doing to this half wig since it didn’t get any belles and whistles added
Jesus is mY Savior: I got This wig it doesnt even fit to small they sent the wrong size
Dalila Dalila: Is this that right link? Your wig looks more kinky curly & the link looks like looser curls