How To Diy Headband Wig | 24" Burgundy Nu Locs | New! Crochet Headband Wig Cap | Missuniquebeau
- Posted on 05 September, 2021
- Headband Wig
- By Anonymous
#diyheadbandwig #Nulocs #crochetheadbandwigcap
How To DIY Headband Wig | 24” Burgundy Nu Locs | NEW! Crochet Headband Wig Cap | MissUniqueBeautii
Follow Me On Instagram@: https://www.instagram.com/missuniquebe...
HUGE WIG SALE!!! October 1st! Mark you Calenders!
24 Inch 6 Packs Faux Locs Crochet Hair, Extended Soft Locs Crochet Hair, Natural Pre Looped Soft Locs Synthetic Braiding Hair (24 Inch, 6 Packs,BUG#)
https://www.amazon.com/gp/product/B08X...
NEW!!! Freetress Crochet Headband Wig Cap https://www.amazon.com/gp/product/B08Z...
Cute Headband I've Purchased:
https://www.amazon.com/gp/product/B07B...
https://www.amazon.com/gp/product/B08V...
https://www.amazon.com/gp/product/B092...
https://www.amazon.com/gp/product/B07T...
https://www.amazon.com/gp/product/B07H...
Other Products Used:
Wig Stand
https://www.amazon.com/gp/product/B07Q...
22-inch Mannequin Head
https://www.amazon.com/gp/product/B071...
Crochet Wig Cap (Shake & Go)
https://www.amazon.com/gp/product/B01J...
T-pins https://www.amazon.com/gp/product/B07F...
Crochet Needle https://www.amazon.com/gp/product/B075...=
Equipment Used:
Cannon SL2 https://www.amazon.com/gp/product/B071...
Neewer Back Drop Kit https://www.amazon.com/gp/product/B07P...
Ring Light https://www.amazon.com/gp/product/B08D...
Rose Gold Backdrop https://www.amazon.com/gp/product/B01C...
nu locs,bobbi boss nu locs,faux locs,soft locs,locs,distressed locs,36 inch nu locs,crochet locs,boho locs,soft locs tutorial,bobbi boss nu locs crochet,bobbi boss nu locs individual,crochet nu locs,goddess locs,nu locs crochet braids,crochet faux locs,butterfly locs,long nu locs,how to do soft locs,ombre nu locs,nu locs 36 inch,24inch nu locs,nu locs 24inch,36inch nu locs,bobbi boss nu locs individual crochet,soft faux locs,nu faux locs
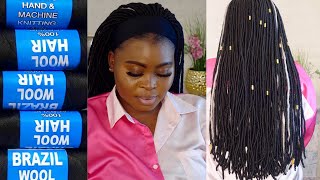
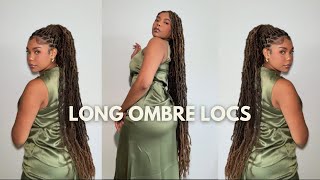
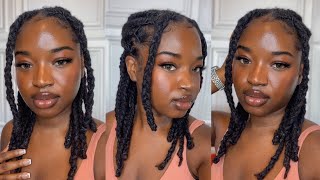
Hey my beauties: it's myself beauty in the building and i'm back with another video, if you guys are new to my channel tap that subscribe button so that you won't miss out on any of my new uploads and if you have already subscribed, what's good. What'S poppin welcome back to my channel also, don't forget to follow me on instagram and tick tock at miss unique beauty. The hair that i'll be using in today's video was sent to me by a company called crolia hair on amazon and they were kind enough to send me. Their 24 inch burgundy new locks, and i am gon na go ahead and do a quick unboxing for you. Guys so that you guys can see exactly how this hair comes. Now, this hair comes in a six pack bundle and in the package you will also receive a few hair accessories along with a crochet needle that you can use to install the hair. Now you will also have 21 strands per bundle, so you will have more than enough hair to complete your desired style. Now. The cap that i'll be using in today's video is the freetress headband crochet wig cap. I'Ve already went ahead and secured the wig cap to the mannequin head. Now i'm going to go ahead and begin crocheting, these new locks to the cap. Now what i will say about these new locks is to me they did feel like they were on the skinnier side of new locks that i usually work with. So i did notice that right off the back, which will allow these new locks to be extremely lightweight. As well, so if you want new locks that aren't as thick as other new locks, then these new locks are the new locks for you, because they are a lot skinnier. As i stated before now, the loops on these new locks were super duper easy to work with. I did not have any issues with working with these new locks at all. Now i am going to go ahead and do my staggering method throughout this entire cap, and all that is, is me crocheting a new lock in between the new locks that i crocheted in the previous row, as i am demonstrating right here for you guys. So i am going to go ahead and use about one and a half pack in this entire back section, and then i'm going to come back and show you guys how i complete the side section of the wig i do want to. Let you guys know that i am having a huge wig sale in the beginning of october, and this week sale will include just about all of the wigs that i have reviewed for you guys on my channel, and this does include handmade wigs, that i create myself. Now, if you guys, are interested in me making any other wig aside from that, you will also have that option as well. So just stay tuned, it is in the works. I am getting some stuff together for you guys just so that i can have that wig sale ready for you guys in october. I also would love for you guys to comment down below any other video ideas that you guys would like me to create for you guys. I do want to let you guys know that i am going to be starting a new series on my channel soon, which is using a sewing machine to create different types of wigs and hair pieces. So if you guys are interested in that, please stay tuned. For that, that series would be perfect for anyone who wants to start up their own hair company or their own wig selling company. That series would be perfect for you guys now for this side, section of the wig. I am going to start off by crocheting the loo locks along the edges of the wig cap, just to create a foundation for my staggering method on the side of the cap. Now, once i've gotten that foundation down, i am going to go ahead and continue with doing my staggering method throughout this middle section of this side section also for this side section, i did go ahead and use one bundle of this hair in this entire side section. I did go ahead and crochet the next size section exactly how i crocheted this side section, so i am going to go ahead and skip along and show you guys exactly how i crocheted the front section of this wig now for the front section of this wig. I am going to go ahead and crochet each new lock right next to each other, and you want to make sure that you do that, because this is the part of the wig that will be styled the most, and this is where people see the most as Well, so you want to make sure that you don't see any gaps or anything like that in this front section: that's why you want to make sure that you are literally crocheting these locks right next to each other in the front. This is what the front section of the wig is looking like after i went ahead and crocheted the new locks right next to each other, and, as you guys can see, the front section of this wig is very full and concealed. Now i'm going to go ahead and finish up the rest of this talk section with doing my staggering method and making sure everything is nice and full. Now, if i do have any hair left over, i am going to go ahead and use the remainder of the hair to fill in areas of the wig that i feel, may need a little bit more coverage in the wig as well. This is what the completed wig is looking like after i went ahead and installed all six packs of the hair into the wig. Very quick disclaimer. Please do not use this blonde wig cap, underneath your crochet wigs make sure that the wig cap is a black wig cap that will be looking a lot more natural underneath your crochet wigs. Now i'm going to go ahead and apply my headband around my neck first and now i'm going to go ahead and apply the wig to my head from back to front now, once i've gotten that wig positioned exactly how i want it to be on my head. I am going to go ahead and secure the headband wig strap in the back and make sure that those combs are by the temple areas of my head and now i'm going to go ahead and apply this cute floral headband to the front of my hair, and This is pretty much the completed look now you can go ahead and style, your wig as you please, and that is pretty much it now, i'm going to go ahead and get into my slow-mo so that you guys can get into the movement the texture and just The everything about this wig - i really hope that you guys enjoyed this video comment down below any suggestions or questions that you guys may have smash that like button and don't forget to subscribe bye. My beauties you
Comments
Redefineustv: This is gorgeous! Thanks for making this video. I literally just searched for a tutorial because I just bought this headband wig cap the other day and once I tried it and it fit so well, I said I just have to make a loc wig with this! Great job!
Tiffany Haynes: I am new to your channel. And I absolutely love your tutorials. Have you ever considered teaching classes? I'd pay for 1:1
Joe Murray: that color looks great on you
Hilda Shaw: great video, best of luck!❤️
Gordon Harper: I love the color
Barry Wells: such a great video...
Mattie Sanders: I need that asap!
Melinda Richardson: you are like a pro at this
Margaret Owens: Pretty