Diy Headband Wig: Extended Soft Locs Headband Wig Tutorial | Medo Hair Amazon | Missuniquebeautii
- Posted on 12 December, 2020
- Headband Wig
- By Anonymous
#headbandwig #diyheadbandwigs #extendedlocs
Headband Wig: DIY Extended 40 Inch Nu Soft Locs Headband Wig | Medo Hair Amazon | MissUniqueBeautii
In this video, I was able to show you guys how to create a 40 inch Nu Locs headband wig! This wig was actually very fun for me to make and I love rocking this style! Like this video, share it with your friends and family, and don't forget to subscribe to my channel to be notified of my future uploads.
Follow Me On Instagram@: https://www.instagram.com/missuniquebe...
Follow My Business Instagram@: https://www.instagram.com/missuniquebe...
Shop My Website https://pressedbymissuniquebeautii.com...
Discount Code: YouTube25 for 25% off the Entire Website!
Shop for your favorite beauty essentials! Press-on Nails, Lip Gloss, Mink Eyelashes & MORE!
I also make and sell Headband Wigs, Half Wigs (without the headband) Lace Closure Wigs, Frontal Wigs, & Drawstring Ponytails. If you are interested in having me make a wig or drawstring ponytail for you, please send me an email at [email protected]. SERIOUS INQUIRIES ONLY!
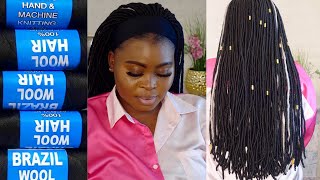
Products Used:
Medo Hair Nu Locs (18 inch & 24 inch)
https://www.amazon.com/gp/product/B08H...
22-inch Mannequin Head
https://www.amazon.com/gp/product/B071...
Crochet Wig Cap (Shake & Go)
https://www.amazon.com/gp/product/B01J...
Black Head Band (I got from my local beauty supply store but here are some other options) https://www.amazon.com/gp/product/B07C...
Needle & Thread
Scissors
T-pins https://www.amazon.com/gp/product/B07F...
Crochet Needle https://www.amazon.com/gp/product/B075...=
Cute Headbands https://www.amazon.com/gp/product/B01F...
Headband Wig: Passion Twist Headband Wig: One More Hair Amazon
https://www.youtube.com/watch?v=KgcSvZ...
Headband Wig: How To D.I.Y. 28inch Kinky Straight Headband Wig With Dome Cap
https://www.youtube.com/watch?v=Mi0tq4...
Headband Wig: How to DIY Mayvenn Kinky Curly Headband Wig With Dome Cap
https://www.youtube.com/watch?v=lwWsi0...
How To DIY Lace Closure Wig: Mayvenn Brazilian Straight Hair
https://www.youtube.com/watch?v=2MpxcB...
Headband Wig: How To DIY Havana Mambo Twist-Out Headband Wig
https://www.youtube.com/watch?v=SpJto8...
Headband Wig: How To Brazilian Kinky Curly Headband Wig
https://www.youtube.com/watch?v=r97Rrb...
Headband Wig: How To Zury Honey Blonde Afro Twist Headband Wig
https://www.youtube.com/watch?v=cNcGy0...
Headband Wig: How To DIY Faux Locs Headband Wig Goddess Locs Pink Wig
https://www.youtube.com/watch?v=9jOER6...
Headband Wig: Box Braid Headband Wig
https://www.youtube.com/watch?v=KCyt32...
Equipment Used:
Cannon SL2 https://www.amazon.com/gp/product/B071...
Neewer Back Drop Kit https://www.amazon.com/gp/product/B07P...
Ring Light https://www.amazon.com/gp/product/B08D...
Rose Gold Backdrop https://www.amazon.com/gp/product/B01C...
Instagram: @MissUniqueBeautiiLLC, @MissUniqueBeautii
Facebook: @pressedbymissuniquebeautii
Website: pressedbymissuniquebeautii.com
E-mail: [email protected]
Oh hey my beauties, it's miss unique beauty and i'm building and i'm back with another video. If you are new to my channel tap that subscribe button so that you won't miss out on any of my new uploads and if you have already subscribed, what's good. What'S poppin welcome back to my channel the items that you're going to need today is a crochet wig cap, the headband of your choice, a crochet needle some needle and thread, and some t-pins. The hair that i'll be using today is these new locks that i did receive from a company called mido hair. Now they were kind enough to send me a package of 18 inch new locks and a package of 24 inch new locks. And when you receive your package of hair, you will receive seven packs of hair within one package. So i had seven packs of 18 inch and seven packs of 24 inch. Now i am going to use this hair to make extended faux locs, so this hair will go from being 18 and 24 inches to being 40 inch beautiful locks. Now, when you receive your hair, you will also receive a free gift in your package, which will be a crochet needle and a few hair accessories that you can use to jazz up your hair. Now, if you guys are interested in seeing how i was able to extend these locks, then stay tuned for the rest of this video. The first thing that i'm going to do is apply my crochet wig cap to my mannequin head right here. I'M showing you guys that this wig cap has three combs in it: two combs at the side and one comb at the back, and i love using this cap for the simple fact that they do have combs. When you apply this wig to your head, this wig will not go anywhere. Now i'm just going to go ahead and apply my headband and when you guys apply your headband to your mannequin, you want to make sure that you flip the headband inside out, so that seam of that headband will remain on the inside of the wig. Once you are done sewing now, i'm going to begin sewing one side of the headband at a time onto this wig cap and the reason why i do that is to make sure that the headband will be evenly sewn on both sides of the cap. I also do want to mention that you do not have to make your stitches too close together when you're doing this process as well, because if you do not be careful with doing that, you can actually cause shrinking in your wig cap. So try spacing your stitches. A little further, apart from each other when you're sewing the headband onto the edges of this wig cap. This is what the headband is. Looking like once, i went ahead and completed sewing it around the entirety of this wig cap, and this is what it looks like once. You flip the headband over the edges so smooth so sleek and perfect. Now i'm going to begin crocheting the locks onto this back section of the wig. Now i did go ahead and extend these locks off camera because it was a lot of locks to extend and i am not going to lie to you guys. Extending the locks actually took me about a little over an hour to do so. If you guys are going to do this type of style, where you want to create the extended locks, please allow enough time before you're ready to wear this wig to prep the hair, because the preparation process did take some time. But i must say it was definitely worth it in the end, so i will go ahead and show you guys exactly how i extended these locks in the next clip so that you guys can see exactly how it's done to begin extending these locks. I started off with the 24 inch lock now for the purpose of this video. I will be crocheting the lock onto the cap and extending it that way, but off camera. I did go ahead and hang these locks on my backdrop, because they were going to be really long and by me hanging them. On my backdrop, it just made me move a lot faster and extend these locks. A lot quicker to get this video going now right here, i'm just showing you guys that i split the end of the 24 lock into two, and now i'm going to attach the 18 inch lock and what i do is i push the needle through the 18 Inch lot pull only one side of the ends that i created on the 24 inch lock and, as you guys can see right here, i'm showing you guys what it looks like. I pulled one side through the hole and now i'm going to create two knots. That'S one knot, and this is the second knot and that's how you extend it now to hide the ends of those locks. What i did was, i pushed the needle through the lock itself through the center of the lock, and i pushed it all the way up until i met the end and i hooked the end on and pulled that through the lock to hide. And then i pull and the end disappears through the lock and now i'm going to do the same thing to the other length, but i'm going to pull it through the bottom section of the lock. I did realize that doing this method did allow the locks to not detach from each other easily. In the beginning, i was cutting those ends off, but what i noticed once i went to pull at the lock they would detach from each other, and i would have to start all over again now i'm going to go ahead and begin with filling in this side. Section and because these locks are on the smaller side, i do space these a little closer together than i normally would just to make sure that i will have the coverage that i need around the edges of this wig when filling in the side section you do Want to make sure that you guys are still continuing to stagger the locks all the way up this entire side section just to make sure that you'll have enough coverage. If you decide to pull the side section of this wig up now, because this is 40 inch locks, i do not plan on pulling this entire wig up into one whatsoever. So the back section will be fine if you space the back section a little further apart from each other. This is what this size section, and this back section is looking like once i went ahead and completed filling in these sections with these new locks and look at these locks guys look at how long they are. I am in love with these locks. Now i'm going to go ahead and finish the rest of this wig and i'll be back to show you guys the finished product. This is what this wig is looking like once i went ahead and filled in this entire wig. Now i do want to mention to you guys that i did not use all of the hair, and the reason being is because this is 40 inch locks. The wig is going to be heavy, so i did not want to pack this wig in and fill it in too much, because i already knew the length was going to weigh this wig down. Now i'm going to go ahead and flip the headband up over the edges of this wig, so that you guys can see the coverage that's around the edges of this wig. One thing i do want to mention that i did do differently in this video is. I did use a headband that wasn't as wide as the usual headbands that i typically use, and the reason being is that i know i'm not going to pull this hair all up into one. So i really only needed the headband coverage in the front section of this wig just to conceal that area. Now, i'm just showing you guys the spacing that i did in this back section and the length of this hair in this video. I was able to show you guys how to extend your faux locs and then use those exact same faux locs to create a 40 inch headband wig, with hair from mido hair on amazon. I will leave the link to this hair in the description box below so that you guys can go ahead and check this company out. I really hope that you guys enjoyed this video comment down below any questions that you may have like this video and don't forget to subscribe bye. My beauties, oh

Comments
ablckdiamd1: Niceeeeeee❤ Hey Sis what size is the crochet cap? Do you prefer Freetress caps or the ones you get from your local BSS( I think the brand name is "Donna" or Annie)?
Darrell Russell: I love how you show everything in detail
afrin aktar: That's so beautiful!
Trigo Alline: that does not look so easy as I thought it was, but thank you for showing us how to do it
Jamaica Nice: Love it!
Moja Sudbina: Great DIY video
David Hopkins: ok this helped my wife a lot thank you so much for the video
Barry Wells: I love your look, looking good
Barbara M Paul: Excellent and Looks Pretty.
Aretha P: Beautiful sis❤
Dolores J. Sutton: Awesome and wonderful video.
Virgil Lopez: you are such a inspiration makes me want to start youtube myself
David Hopkins: my wife loves watching your videos
Felicia Cat: Great video
Joe Murray: where can I get a quality wig?
Jesse Cook: that takes some skill to do, trust me I know
Gordon Harper: where did you learn all you skills
afrin aktar: LIKED SUBSCRIBED
Trigo Alline: subbed for more
Erik Bosarge: 2021 = your year