#Headbandwig #Syntheticheadbandwig Step By Step Tutorial How To: Diy Headband Wig.
- Posted on 10 November, 2020
- Headband Wig
- By Anonymous
Hello beautiful people!
Do you own a HEADBAND wig? like those wigs that are super easy to wear and dash out to the store or for a function. I mean do you own a wig that doesn't need glue or hours to install before you can get on to your activities for that time?
Today's video is all about how you can make a headband wig by yourself. it's a very short video because this DIY is very easy to achieve.
ITEMS INCLUDE:
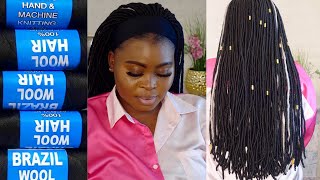
~ Hair extension(Darling kinky curl)
~ mannequin.
~ wig cap
~ elastic
~ satin material for the head band.
~ sewing machine.
~ crotcheting pin.
I hope this video pumps you up to try out your own DIY headband wig and I also hope it was very explanatory.
You can subscribe to my channel and watch many other DIYs that will help you save money but still give you that gorgeous look you dearie
Don't forget to leave your comments in the description box below.
Thank you:)
HOW TO: DIY CROCHET WIG WITH BRAIDING HAIR--https://youtu.be/GF58KlJMW0Q
#headbandwigtutorial #naturalhairheadbandwig #chevb #diyheadbandwigtutorial #diyheadbandwig
Hello, beautiful people, it's your girl so guys today i'll be making a headband wig, and i will be doing a voice over for this video because i couldn't use the original audio for this particular video. Okay. So i'll start off by using my recap: i'm going to place my wig up on my mannequin's head. As you can see, i'm presenting you with different types of recap, so you can just use any of your choice. But for me i'll be going in with this wig cap because i'm going to crochet the hair extension through the wig cap, then i'll be using the kinky curl for darling kinky curl, for this video for this diy and as you can see it's so bouncy and Curly, so this is what i'll be using and yes, this is how it looks the darling, kinky curl and i'm using it in black. So now, i'm just showing you how it is: it's actually wefted, it's not a crochet um extension, no, it's wefted! So i'm going to clip off all those um, the wefts, i'm going to clip off the extensions from the weft and crochet the hair extension through the wig cap. So this is how it is bouncy, nice soft. So now i'm just crocheting the kinky hair through the wig cap, and i used only one pack, but i would advise you if you can get up to two packs. Then fine, because i realized that the hair wasn't as full as i wanted it to be. And i'm not doing a detailed video on how to crochet this. So if you've not watched my video on how to crochet how to make crochet braids, please do so i'll, try and leave the link somewhere in the descript description box. For you to view that. So i'm just going to crochet these extensions all through the hair, but if you notice, you see that i'm not starting from the rim of the recap. Yes, i left some few inches because that is where i'm going to sew in my headband. So you also want to do that if you're going to recreate this style. Yes, you need that space for your headband, so i'm just going to crochet this all over the um recap until i'm done with my hair extension. So this is the finished product. As you can see, it's it looks full. Yes, i had to um use something another kinky hair to feel all to fill up the spaces. So now i'm going to make my headband and i'm going to use a satin material. My elastic and my mini sewing machine. Yes, i got this from jumia, so if you're, if you need one, you could also get that, and this is what i sewed. This is my headband, that is, that is the elastic covered with satin material, and then i want to place the headband on the um, weak cap. So i'll know where exactly i'm going to sew the headband on the recap and i need to do and if you're going to recreate this style, you need to pay close attention to this, because, however, you sew, it is how you're going to wear your wig. So you want to make sure you place it, how you want how to be very favorable to you and then you can take it off and sew the headband around the recap. So this is what i want. This is my. This is what i want. This is how i want my recap: how sorry, how i want my headband to be on my recap, as you can see, so i'm going to sew that now and i'll show you the finished product. So you can see this video isn't long, because this style is very easy. This is the finished product. I'Ve sewn the headband round and there you go so if this video was very detailed and if you know you're going to recreate this style. Please leave your comments in the description box below and also leave, suggestions of, hairstyles and diys. You want me to make for you. Thank you. Oh


Comments
Sommie's Choice: This is beautiful I'm just learning that you can actually sew in the headbands I'd definitely consider doing that in my next video if I'd be doing another diy soon lol Good job
Iruke K.C: You're getting so much better... Subsequently, to have the video sync with the audio will be so amazing. Good job actually.
CHINENYE GNONLONFOUN: Wow nice kaka it's Victor your cousin