Wow!!Diy $1 Bridal Hairstyle Using Braid Extension | First Time Trying This And I'M Shook
- Posted on 09 November, 2022
- Headband Wig
- By Anonymous
Hello Gorgeous,
Hope you enjoyed today's video. As usual, please DON'T FORGET TO LIKE , COMMENT, SHARE, AND SUBSCRIBE {https://www.youtube.com/channel/UCHMPZ...} for more Videos
Love you guys, See you soon in another video
***********************************************************************************
MY FILMING EQUIPMENT / TOOLS
MUSIC: https://www.epidemicsound.com/referral...
CAMERA: https://amzn.to/3vDC0pS
TRIPOD: https://amzn.to/2RQ5Etp
REFLECTORS: https://amzn.to/3frj0FO
SPARE BATTERIES: https://amzn.to/3bWxY4u
MICROPHONE: https://amzn.to/2TPu3QG
RING LIGHTS: https://amzn.to/2SmHxTr
SD CARDS: https://amzn.to/3gguQ4J
HARD DRIVE: https://amzn.to/3iuRlFU
*DISCLAIMER* Some of the links found in the description box of my videos are affiliate links. Buying through the link means I make a small commission which helps to support me and my channel without any extra cost to you ❤️
You can also support me and my work by becoming one of my patrons, please feel free to leave your donations via this link: https://www.patreon.com/funmibiolawore...
(Please note that becoming one of my patrons is NOT MANDATORY, I'd still keep bringing more awesome content on here )
***************************************************************************************
WHEN I AM NOT HERE, I AM HERE
----- (●'◡'●) ----- Connect with me -----
* My Instagram ▶ https://instagram.com/funmibiolawore_/...
* My Facebook ▶ http://facebook.com/funmibiolawore
*My Facebook Page ▶ https://web.facebook.com/FunmibiOlawor...
* For Business Inquiries and Partnerships, please send an email to: [email protected]
▬ CHECK OUT MY OTHER VIDEOS ▬ :
HOW TO MAKE AN ELEGANT AUTOGELE (HEADBAND) USING ASOOKE | NO SEWING NEEDED | BEGINNER-FRIENDLY
HOW TO MAKE A SCRUNCHIE HEADBAND WITH INNER PLASTIC | BEGINNER-FRIENDLY TUTORIAL
HOW TO MAKE A VERY STYLISH AUTOGELE USING ASOOKE IN VERY SIMPLE STEPS | BEGINNER-FRIENDLY TUTORIAL
HOW TO MAKE AN EXTRAVAGANT AUTOGELE HEADBAND | PERFECT FOR BRIDES, BRIDE'S MOTHER, AND OWAMBE LOVERS
HOW TO MAKE A BRAIDED ASOOKE HEADBAND | NO SEWING REQUIRED | BEGINNER-FRIENDLY TUTORIAL
HOW TO MAKE A SCRUNCHIE HEADBAND WITHOUT PLASTIC
HOW TO MAKE SATIN BONNET WITHOUT AN ELASTIC BAND | MOST COMFORTABLE BONNET FOR SLEEP || 4C HAIR TIPS
HOW TO MAKE AN EMBELLISHED (BEADED) HEADBAND | PERFECT FOR ANY OCCASION | VERY EASY TUTORIAL
She did it again! HOW TO MAKE A STUNNING ASOOKE HEADBAND AUTOGELE | BEGINNER-FRIENDLY TUTORIAL
Asooke Fabric Transformation! The MOST BEAUTIFUL HEADBAND GELE | BEGINNER TUTORIAL | Wear and Go
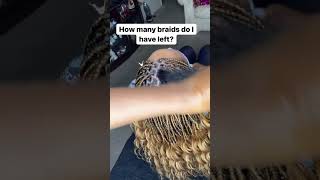
Hello gorgeous welcome back to the channel in today's video. I'M doing something different and I know a couple of you guys might be wondering from before you're going towards with the outfits. Don'T worry you guys, I do it all for you, okay. I just finished filming a cute little tutorial for you guys and I decided to play dress up as well, while filming this tutorial, you guys are going to see in no time okay, but in today's video I'm going to show you all how I diyed this particular Cute little hairstyle that we have right here, I'm going to give you guys a 360 spin, so you can also add my ID here. Celebrate you like it right. I know anyway in today's video, I'm going to show you all how I packed my hair. If you've been interested in knowing all about this process, please be sure to watch this video to the end. Also, if you're not subscribed to the channel - and this is your first step of seeing my beautiful face - okay, please don't make it the last time you see this place by hitting the Subscribe button. Turn on your post notification as well, so you'll be the first to know anytime. I post tutorials, okay, I typically share DIY tutorials, but the main content you would typically see on here on the channel is how to make cute little hair accessories. Okay, I am obsessed. I am in love with hair accessories and I like to share tutorials on how to make them for yourselves or for your clients. If you're running a business where you make hair accessories, my channel is a plug. Okay, so please be sure to subscribe to this channel. Also, if, after watching this video you enjoyed watching, which I'm sure you would please be sure to hit the like button that way, I know that you guys enjoyed okay or you could as well just go ahead and hit the like button right now. Alright guys without wasting too much of your time, all right, let's get straight into the meat and the potatoes of today's video. Let'S Go foreign guys to make this hairstyle. You need your help. Adding I made this one by just stuffing my regular wig cap with hair extension. You can also buy the ready-made one. You can easily find that in your beauty, supply store. You also need your scrunchie or just hair ties. You need your combs. I have my white tooth comb and your regular pin tail comb. You also need your Edge brush and then you need your hair wax your gel. I'M using this got to be glue for just my edges. You need your hair pins. You also need hairspray. Of course, I'm trying this brand for the first time and you need your regular smiggler attachments. This is just expression, hair attachment, okay or hair extension, depending on what you choose to call it, and then you need your invisible net, of course, to just tidy up the entire look. This is me I just washed my hair, I'm taking out the scrunchie on it. What I went ahead to do was to straighten it, and this is my hair after blow drying and straightening, and I just start to flaunt it for you guys to see how my relaxed hair is during. It looks absolutely beautiful, as you guys can see alright. So the next thing I'm going to do now is to pack the hair and I decided to go with a center part. Okay, um decide if you want to do side, part center part. All back. That'S your call - and this is me just combing it using my white tooth comb. First of all, then I went ahead to go in with my Bristol brush all right and then I used that Bristol brush to just slip everything to the back and make it look. Absolutely smooth, okay, depending on the fullness of your hair and just your hair situation, okay, determine how you know how you want to comb it and smoothen everything to look nice. Okay, this Bristol brush very, very important. Okay, if you don't have it it's, the hairstyle will give way to not give enough. Okay, this Bristol brush just has a way of make, make the hair very smooth and nice, and just let everything, slick down perfectly okay. I also went ahead to go in with my um tail comb. Okay, the tail comb as well, just it helps to just comb the hair nicely and make everything look smooth. Okay, I just did the combination edition of different Combs becoming my hair, and this is the gel that I chose to use feel free to use any type of gel that you, like. You just want to use your gel to just make sure that your hair slicks down at this point I could have gone in with hair wax, but I just changed my mind last minute to use gel as opposed to the hair wax okay. So the choice of hair products that you want to use to slick down your hair is yours, feel free to use the hair wax like I said, or go with gel depending on you and what you like, okay and I'm just applying that gel all over my Hair I saw that I did not use it on the center part of my hair. At that point, I I'd like to just go in with Scott to be because got to be just as a way of slicking down your hair really really smoothly. So I just avoided that Center pattern and I applied gel all over my entire hair and I also went in again with my Bristol brush to just slick down the look. And then I packed my hair one more time to make sure that everything is lying down. Smooth, so what I'm doing now is I'm just weaving or is it braiding um, the ponytail of my hair? I don't know if it's pulling till they call it, but I'm just braiding it. Okay, and at this point you want to braid it very firmly. For me, I didn't really braid it firmly and you guys will see why it's important for you to braid the hair very firmly, okay, not too tight or firm. Okay such that the hair doesn't look too poofy and loose okay. So I'm just going to do this real, quick, um braid. It all the way to the end and then once I get down to the end of my hair I'll just twist it around and just roll it around to just secure the ends of the hair. You guys see the way, I'm rolling it around. Okay, my hair is pretty thick, so this point it kept loosening and listening, but I was eventually able to just run it around, and this is what the end result looks like. So the next thing I'm going to do now is to grab my hair extension. This regular Nigerians call it attachment some people, call it a hair extension. Okay, so decide the one that you want to call your own so yeah. This is me just using my rubber band to just pull um just to create some kind of attachments for the hair extension to my own channel here, okay and on camera. I just attached it once, but you need to go into and roll it around like twice. Okay, make sure that it's sitting firmly on your hair and it's covering your natural hair. They want to take this tiny portion here and just use that to roll around the hair just to attach the extension properly to your hair and cover up the joining okay. You don't want people to see where the hair and your natural hair and your hair extension are missing each other okay. So you use this to just cover everything up and roll it around nicely and as I roll it around, if you like, you can choose to spray some hairspray on it. Iodine spray hairspray on mine - and I think that also not doing that also kind of needs was it made things pretty difficult towards the end. So please go ahead to spray some hairspray at this point on your hair to make sure that everything is sitting perfectly okay, and at this point I'm going to attach my hair padding. Okay - and this is how you attach it. I don't know how to explain it. Just watch the way I'm rolling it around. If you have someone with you, this is good point to probably call them to come and help you just describe how you want them to roll it and they roll it for you guys so there's my face here. I was struggling okay, so it's gon na be nice. If you have um it's gon na be nicer, I mean, if I had someone that could just see behind and roll it around perfectly for me, but because it was just me in the house - and I had to make this hairstyle for the video that I was Filming I just had to make do with what I could do and it would have been really nice. If maybe I had some kind of eye behind me. So I was now wishing. Maybe I placed my camera behind me and add a monitor in front of me to just see what I'm doing clearly but yeah, maybe next time. I would not make this mistake but yeah. This is me just using my hair pin to just um secure the hair padding and the way I rolled my hair, and this is what the back view looks like I feel like it could look better like I said, if I had eyes behind me, that could Tell me: oh, do it like this or if I had my camera and I could see what was going on behind me, but because I was just working my face or hoping that's what I was doing made sense but yeah. Eventually, I was able to make the whole thing work, so the next thing I did was just attach my head um. First of all, I wore this. My invisible net on the um hair extension and the work of this invisible knit is to keep your hair. Looking neat: okay, if you leave your hair without the invisible net chances that you will have some flyaways and things like get raw from there. But the moment you add this invisibleness, the invisible neck is going to keep your hair looking incredibly mixed from starts of the day to the end of the day. Okay, so it's pretty important! You can get it from your beauty supply store as well. All right, I shared in my previous video, where I got the invisible Nets from so you can go ahead to check it out. I linked the name of the brand just in case you are located in Port Harcourt and you want to get for yourself as well. So this is me just showing the end result of my hair. I attached this cute little hair Vine that I made if you've not seen that video I'm going to link it on the screen, you should go check it out if it's something you want to make for yourself or for your client. Okay - and this is me just show you guys the end result of the look. I was filming a video like I said, and I'm sure you guys have seen that video, the video on how to make a bridal hand fan, and I thought, to play, dress up and wear something cute to make my hair. Do my makeup. You guys this content creation work for me, don't be small thing and my own hair stylist, my own fashion, designer my own makeup artist, it's a lot, but we love it. Okay, I love it. Thank you guys so much again for watching this video. If you've not subscribed to this Channel, please don't forget to subscribe to the channel. Okay, please don't forget to like this video, it's very important to me and share with your friends and family and all that jazz. Okay, leave me comment in the comment section as well. Give me feedback on this entire video. Thank you guys again for watching, and I can't wait to see you in another one. Bye-Bye

Comments
Funmibi Olawore: Hello Gorgeous Thank you for watching today's video. Please LIKE, SHARE, COMMENT and SUBSCRIBE
Ami Deladem: Your videos have been very impartful especially to me. God bless and keep you, Dearest Funmibi!