New Style: How To Make A Headband Wig | How To Make A Neat Diy Headband For Your Wig | Must Watch!!
- Posted on 04 April, 2021
- Headband Wig
- By Anonymous
Hello Lovelies,
In today's video, we are going to be making a headband wig from start to finish, I shared a detailed tutorial on how you can make a headband for your wigs. This video is very detailed and I shared a lot of hacks as well as information on how you can replicate something like this for yourself. Make sure you watch the entire video so you don't miss any important information. Also, DON'T FORGET TO LIKE , SHARE, COMMENT AND SUBSCRIBE {https://www.youtube.com/channel/UCHMPZ...} for more Videos
Love you guys, See you soon in another video
#headbandwig #wigs #diy #beginnerfriendlytutorial
***************************************************************************************
WHEN I AM NOT HERE, I AM HERE
----- (●'◡'●) ----- Connect with me -----
* My Instagram ▶ https://instagram.com/funmibiolawore/
* My Facebook ▶ http://facebook.com/funmibiolawore
*My Facebook Page ▶ https://web.facebook.com/FunmibiOlawor...
* My Email ▶ [email protected]
▬ CHECK OUT MY OTHER VIDEOS ▬ :
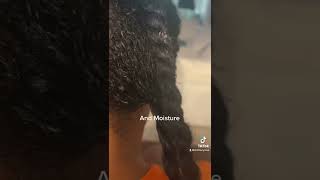
THE POWER OF MOISTURIZATION | HOW TO MOISTURIZE YOUR NATURAL HAIR TO RETAIN MOISTURE FOR DAYS
DETANGLE, PREPOO, WASH AND STYLE MY 4C NATURAL HAIR WITH ME || HAIR ROUTINE FOR MASSIVE HAIR GROWTH
3 WAYS TO USE ALOE VERA FOR FAST HAIR GROWTH | ALOE VERA AS A PREPOO, DETANGLER AND HAIR GROWTH OIL
HOW TO REGROW YOUR EDGES/HAIRLINE BACK FAST | 3 PRODUCTS YOU NEED + BEFORE AND AFTER PICS
NO MORE DRY HAIR: HOW TO MOISTURIZE DRY HAIR | USING JUST 3 ITEMS | 4C NATURAL HAIR
HOMEMADE PROTEIN TREATMENT FOR HAIR GROWTH AND STRENGTH USING ONLY 3 INGREDIENTS || FT. MY 4C HAIR
WASH YOUR HAIR LIKE THIS TO REDUCE BREAKAGE / HAIR LOSS ||WASH DAY ROUTINE FOR 4C NATURAL HAIR
NATURAL HAIR PRODUCTS HAUL 2020 | THESE PRODUCTS ARE SAID TO BE GAME CHANGERS
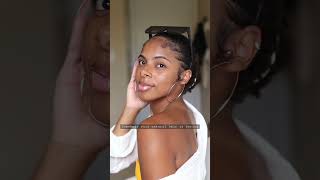
Let me be in your crew, i just wan na be free, be with people like me to be broken and blue. I just wan na go dance baby find me some moments, hey guys! Welcome back to my channel. This is funny here again with another video in today's video. I'M going to be answering a question. I got from one of you guys my family members on here. She left a question and i'm going to read out the question now she said: please show when you sew the headband with machine. Where did you get the headband in nigeria? So this question came from the last video i did on how to make a headband wig. So basically the question is, or the person was requesting, that i show how i usually attach the headband or construct a headband and then attach it to the weave when i want to make a headband. So in today's video i'm going to be showing you all how i made this stunning wig, i have on me right here, i'm going to show you guys how i sewed or constructed the headband now and then attached it to the hair. I'M here, for you guys, like i always say so, feel free to drop me a request. Just like this person did right this person, my name is ben solar, uluwat bhimi feel free to drop your questions like how, if you have any requests or something you would like me to show you guys how i went about it feel free to drop it in The comment section as i always encourage you guys to drop me comments, i'm always there. It might look like i've, not seen it all. I always respond anyway, but in case you asked for something and then it seems as if i've not answered you trust me. I have it at the back of my mind, so feel free to drop your suggestions, your questions and stuff like that down in the comment section. So without further ado, i'm going to take you guys, along with me, into the whole process of getting this stunning headband wig that i have on me right here. I'M going to i'm going to show you guys. Basically also there was another person that was asking how long it usually takes for my hairs now, because most times whenever i make wigs for you guys on this channel is usually synthetic wigs right, because those types of curl patterns that come with synthetic wigs they mimic. My natural hair strand, right occasionally i do not like normal straight hair, but most of the time when i'm making wigs on here, i do like synthetic types of hair and she was asking how long those types of hairs last now and generally for me personally, i Don'T know if it's that i know how to manage hair now i don't know if it's a personal thing or is general right, but most times my wigs last me up to two years right. There are some wigs that i made two years ago that i'm still wearing till now and they're, not even natural hair, wigs right they're, just like synthetic wigs, so it all depends on how well you take care of your hair and, most time when it comes to These types of hair, except maybe you are fixing it directly to your head right, but if it's a wig most times those hairs they last long right, they last you up to two years depending on how well you take care of it. So just try, if you're the kind of person that is looking to make stuff like this for yourself as a wig right, try to make sure that you take good care of them and yeah those hairs will last you up to two years. I think, but yeah nothing less than a year then just maybe i should put it as one year. That'S if you make a wii similar to whatever i show on here on my channel trust that it's going to last you for up to a year so yeah. Those are the two questions that really really struck me and i decided to answer those questions before filming this video. I know this. My intro is kind of long, but i just wanted to go ahead to answer some questions that some of you guys might have, and then maybe you just didn't drop it in the comment section, i decided to just answer this question so now that i'm done answering Questions, let's get right into today's video, all right guys. So the first thing you need is a stretchy fabric and you're cutting that stretchy fabric. On the dimension of your head circumference, you need to use a table to measure the circumference of your head and then add about four inches extra to the second frames of your head, and then the width of the fabric is five or four inches, depending on how Wide you want your headband to be. All you need to do is take your piece of stretchy fabric that i already cut out to your sewing machine and sew it along the length. Now you are sewing along the length of the fabric just to close up the edges and once you're done sewing, you need to turn that particular piece of fabric inside out just look at the way. I'M sewing this particular headband for myself, using my sewing machine once i'm done with sewing now, i'm going to turn it inside out feel free to use a what they call this item now. I think it's called this pulley or something or you can just turn it inside out. The fabric is wide enough for you to use your hand to turn it inside out just turn. The fabric inside out doesn't mean points, and once that is done, take it to your ironing board to give it a good press, and once that is also done, you need to fold the edges, the on certain edges of your headband and also run it under your Machine to close up that particular part of your headband and that's it guys that's how to construct a headband for your headband wig. But there are many parts of this tutorial. I'M not going to be doing a lot of talking because i already have about five or six videos on how to make wigs. So i'm not going to really focus on that part while filming this video, because i just feel like there are other videos, i'm going to link the previous video i showed on how to make a headband with somewhere on the screen. So, just in case you want to you know, get a more detailed tutorial that tutorial is going to serve you really really well, but yeah. This is my headband. I'M already done constructing my headband for my head bandwidth and with the type of fabric you want to use for someone who has just a home sewing machine if i ever an industrial machine feel free to get a very thick and very stretchy lycra fabric. But if you're using your regular at home machine personally, i found that those types of machines don't really show like craft fabrics easily, but if you've mastered it out of sewing like craft fabric, feel free to use something really really neat and yeah. That'S pretty much it for the fabric. I got my fabric that i used for the headband wig from one of all these shops that they sell. Um sewing materials and yeah. I think that's pretty much it for how to construct a headband for making your headband wig. What i'm showing now are the items that i used while trying to make my wig, i used a darling empress collection, hair. I used this peruvian wave hair just because i wanted something with this curl pattern. I don't have any proper wig. That has this pattern, and i think, for this part, a lot of you guys already know how it goes for you to attach your headband. You need to first of all sew the first line or the first part of your wig cap, so we put in front just like i'm doing so. I'M just going to quickly quickly run through sewing. This part of my wig cap on like sewing my hair onto it right and once that is done, i'm going to take it to my sewing machine to attach my headband to it, because i found that if i attach my headband when i'm done with you know, Filling up the whole um recap: it tends to be a bit difficult, so i already shared this hack as well in my previous video that i told you guys about feel free to go check that out also that week tutorial that head bandwidth tutorial is quite detailed. I shared a lot of information in that video. So the point is i like to sew the front of my wig cap first of all, and attach my headband wig right from the start before going ahead to make the entire hair right to make the entire way fill up the remaining parts of the wig cap. If you enjoyed this video so far and you get to subscribe to my channel, please do well to hit the subscribe button down below. Thank you guys so much for 600.. We hit 600 sometime this week and the love i've been receiving from all of you guys has been so mind-blowing most times. I just look at myself, i'm like, oh, my goodness, what's going on bo, thank you guys so much. Thank you. Thank you. Thank you. I can't thank you guys enough we're still on the way to 1000 subscribers, as i said in my thank you for 500 video we're on the way to 1 000 subscribers. So please do well to hit the subscribe button if you are yet to be subscribed to my lovely channel, if i do say so myself anyway, this is it. I'M doing you know sewing the front parameter is a parameter. Now all the second frames, this front parts the front part of my recap. So i'm just going to fold it into two like i'm doing right here and i'm also going to fold my headband into two as well to make sure that the middle match each other make sure that everything is equal onto each other. And this is just to prevent my headband from you know tending towards one side, because usually i like to either tie my headband when i wear my headband wigs or add velcro to it just to make it. You know um clip to each other and stay put on my head feel free to choose whichever one works for you so make sure that the edges are equal and attaching anything of time. It'S whichever one you choose to do will be easy for you, so once that is done, i'm going to stick to my sewing machine and then just sew it along that edge that i sewed making sure that i'm covering any rough edges in front. You know the pathway i sewed in front make sure that i cover that part and the front looks very, very professional and just beautiful, as you guys will see once i'm done sewing this first parameter, i'm done now so yeah. This is what the front looks like. Well, i'm sorry to move it to where it is. You know proper lighting and you guys get to see how neat and just professional the headband width looks. So what i'm going to do now is i'm going to go ahead to yeah exactly this. Is this is part i'm talking about. Look at how neat the front looks. It just looks like something something premium. Okay, so i'm going to start from the back now and then start to you know, fill up the entire the entirety. Okay, i'm giving you guys english the entirety of my headband, we're going to be here to sew it and, like i said, i'm not going to pay. You know too much focus on this part, because i have a lot of videos. This is why you have to subscribe and watch my old videos. I have a lot of educational and just eye opening videos on how to make wigs diy, tutorials and stuff, like that. I have a lot of fun content on my channel so feel free to smash. The subscribe button and just go watch my old video. So i'm rounding up this part. Now, i'm almost done making my wig and yeah that's pretty much it as usual. There is the end you guys are going to see me work this wig on myself and just show you what it would look like if you go ahead to replicate something like this for yourself, so you guys, if you replicate anything i share on my channel. Please don't be, you know, don't feel some type of way send me your pictures on instagram on tick tock, i'm very active on tic tac now. Thank you guys if you are from my ticktock family leave it down in the comment section. I know a lot of you guys found me from tiktok, so please leave comments down in the comment section, so i can shout you out to my tic toc family. So yeah like i was saying, feel free to tag me in your post on instagram on tick. Tock on facebook, i try to be regular on facebook or yeah i'll try, but i'll do better. Basically, i'll do better, but yeah tag me on any of your favorite social media platforms. I'M always active on this, so yeah. This is me now. I already went ahead to just pack my hair backwards. My hair is not in cornrows, so i just pressed my hair down and then packed it into this. My regular wig cap and left the front already slipped down the front. I used my eco styler and for the edges i focused on the edges. Using my got to be gel, i found that that gel does a fantastic job when it comes to slicking down your edges. I already shared a video where i shared all my favorite gels feel free to go check that out, i'm going to link it somewhere on the screen. Just so, you get to know all the gels and items i use for sticking now, my hair to achieve a stunning hairstyle and yeah. This is pretty much it. This is me feeling, like. I don't know whether to call myself rapunzel now you guys should give me a name. Give me a name down in the comment section. What do you think this hairstyle? What name do you think this hairstyle is screaming? You guys should name me do naming ceremony for me down in the comment section anyway. This is me, like i said the headbandwing is done and it looks absolutely stunning. Okay, this is look. I mean you guys. Look at how neat neat this thing looks: you guys should feel free to. You have to replicate this tutorial, and let me see what you did. I can't wait to see your applications on different social media platforms anyway. Thank you guys so much again for watching it means a lot to me. Thank you for 600. We are on the way to 700 and ultimately, on the way to 1 000, so smash the subscribe button. If you are yet to be subscribed to my channel, i love, and i appreciate you guys - i forgot to blow you guys kiss in this in this first play video. So please just forgive me in the next one i'll blow you double kiss. Okay, thank you guys. So much for watching i love and i appreciate you and i can't wait to see you in the next one bye. You
Comments
Abigail Atuogu: This tutorial is great! thanks for sharing❤
Itsjustsp: beautiful I absolutely love your channel. keep killing it sista ❤️
Joy Ogechi: Beautiful and love your videos they are well detailed
Joy Ogechi: I have done mine and thanks for your tutorials
Keeping up with Goldielockes!: I didn’t need to watch till the end of the video before liking at first...☺️ Your videos/tutorials are always dope.
Agnes Koko: Very beautiful.... you're so creative
Treasure Hanson: So beautiful... and the hair fits your cute face so well
Keeping up with Goldielockes!: The hair screams’Bella!’ ☺️
Malia Manicord: Hi ! Super video ! But we don’t really see how you sewing the headband on the first layer of hair, can you please explain me that ? Thank you for your answer
Funmibi Olawore: #roadto1000subscribers Thank you so much my dear Family for watching this video, I love and appreciate you all ❤. Please don't forget to SUBSCRIBE, LIKE, SHARE AND LEAVE ME YOUR FEEDBACK in the comment section. We are really close to hitting 1000 subscribers
Abigail Fadeni: Please we didn't see how you sewed the band on the wig cap and it was too dark showing how you did it
Joy Ogechi: Please how much did you buy this weavon?