How To Curl Hair & Style Headband Wig Unit Part 2
- Posted on 26 June, 2021
- Headband Wig
- By Anonymous
HOW TO: Curl Hair & Style Headband Wig Units | PART 2
This tutorial is a step-by-step video teaching you how to curl and style headband wig or other extensions. The Brandon Experience goes in detail about all things headband wigs in this video. The previous video (PART 1) will show how to shampoo, condition, blow dry and prep the unit.
//PRODUCTS MENTIONED IN VIDEO:
Dream Coat: https://www.thebrandonexperience.com/p...
Shine Spray: https://www.thebrandonexperience.com/p...
Cult Favorite Hairspray : https://www.thebrandonexperience.com/p...
Style on Steroids Texture Spray: https://www.thebrandonexperience.com/p...
FHI Platform Flat Iron : https://www.thebrandonexperience.com/p...
// TODAY’S EPISODE HIGHLIGHTS:
1. Curling
2. Styling/ Prep & Shipping
— SUBSCRIBE TO STAY UP TO DATE.
New Videos Every Week!
— FOLLOW:
Business Instagram : @thebrandonexperience
Facebook : The Brandon Experience
— WHO IS THIS “THE BRANDON” ?
I’m Brandon, I began my career as a licensed cosmetologist with a focus in color and balayage. Quickly I began to realize my passion is education, whether it be behind the chair or helping other professionals. I decided to share what I have learned to help others grow in their knowledge of hair care, color theory, product knowledge and how to present themselves/develop their brand successfully.
I see so many talented individuals on a daily basis that want to take their business to the next level but have no idea where to go...I am here to take that journey with you. Welcome to THE BRANDON EXPERIENCE.
#ColorWow #HeadBandWig #WigCare
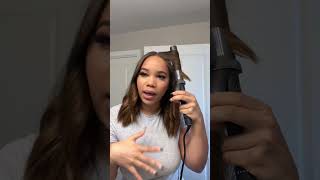
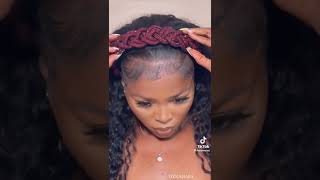
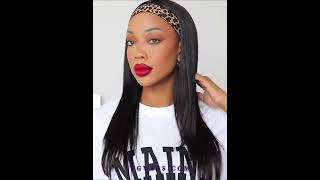
What is up everyone welcome back to the brandon experience. My name is brandon certified, hair loss specialist and today we are going to be doing the part two follow-up video to our last video, which taught us how to prep our wig units for styling. We are going to be using the fhi platform, one inch model, which is available on my website through the affiliate link. The first product you see here is the color. While cult favorite hairspray, it is an extremely flexible and buildable hairspray. It offers a great foundation for any type of styling, especially if you're going to be curling. I'M using my comb here to distribute the product throughout the hair to ensure that it is even so that when i go over it with my smoothing iron, i'm sure to have good long, lasting results. Part one is going to be linked right, above so be sure to check that out as well. If you haven't gotten a chance to yet we are going to start this styling tutorial off with vertical sections that are going to frame the face for the first like two to three sections. I do like to curl those away from the face. So if i'm using a curling iron or a smoothing flat iron, i typically follow the same look remember your headband units are typically going to sit a little further than a traditional lace, front or frontal unit. So you will get to the section where the ear is a little faster. It is okay at that point, to begin alternating your curls. So if you want to do a couple of panels towards the face or if you wanted them to all, go in the same direction, that would be the point that you could decide to begin alternating if you curl, hair all in the same direction. If you comb them out, you get a really nice wave. If you alternate them, you get a little more body, texture and definition, i'm splitting this unit from top and bottom so that i can increase the volume. So i will actually have two rows of curls. That will be going in alternating directions that will lay on top of one another. Keep watching. If you want to see exactly what i'm talking about. The shine that you are seeing on the hair is a result of the color while dream coat. It is a wonderful humidity blocker, which i highlighted in our part one of this video series, if you want to know the steps for applying that, so that you get the maximum benefit, you can refer to that video for that as well. A good tip some refer to this as the chase method, is to use your comb to feed the hair through the plates of your smoothing iron. It ensures that they come out as smooth as possible and also on natural hair does a great job of ensuring that those ends are not crushed by the plates. They go through nice and even by using your comb. I am alternating these sections, one section to the left and one to the right so that i can build texture and volume. It literally creates a collision with the curls and it makes the hair so much more full and very modern. Looking, if you want more of a beachy look, you can just leave the ends out or smooth them straight at the ends. The choice is totally yours, there's so many different ways that you can curl your unit. This is just the method that i have opted for. My customer i'm going to be shipping this unit out of state, so this is what i have found is the most effective and long lasting way as i get to those panels around the face again, i'm following that same pattern that i would have done on the Right side and i'm going to take those two to three panels away from the face. As i enter my second row, i'm going to do the exact same thing as i go through the unit. I ensure that i bricklay my curls, meaning that if the section underneath is curled to the right, i try to make sure that the section on top is curled to the left. When you are working on any top row, whether this be a wig unit or natural hair, it's important that you make sure that you're, not exposing the scalp or the lace or whatever is under your unit. So if you need to take one curl, a little lower or go up a little higher to camouflage that make sure you do that, styling is an art you don't necessarily have to just stick to rules. These are little tips that i have found along the way that make my units look more realistic as that's what we are attempting to convey. If i wanted this unit to be extremely tightly curled, i would pin curl each of these sections upon finishing them. Let it cool down and then release them. This is also an option that is an upgraded surface that i offer. I will pin curl a unit clip it put a nice net on it and send it off to my clients. The temperature selection for your smoothing iron is going to be dependent on the hair, texture and the desired. Look that you are looking to achieve the finer, the hair, texture, the lower the temperature. If you have a coarser texture of hair, then that means you can increase your heat incrementally until you get the desired smoothness that you are looking for, keep in mind that curl pattern does not dictate heat. So if hair is extremely curly, that does not mean that it needs more heat. Remember that is texture alone, meaning the diameter of the individual strand of hair that you are working with, and here is our finished result. So i do a couple of things to finish off my styling, first of which is using the color, while extra mystical shine spray, it's a wonderful uv blocker, and it just takes your shine through the stratosphere. I like to layer my products using a shine spray first and then using a hairspray. This is that same hairspray from earlier one, and only greatest of all time: cult, favorite, buildable, flexible hairspray, tilt the hair back and spray underneath to get good coverage. The last spray that i'm going to use is going to be styled on steroids. This is my go-to textures right, so if you want a little off and a little extra volume, this is going to be your best friend. Remember that if you're using a shine spray to use that first, if you want your curls to hold as long as possible shine sprays do tend to make your hair sprays a little softer. So i use the shine spray first for the effect, and then i use my hair sprays afterwards for the benefit. Look at that shine, you can see this hair is still moving. It is very full from the texturizing spray and as a pro tip right at the end. Go ahead and secure your unit in a hair net. Hair nets are super beneficial for protecting your style if you're shipping units out as a stylist or wig maker, or if you are just looking to curl your units and store them for a later date. I promise you. Hair nets are my secret for keeping your hair as fresh as it was when you first did it. Please give this video a thumbs up. If you learned at least one thing from this video just one and i look forward to seeing you all same place same time - same channel stay safe out here, and i will see you all on our next video peace.
Comments
Alicia Harris: Very informative! I learned about alternating when curling gives the hair different looks. Pin curling and putting a net on maintains the curls and make them last. Thank you for sharing your knowledge!
Tracie C: Turned out beautifully! Thanks for all the great tips!.
bessiesimmonsmusic: Securing the curls with the hair net was different and creative. Im going to try that with my wigs. Thank you!
Yaritza Gilbert: Learned about layering sprays. Thanks
Deidre Walker: Great tip about using a hair net!!
BigGcavsfan: I got into a curl collision once, then the cops used the chase method