Beginner Tools For Lace Front Wig Install + How To Install
- Posted on 01 May, 2022
- Headband Wig
- By Anonymous
What is a Lace Front Wig?
• A lace front wig has hairs that are hand-tied to a sheer lace which goes over the scalp. The hair is attached to the mesh holes in the lace using ventilating hook needles, they are hand tied to get a natural look.
What this wig? get it here https://amzn.to/3LWEN5O
Wig used in video:
~ Outre
~ Style Jelisse
~ Color: Teal Melt
~ Lace: HD Deep part
Link for the difference between HD, Swiss, French, Korean, and Filmic videos.
Part 1: https://youtu.be/F9DhgFhB_hI
Tools Need for Lace Front Wig Install w/ links to get similar products
· Wig Cap https: //amzn.to/3vYMrHy
· Foundation, Concealer, or Lace Tint Spray:
· Application Brushes & Beauty Blenders: https://amzn.to/3ymq93Z
· Scissors: https://amzn.to/3P6Pyo8
· Got2 B glued: gel https://amzn.to/38gbPzh spray https://amzn.to/39O1dbo
· Rat Tail Comb(comes in set): https://amzn.to/3smn403
· Edge Brush: https://amzn.to/3P86rik
· Wide Tooth Comb(comes in set): https://amzn.to/3smn403
· Satin Scarf or Silicone Head Scarf: https://amzn.to/3yqVv9A
· Hot Comb: https://amzn.to/3Fter93
· Fly Away Mousse: https://amzn.to/38a60n9
· Edge Control: https://amzn.to/3soXSWx
· Styling Gel: https://amzn.to/3M218Pm
· Clips: https://amzn.to/3soYrQ9
· Bonus Shea Moisture Bond Release Spray: https://amzn.to/3N0ss0x
Follow me on social media:
www.instagram.com/kalahricoven
https://www.tiktok.com/@kalahricoven
Music:
GLORIA TELLS / Maximum Profit (Instrumental Version) / courtesy of www.epidemicsound.com
https://www.epidemicsound.com/track/AJ...
Some of the links in this description are affiliate links
#lacefrontinstall #beginnerwiginstall #toolsforlacefrontwig #whatisalacefrontwig
#outre #stepsforlacefront
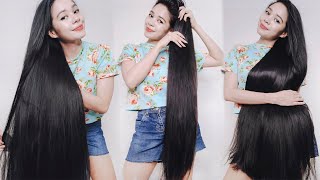
I have on a bob and i'm a barb and i got bars hi guys. I am kalari and welcome to my channel. I am a hair lover. I am a wig enthusiast. I love that i can switch to my style and that it's a protective style and in today's video i am going to talk all about what are lace front units, slash wigs as well as show you the tools that you need to get started on. Installing a lace, front wig and how i installed this gorgeous lace front unit by otre. So if you are interested on seeing all of those awesome, things stay tuned. So what is a lace front wig for those of you that are just starting out and are a little bit confused about what these terms mean lace, front. Wigs are just wigs that have mesh lace in the front part of the wig. These meshes have fine holes in them, and the hair is hand tied using ventilation hook needles in order to get a natural hairline. So if you have ever done like crochet braids like the crochet locs or seen, somebody do like latch hooking like to make those rugs and blankets or whatever that's. Basically what it reminds me of when i looked up what it was so there's different types of closures. When dealing with lace, wigs depending on if it's human or synthetic, when dealing with human hair, the most popular lace closures that i've seen are 4 4, 5, 5, 13 by 4 and 13 by 5., when i say 5 x, 5 or number x number. I am just talking about the length from ear to ear. That is the first number and then the second number is the depth from forehead to the back of your head. Now, for synthetic wigs and human hair blend wigs, you will have some freedom parts, just like the sizes i mentioned before, but also you will have like predetermined parts that you cannot switch up so like, for example, this wig is just a deep part. She is only a solid line right here with some lace going right here. This lovely wig i have on today is the ultra color bomb collection. She is premium synthetic fiber, so she is a synthetic lace front wig. She comes in many different colors. These are all of the color bombs that she comes in. I have the color teal melt, so you will also encounter with lace front wigs different types of materials. You have swiss lace, you have french lace, you have korean lace, you have hd lace, there's a whole bunch of different places out there we're not going to talk about that in this video, though i'm actually going to be covering that in the next video. So, if you're interested in knowing about all the different laces out there subscribe to my channel that way, you know when i post and hit that bell notification, because that's going to be the next video anyways, i'm going to show you guys all the tools you need And how i installed this here are all the tools that you need in order to successfully install a lace front unit. First get a wig cap. You can either match your skin tone or be a shade lighter than your skin tone neck, some foundation or concealer. In order to color the lace and the wig cap to match your skin tone, some application brushes in order to apply foundation and concealer to the wig cap and lace, some scissors in order to cut the lace tweezers are optional but highly recommended. If you need to tweeze the hairline to make the hairline appear more natural, some sort of glue or styling gel, i like to use the got to be glued in order to glue down the wig to my head, a wrap tail comb and edge brush in order To lay those baby hairs a wide tooth comb in order to comb out any tangles that happen throughout this process and to comb the hair back, a silicone headband or a satin scarf in order to pull down the hairline when you're, laying baby hairs and gluing the Weight down a hot comb in order to style the wig, some flyaway spray or mousse, in order to get those strands that fly away during this process back in order edge, control and styling gel. In order to do those baby hairs and some clips in order to hold the hair down throughout this whole process, here's how to install a lace front wig from start to finish in six easy steps step one get your wig cap. If your wig cap is lighter than your skin tone, you're going to want to use your foundation or concealer to color it in order to get it as close to your skin tone as possible, because you do not want that wig cap showing underneath the lace step. Two color the lace you're going to want to turn your wig inside out. That way, you can see the lens a little bit better and then take whatever concealer foundation, whatever paint spray that you're using and color the lace underneath, because if you have a freedom, part you're going to want to make sure that no matter where you part it. The color at least matches your skin tone or resembles your skin tone. I am just going in with my beauty blender that way i can get maximum coverage and i like how it blends, with my skin step 3 cut the lace, if you have small scissors, definitely use them the smaller the blade, the smaller the cut. But if you have large scissors that is okay, what i like to do is i like to cut it inside out. You see the knots right there i like to cut above the knots, and i feel like cutting inside out, allows me to have better control, because i can push the baby hairs and the hair down. As i cut again, you want to take your time with this process. Go slow, do not cut too fast, and it's okay. If you accidentally cut some baby hairs, you can always create more see. That'S what the hairline looks like when it's fully cut and you're also going to want to make sure that you adjust any straps and make sure the wig fits securely on your head, and it just looks right. I'M just prepping for the next step. So i'm just combing my hair back and using the clips that way the hair is out of the way when we get to the next step step four glue, the wig down, i will be using the got to be glued styling gel system in order to glue Down my leg, i am using the styling gel and i am just applying it right above my hairline, because this wig is a bit small, i'm kind of getting a little bit on my hairline because she doesn't come too far up and i kind of have a Big forehead but you're going to want to wait for it to dry a little and turn a bit clearer before you place it down. If you place it down too early styling gel is going to dry white and i'm just using my rat tail comb to hold down this side, because i have to glue down the other side once i glued on the other side, i used silicone band to wrap It and secure it while i waited this is after i waited about like 15 to 20 minutes now, i'm just cleaning up the hairline and any excess glue, and next i'm just pulling back and pushing back and redoing the clips for the next step. That way, the hair is no longer in the tank step, 5 baby hairs. This is optional. I like baby hairs because they do hide the lace. So what i am doing is just creating some baby hairs where the wig does not fit so nicely on my head. So i'm starting close to the hairline near my ear and then i'm just going to try to create baby hairs all throughout the parts of the way that i feel like. I want to hide a little bit better if you're going to do this, make sure you cut the baby hairs at an angle, add a little bit of styling gel and use your edge brush to scoop the baby hairs wherever you want the swoop and curve to Go you need to hold your hand and then swoop the edge brush, so i'm going to do it again on the middle part or the middle section halfway up whatever you want to call it. So i'm just doing the same thing: i'm taking my wrap tail comb. I'M pulling out the baby hairs all the hairs that i want to be a part of this and again since i did accidentally cut some of the baby hairs off the lace, i'm creating a little bit more. That way, the hairs look a bit fuller, so i'm just taking the comb part of my edge brush using my fingers holding and swooping. So this does take some time. Practice makes permanent, not perfect, so just keep trying keep working on it. I am definitely not a baby hair expert, but i do like trying to experiment with them a lot more recently like i just started learning how to do the swirls and the swoops and i've just been swooping, swoops and swooping. So yeah just repeat this process for the rest of your hairline you're, going to want to get your satin scarf or your silicone headband back and you're going to want to gently place it on your hairline. That way, the baby hairs can be held down while they dry i'm just adding a little extra gel on the parts where i try to do the little swoops and the extra curves that way they can hold a bit better and they don't lift, do not use Cotton do not use any type of cotton material to lay down your baby hairs because from my experience they lift, they will attach to the fabric and they lift when you take it off so use satin use a silicone headband, something with spandex in it and just Wait and let your baby hair dry once your baby hairs are dry gently, take off your headband slowly slowly, but surely take it off and just clean up any parts that are, you know, excess. You see some residue just clean it up um. I am just cleaning up the part and making it a little bit more closer to my skin tone, step six style. So if you have a hot comb, definitely recommend using it um. I love to use this to flatten down the parts, especially if i want to define them or if they appear a little bit more bumpy. If you do not have a hot comb definitely invest in one. I used to use a hot iron to do this and i would flatten the wig before i put it on my head, but a hot comb definitely makes it a lot easier. Just get one. You can get it off at amazon. You can get at your local beauty. Supply store, definitely a great tool to have if you need to define the part or flatten the hair at the top of the head. It'S definitely a game changer and after that, i'm going to use my flyaway spray to kind of just keep the hair more uniform and to control any of the hairs that have separated from their friends during this whole process definitely be generous and it will dry, invest In this, this is the shea moisture, wig and weave tea tree and borage seed oil fond release spray. I love this. You do a little spritz around the hairline, be generous with it massage with your fingers and slowly lift the lace up, don't yank it because you don't want to rip your edges. You don't want to hurt your hairline. I definitely recommend investing in that. They also have wiggly like they have a whole wig and weave collection. I have tried the wig glue. It'S really runny, i don't care for it. I'M gon na keep using my got to be glued and, if you guys are interested in seeing the next series that i have in this, what is lace, what is wig collection series playlist that i'm gon na start go ahead and subscribe to my channel again. The next video i'm posting and then i go all about what is the difference between korean friends, swish hd lace, transparent, sleeves filmic lace, there's even other laces out there, besides those, but those are the main ones that i'm going to cover in the next video. So, if you're interested in seeing that subscribe to my channel and hit that bell notification, that way, you know when i post it, because you're not going to want to miss it and if you're, watching this from a different time in which, in that time, the video Is already released, i will link it down below that way. You can go see it. Thank you guys so much for watching my video and you guys have a great day. Bye.


Comments
Gabi Glover: love this wig! this was very helpful! can't wait for the next video!!
Stacey M: Keep'em coming!!
Zavier Coleman: WE WANT MORE!