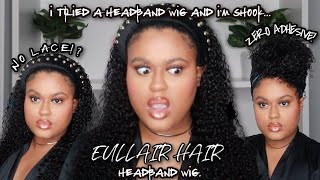
Best Afro Kinky Curly Hair | Diy Headband Wig | New Headband Wig Cap | Exyhair | Missuniquebeautii
- Posted on 04 June, 2021
- Headband Wig
- By Anonymous
#diyheadbandwig #headbandwigcap #exyhair
BEST Afro Kinky Curly Hair | DIY Headband Wig | New Headband Wig Cap | ExyHair | MissUniqueBeautii
NEW!!! Headband Wig Cap (Get Now While Supplies Last!!!) https://pressedbymissuniquebeautii.com...
Follow Me On Instagram@: https://www.instagram.com/missuniquebe...
Follow My Business Instagram@: https://www.instagram.com/missuniquebe...
Shop My Wig Collection Luxe Wigs Beautique https://pressedbymissuniquebeautii.com...
Shop My Website https://pressedbymissuniquebeautii.com...
Discount Code: YouTube25 for 25% off the Entire Website!
Shop for your favorite beauty essentials! Virgin Human Hair Wigs, Press-on Nails, Lip Gloss, Mink Eyelashes & MORE!
I also make and sell Headband Wigs, Half Wigs (without the headband) Lace Closure Wigs, Frontal Wigs, & Drawstring Ponytails. If you are interested in having me make a wig or drawstring ponytail for you, please send me an email at [email protected]. SERIOUS INQUIRIES ONLY!
Equipment Used:
Cannon SL2 https://www.amazon.com/gp/product/B071...
Neewer Back Drop Kit https://www.amazon.com/gp/product/B07P...
Ring Light https://www.amazon.com/gp/product/B08D...
Rose Gold Backdrop https://www.amazon.com/gp/product/B01C...
$5 coupon code: Exy5
Hair detail: Best Selling Tight Afro Kinky for weaving in 100% Human Hair (free shipping))
Hair link: https://bit.ly/32Np97K
Contact Exyhair:
Website: https://exyhair.com/
Like us on Facebook: https://www.facebook.com/exyhair
Follow us on Instagram: https://www.instagram.com/exyhair/
So hey my beauties, it's miss unique beauty and i'm building and i'm back with another video. If you are new to my channel tap that subscribe button so that you won't miss out on any of my new uploads and if you have already subscribed, what's good. What'S poppin welcome back to my channel the cap that i'll be using in today's video? Is this newly designed headband wig cap and it retails right now for six dollars? I will go ahead and leave the link to this cap in the description box below so that you guys can go ahead and check it out now, when you guys do purchase this cap. It also comes with two wig combs that you guys can go ahead and sew into the cap for added security. I will also be using some needle and thread to sew the hair onto the cap. Now the hair in today's video was sent to me by a company called xc hair and they sent me their afro kinky curly hair in 8 inches, and this is 100 human hair. They will also add a few extra goodies along with your hair as well. Now the first thing that i'm going to go ahead and do is sew. The wig combs on the underside of the wig cap and i like to sew my wig combs near the temple areas of the cap, because i feel like that is where you will get the most security when you're wearing your headband wigs. Now i'm going to go ahead and have you guys watch me sew this wig comb on this side? Then i'm going to go ahead and sew. The other wig comb on the other side of the cap off camera, then i'll, be back when we're ready to install these bundles onto the wig cap. This is what the wig caps are looking like after i've completely sewn, both of them on both sides. Now this is their afro kinky, curly, human hair and each bundle is 50 grams. Now normally one bundle of hair is usually 100 grams. So, keep that in mind that these bundles are half of what a normal bundle size would be now they did go ahead and send me 450 gram, bundles, which is equivalent to two bundles of hair, but when you guys are doing this style. This is more than enough hair that you will need to complete this style and the reason why i say that is because this hair is super kinky and it definitely gives you that afro kinky curly look. So you will not need more than four bundles of this hair to complete this type of wig. I like to begin sewing my first bundle right behind the air on the mannequin, and i like to keep my stitches fairly close to each other. When i begin the track and then i'll slightly do them a little further apart from each other, as i sew each track onto the wig cap now once i reach the other end, i secure the end with a knot by sticking the needle through the weft, then I will go ahead and flip the track over and begin my second row. I do not like to cut my tracks because cutting your track does increase shedding and we don't want any added shedding to any of our wigs. So i do not cut my tracks. I just flip them over and begin going in the next direction. Now for the spacing on the wig, i do try to keep my spacing pretty far apart in the back section, because i want to make sure that i have more than enough hair to complete this wig. So my first two tracks are three finger widths. Apart from each other and the next two rows will also be three finger widths apart from each other. Now, once i reach the top section of the wig - and i realize i have more than enough hair to complete the wig, then i will go back in and fill in that back section with the extra hair that i have left over now. If you guys watch my channel, you guys know that i love me some big hair. I love my hair to be full, so i will go back in and add in every last track that i have, because i love my hair to look super big and super full. Now, as you guys can see, i am still only on the first bundle of hair and you guys see how far up this first bundle got me and immediately. At this point, i knew that i had more than enough hair to complete this wig, as you guys can see right here, i'm showing you guys my spacing, so i kept the three finger widths apart in the bottom. Now, as i got towards the top section of the wig, i decreased my finger width spaces to two finger widths apart towards the middle of the wig. Now i'm going to go ahead and tack down the end of this track so that i can begin sewing. The second bundle onto this same track as well. Now all i'm doing is passing the needle through the end of the weft on the second bundle and then i'm going to pull it until the track reaches the cap. Then secure it with a knot and that's how i connect the two tracks together. Now i'm going to go ahead and finish off this row with this bundle, then i'm going to secure the end of this row and flip the track over and begin continuing to sew. The next row on and like i said i am going to decrease my finger with size by one as i go further up the cap, i'm gon na go ahead and finish off this row and then i'll be back to show you guys exactly how i complete Sewing the top section of this wig now for the top section of this wig, i am not going to continue sewing the tracks in a u-shape, i'm going to be going horizontally across the top section. I did go ahead and point it out. So just pay attention to exactly how i sew these last few tracks on, because it's very important that you do not continue in a u-shape, because you do not want the ends of each row to be bumpy towards the front section of the wig. So, by sewing the top section horizontally across the back will just allow the tracks to lay nice and flat on the top, and also in the direction that you need them to lay. Once you apply the wig onto your head, i'm gon na go ahead and continue to sew horizontally in this top section right here, then i'll be back to show you guys exactly how i sew the last track in the front section of this wig. This is what the wig is looking like, after i finish, sewing the middle section of the wig. Now i'm going to go ahead and sew, this last bundle in the front section of the wig, and i'm going to take this last bundle, basically from ear to ear. On the cap now, the way i'm sewing this last bundle on is the hair is falling on the face of the mannequin and the reason why you want to do that is because, once you flip that hair back, it will conceal everything in the front, and you Won'T see any of the track area in the front section of the wig. I really hope that made a lot of sense, but doing it this way will make the wig look extremely natural on your head. Now i am sewing this bundle as close as possible, as i can get it to the headband wig strap on the front. I'M not sewing it on top of the headband wig strap, but i'm sewing it right behind the headband. Wig strap in the front section of the cap. Now i'm gon na go ahead and have you guys watch me and see exactly how i sew this lash track on then i'll be back to show you guys what the next step is in finishing up this wig. This is what the wig is looking like after i went ahead and sewed that lash track on in the front and as you guys can see, this wig is looking phenomenal. Now that i went ahead and installed as many bundles as i can into the wig, i did realize that i do have one entire bundle left over. So i am gon na go in with that last bundle and i'm gon na use it to fill in. All of the gaps in the back section of the wig, i'm gon na go ahead and have you guys watch me finish installing the rest of this bundle, then i'll be back to show you guys what the finished results of this wig is looking like. While you guys are watching me, so this last bundle on i do want to let you guys know that this hair is currently 20 off on their website and their website is xc hair.com. That'S e x y h, a i r dot com, so i will leave the link to this hair in the description box below so that you guys can go ahead and check out the discounts, and i also have a coupon code for you guys and you guys Will receive five dollars off of your order and that coupon code is xc5 e x y. The number five. I will also leave that in the description box below so that you guys can go ahead and take advantage of the discounts. And let me tell you guys: this hair is super affordable, so if you guys are looking for some really nice afro kinky curly hair, this is the hair for you, and this hair is extremely lightweight. You do not feel it on your head, it's very short and it's off of the shoulder, and it definitely gives you that natural feel if you are a 4c natural texture girl like i am you guys, will love this hair as much as i do, because it Gives you the freedom of not having to wear your own natural hair out, but still having to have that same natural hair type of look that we all love? This is what the completed wig is looking like after i went ahead and sewn all four bundles of the hair onto the wig cap, and, as you guys can see, this hair looks so natural. This definitely gives you that gorgeous afro, look that you are looking for. In this video, i was able to show you guys how to create your own afro kinky curly, headband wig from scratch. I will go ahead and leave a link to this hair in the description box below along with a discount code, so that you guys can go ahead and check them out, and please please, please if you guys check this hair out. Let me know how much you guys love this hair. I really hope that you guys enjoyed this video comment down below any questions that you may have like this video and don't forget to subscribe bye. My beauties you


Comments
Hilda Shaw: educational video, really like it!
Melinda Richardson: great video as always
Barry Wells: your vlogs are awesome
Margaret Owens: That's too cute
Mattie Sanders: ok, now thats a good video
Virgil Lopez: ok, not bad I guess