Installing Deep Wave Wig! Vacation Install | Amazon
- Posted on 20 July, 2022
- Headband Wig
- By Anonymous
***Welcome Back***
In this video I’ll be installing this deep wave vacation wig! This wig is from Amazon and Not Sponsored. Let me know if you try this wig out and how it works for you.
Like Comment, and Subscribe for more videos from me!
*Make sure to watch in 1080p!!!
*Comment ANY video suggestions you have!!!
LINK TO WIG- https://www.amazon.com/dp/B098ND1B7G?p...
Wig Details:
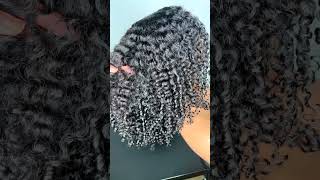
Deep Wave HD Transparent Lace Front
"24 Inches
150 Density
13x4 Lace Front
Medium Cap Size (22.5)
Dark Brown
Products Used:
Melon Edge Booster
Olive Oil Eco Gel
EBIN Wonder Lace Bond Spray
EBIN Wonder Lace Extreme Firm Hold Glue
Fantasia Liquid Mousse Spritz
SUBSCRIBE SUBSCRIBE SUBSCRIBE!!!
Social Media-
IG:@goldendia_
TikTok:@aadiaa_
Twitter:@Courtney_adia
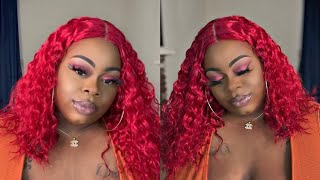
So in this video, as you can see by the title today, i'm going to be installing this vacation wig when i think of vacation like a hairstyle for vacation, i automatically think of either braids or like a curly wavy wig. So that's what i went with for this video, so i'm just speeding through this first part here um i smooth my hair back and then i'm using the ball cap method and then i'm going to be using this ebben wonder lace bond spray, so i'm using this! Instead of my got to be spray - and i'm doing i'm doing this a little bit different and you'll see later in the video i'll, explain it um, but i'm using that and i'm cutting off the lace after it dries. Even with the ball cap, i didn't even like put it around my ears. I just i kind of got lazy with that. I'M getting lazy with my bald cap, because only thing that really matters is that it looks like a ball cap underneath the wig. You know so this is what the wig looks like um in the box it came in, he opened the box, it just came with the wig cap and the wig itself, so this is the wig cap and then the wig i took the hair net off. This is in deep wave, i believe, or either deep wave or deep curl, i'm not sure which one it is. I was expecting it to be like a kinky curly wig, but i didn't read the description well enough, so this is what i got um. This is what it looks like in the front, so once you take out all the packaging and everything um when you run your fingers through the wig and i'll get into it a little bit later, it did feel a little bit tangled and it did have some Shedding i'll show how much uh shedding i had when i first took it out, but this is what it looks like in the front here: it's a 13 by 4 uh wig and then that's what the inside of it looks like as well and then also this Wig is 24 inches long. So this is again me running my fingers through the hair and i'm going to show here in a second. What i had that came out. It wasn't a lot of hair. Actually that was shedding, but it was some hair. It was actually kind of more than that. It just fell on the floor so now i'm using my powder foundation and i'm coloring, the wig uh or the lace of the wig, and that's what it looks like when i'm done um then the top part it's gon na get fixed with just water. It'S just foundation on there, so that'll get fixed now, i'm putting the wig on and i'm kind of adjusting it seeing how it looks seeing how it fits and then i'm cutting off the side pieces. The side part of the lace - and i do this so that i'm able to have the wig actually flat down on my head and not lifting up by my ears. So then i kind of test it out there. I pull out, i you know, cut the lace. You got ta cut into the actual wig. Sometimes when you do that um so yeah, i went ahead and made my three little cuts in the wig also or my two cuts to make three sections and then i'm using this uh eben this glue, this lace glue. This one i've never tried before this is part of like my new something that i'm using um, so i'm spreading that out and i'm letting it dry um. I didn't wait till it was clear. Wait till it's clear before you put down the lace like completely clear. I'M really impatient when it comes to putting on my wigs and i don't wait a lot of times and it kind of it'll mess up this time. I didn't but try to make sure it glue. It dries clear. So once i'm done putting the glue in all the sections, i'm cutting the lace, i'm not cutting it completely um. You know close to the wig line, i'm just cutting it enough. So it's not in my face and then i'm using that um like headband thing, whatever that wrap and i'm just letting it sit on my hair, for maybe like i said it for 10-15 minutes or so and then i came back, i took it off. This is the part that i'm talking about here, where i'm doing it a little bit differently. So i'm going back in with that same spray that evan spray and i'm just spraying my lace and then i'm using a blow dryer and i'm letting that dry. So i'm gon na do like different layers, and this is gon na help for making sure my wig is secure, making sure it stays in place the whole time because it's hot outside and everything and this method i did get from another youtuber um. Her name is erisa anjali, so i got it from her. She had done. She was just talking about it in like a vlog, but i got this idea to do this from her, so i went ahead and let that sit and then i'm taking off. I added another one, because this first one right there was taken off was not enough. That red, like silky scarf thing, was way. It was not enough, it didn't hold it enough, but now i'm using my water as y'all just saw and i'm going in with a comb and i'm kind of picking at the actual hair um. It'S really stiff from using all of the hair products and sprays and everything so i'm kind of getting it a little bit unstuck and making it move a little bit. It was super stiff, so i'm using that and then i'm going in with this mousse, it's like a spritz mousse spray and i'm using that on the lace and i'm just spraying that where i put the um other sprays at just around the hairline, i'm spraying that Letting it dry and i'm putting that scarf back on so now um once i went ahead and tied that up, i'm going back in with the comb just to make sure it doesn't get stiff again and then i was trying to decide. If i wanted a side part or a middle part, this is what the side part looked like or a side part. It wasn't even really a side part. It was kind of far up. I didn't like, where the part was gon na be at so i decided to change it um. It did look okay, though, for the moment, but i went ahead and went. I went ahead and went with a middle part um, so i'm using some water first and i'm just uh kind of using the water and i'm like slipping it down. I went ahead and also i went in and i cut my lace. I didn't cut it like how i should like next time i do a wig. I need to start cutting the lace a little bit closer. So now i'm using a hot comb - and this is my first time using this hot comb and i'm uh just using that on the perimeter of my hair around my part and then i went ahead and took a pause on this real quick. I wanted to do my baby hairs first before i went in with the hot comb, so i pulled my hair out as you see here and i did my edges off camera and then i wrapped them up and then i'm going back in with that hot comb. I just felt like it was a little bit i feel like i could get closer with my baby hairs being done and like once already pulled out, you know i can go crazy with hot comb, so i went ahead and just used a hot comb again and Just i'm going over the same parts and now for the hair, that's left out. I did not like how it looks so i decided to wet the hair i'm using this mousse and i'm just going in with mousse and water and my brush, i'm just brushing the hair out, and i just i wanted to kind of change the hair texture. A little bit like i said i wanted it to be like kinky curly, but i read the description wrong, so i kind of tried to fix it a little bit and make it a little bit more curly. You know, but of course none of the methods that i tried worked um, so it was fine. I went ahead and just continued to detangle the hair, still a nice texture, but i do like my hair to have a little bit more volume and i feel like curly hair. Does that for me but anyways. This is what the hair looks like while it's wet. I went ahead and finished detangling and then this is what it looks like when it's dry. This is actually the next day, so my edges were they're, not messed up completely, but they didn't look how they first looked, and this is what i was talking about with my hair being tangled um simply just running my fingers through the hair. It will just get tangled automatically like this part here. It will just always get tangled. So that's something about the wig that i did not like. Obviously, everything else was okay about it. The length was pretty good. The end zone. You can see on the ends. They just look really dry and, like not, i don't know they just don't. Look all that good on the ends. So that's the only problem i have with this wig so shedding and the wig being a little bit tangled at the bottom. That'S the main thing. That'S wrong with the wig, so overall, i probably would give it a good six out of ten um with the money that i paid for with this wig. It should have been a lot better, but i still want to give a review and do a video on it and again, i'm gon na rate, this probably a good six out of ten but other than that. I hope you guys liked the video and everything i showed and if you did make sure to like comment subscribe for more content and more videos from me and i'll see you guys in the next video bye. You

Comments
Tara Coley: you always give the best reviews for amazon wigs!!
Doris Davis: I really liked this hairstyle on you.