Installing Outre Perfect Hairline Synthetic 13X6 Hd Lace Front Wig "Ariella" | Ft Beauty E
- Posted on 30 March, 2022
- Lace Front Wig
- By Anonymous
Hey y'all! I'm back with another video and today I'm installing this wig from Beauty Exchange beauty supply! The wig information and Beauty Exchange website is linked below. Thanks for watching and of course don’t forget to like, comment, share and SUBSCRIBE for more of me!
Wig Name: Outre Perfect Hairline Synthetic 13x6 HD Lace Front Wig -
Ariella
Color: #DRFF2/CINNAMON MOCHA
Features: Outre Perfect Hairline Synthetic 13x6 HD Lace Front Wig -
Ariella is your most natural-looking wig yet. Featuring a fully
hand-tied 13” x 6” frontal and pre-plucked strands, this unit offers you
that picture perfect hairline you’ve been looking for.
Designed ready-to-wear and easy-to-style, all you have to do is cut the
lace.
Wig Link:
https://www.mybeautyexchange.com/produ...
Discount Code: XOFF10
Beauty Exchange Beauty Supply
Beauty Exchange Specializes in Top Brands at Unbeatable Low Prices.
Find your nearest location
• https://www.mybeautyexchange.com/pages...
Monthly Sales
• https://www.mybeautyexchange.com/pages...
Follow Beauty Exchange on Instagram
• https://www.instagram.com/beautyexchan...
Subscribe to Beauty Exchange YouTube
• https://www.youtube.com/channel/UCwqj3...
Like Beauty Exchange on Facebook
• https://www.facebook.com/mybeautyexcha...
**I DO NOT OWN THE RIGHTS TO THIS MUSIC**
CONNECT WITH ME!
TWITTER: https://twitter.com/theendiataylor
INSTAGRAM: @theendiataylor
SNAPCHAT: theendiataylor
#bxbabe #beautysupply #beautyexchange #syntheticwig #syntheticwiginstall
#bobwig #lacefrontwig #lacefrontwiginstall
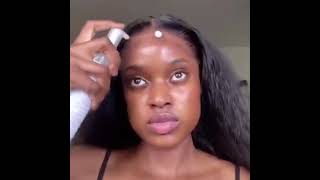
Uh, hey hi guys and welcome back to my channel. I feel like it's been a minute since i posted a video, but today we are back and i'm here with another synthetic wig review, so today's wig is from beauty exchange. They sent me this outra perfect, hairline, fully hand tied 13x6 lace, wig and the name is ariella and the color is in cinnamon slash mocha. So, as you can see it's just this brown curly wig and it has like kind of light. Brown um highlights in the front um it's pretty long. It reaches like mid back um. There is no length on here, but i would say it's about 20 22 inches um, it's pretty long, but yeah. So this is what the hair looks like installed. You guys are going to see me install it, but first i just wanted to talk a little bit about the hair and show you guys the packaging and whatnot, so you guys have already kind of seen the box. This is what it came in um. It just has you know the name is transparent, hd lace. I did not do any plucking on this wig. First of all, so that says a lot, because this looks really really good and i've always been scared of like curly synthetic wigs, because i never knew how they would look or how i would be able to like refresh the curls. But i had no issues with this wig um. You guys will see, as you continue with the video but yeah. As i said, this is the name ariella. There are obviously a number of different colors that you can choose from. Besides this um brown color that i have in my head, but um on the box, i just want to show you guys what it looks like so the back it just explains what it is perfect hairline fully hand tied 13x6 frontal. This is a frontal wig um, ear to ear transparent lace, natural baby hairs um. It comes with a pre-attachment, a pre-attached elastic band. Yes, it does. I also talked about that later in the video um pre-flex hairline. As i just said, i didn't want to do any plucking um and it's heat friendly. So if you wanted to add some heat to this, you know how it combines straighten it whatever blow dry it. You can do that and then it just shows you what the unit looks like on the inside pictures of it and i'm just gon na open it up really quick. So this is where the wig was but um. I also like the back of this a lot because it has a care guide and also a step-by-step of how to apply the wig, so it just shows you what to do to take care of the wig to maintain the wig, which is really really helpful. I even had to look at it because, as i said, i've never had a curly synthetic wig, but it shows you exactly what to do and then it has a step-by-step if you need it, and i just think that it's very helpful, i just wanted to show You guys the packaging, because i thought it was very nice and cute, but yeah. I just applied the wig today, so i can't give like a lengthy review. All i can say is you know how it's been for the last couple hours, but i really like it. It is super cute um, i'm about to take some pictures in it because yeah but yeah, i love the color. I like the pattern. Only thing i will say is again: i say this in all my synthetic wig videos, it's just tangling and especially because it's curly, i feel like there's a lot more tingling, but it is still a good and affordable wig. I believe this wig is like from 40 to 50, like no more than 50, which is amazing for how it looks um i'll do like a little turn. Show you guys the back. That'S what it's giving it's pretty big um, but i kind of like that. So if you guys want to see how i actually applied this wig from beauty exchange just continue watching the video give this video a like before you even continue and yeah, let's get into it, hi you guys all right, so i probably just did the intro and All of that so we're just going to jump into the video um. I apologize for this setup. You guys i am in a different dorm than i was before, and it's just been a struggle and that's really a part of why i haven't really been um filming as much because yeah, but we're just gon na get into it. Um bear with me um. So first my hair was already braided back because i had on my wig before this, so my hair is already braided back and then this is just the same cap um i didn't do the bobcat method. I never really do um. I just put on a cap regularly and i put some makeup on it. The makeup is kind of fading away, but that is okay and after i've put in my tent and also sprayed it with the got to be i'm just going to take my blow dryer and let it dry for a few seconds, because this stuff is wet. So we're just going to blow dry it real fast, all right now that it's all blow dried, we are just going to plop it on our head. That'S what the lace is looking like right now, don't mind the little dots, but the hairline looks pretty good unplugged to be a synthetic wig, but we're going to see what it looks like once it's on. So i'm just going to plop this on my head. Oh yeah, and also there are these little adjustable thingy. So not only do you have the elastic band and the clips, you also have these little um adjustable things that you can latch on to the hooks in the back, so yeah, but i'm just gon na put this on you guys. The hairline looks really good like untouched. I'M not even gon na lie like that looks really good, and then this is the hair. It'S cute, i don't know if i want to do a side or a middle part. With this it's getting side, i feel like middle part like when i have middle part curlier, i feel like i look like. I want to be beyonce or something but okay yeah. This looks really nice. I honestly may not plug it. So i can just show y'all that effortless clapping on and go look. I don't even think i'm gon na pluck you like, it really looks. It looks good without it and it's really snug on my head. It'S not too small. It'S not too big. We just obviously have to cut these um little sides, so what i'm gon na do is i'm just going to part out where my ear is, and it's not that much hair than or that much lace that needs to be cut off, and i'm just going to Take my scissors and cut that all right, that's the first ear tab. Literally, that's all the lace that i just cut off like it really does fit nicely on my head. I think i'm gon na do a side part. We love a good side, part yeah. It'S getting side, but all right now that we have cut off the ear tabs. It is time to lay our lace, of course, um. So i'm just gon na lift that up and i'm not gon na use any glue or anything. I don't usually use um lace glue. I just take this um. The black uh got to be, and i have a really small bottle right now. I need to go get like a regular sized one, but i just use this and my got to be spray and yeah. So what i like to do first, is just take a little bit of the black bottle of the got to be, and i just like to put dots along my hairline rub it in, and i like to do two layers of that. So i'm going to take two layers and then again we're gon na take our blow dryer on low heat and i'm just going to let this dry a little bit and let it get tacky. Once it's a little bit tacky i'm going to take two layers of the got to be spray and i'm just going to do the same thing just spray and then spread with my fingers. Alright and once it is good and tacky um, i'm just gon na pull this down and lay it down, and i'm gon na take a comb and kind of press it into the glue that we just laid down and also during this part, i like to take Some more got to be and put it right on the hairline, we're going to comb that in comb it through and i'm also going to add a little mousse and comb it through and once i'm done with that, i'm just going to take my scarf and apply It right on the hairline and we're just going to let that sit in usually, i part my hair to this side, but i just recently had a curly wig on and it was parted to this side. So i think i actually like this side. I'M not gon na lie and y'all look at the parting. It looks so good like that. Oh no, that looks like scalp like the parting is really really nice, and this is a 13x4 frontal, so you can literally part it anywhere like it's a frontal. You can do middle either side, but we're going to take it over here to this side. Hey you guys. The moves i'm using is the lotta body um moose. I feel like a lot of people already know about this, but you know the coconut and shea oils wrap meat, foaming, mousse um. The next thing we really need to focus on is just defining these curls because they've obviously gotten a little bit messed up in this whole process, so we're gon na figure it out. So, first i'm just i'm not gon na comb through it, but i'm just gon na take my fingers and kind of like try to detangle it. That way, all right! So now that i have it um kind of detangled out just with my fingers, what i'm gon na do is i'm going to take a spray bottle and apply some water, and then i'm also going to apply some mousse and do the same finger through thing and Hopefully that works all right, so this is what the hair looks like after i've applied some water and some mousse. I don't really know if you made that much of a difference, but i kind of feel like it did a little bit. Let'S see what it's looking like y'all again, the hairline looks really really good. It does so i'm just going to cut this lace and, as y'all can see, i said it's really snug on my head, like the lace is like right on my head, but um we're just going to start cutting the lace, i'm just going to use some regular Scissors, i just went down the middle and then i'm going to take my little eyebrow razor and cut off the rest of the lace. So now that that's all cut off, i know you guys can see like a white cast, but we're gon na get that together. So first um, i'm just going to part out my edges. Ah foreign, i'm just taking this fit me um powder foundation and i just have like a regular angled brush and i'm just going to kind of try to blend it into my skin. Just a little bit more now, for the last time i'm just going to put on my scarf and let my edges sit in and marinate all right, you guys so once i took off um the scarf. This is what it looks like. This is what it's giving it's super cute. The lace looks really good and you guys, as you all saw, i did not pluck a thing. I literally just put it on refresh the curls um added some edges, and that was it, and this is what it looks like um. I like it uh. I love how it came out and again. This wig is from beauty exchange, so check the description box for the link to this wig and definitely visit beauty exchange for this wig and many more cute, wigs like it affordable and cute, i should say, and yeah um. This is the finished product. Thank you guys for watching this video, of course, like this video comment and subscribe. If you haven't already also click the notification bell to get notified. Whenever i post a video, um and yeah visit beauty exchange, again link will be in the description box and i will see you guys in the next video bye.


Comments
DelVaisha Collins-McDaniel: Love this wigI didn't know if I could comb it without it losing its curls so I was just doing space buns. Finally broke down and combed it out(took about 2hrs) and it looks perfect
Shardae Mitchell: It definitely made a difference yours looks better than all the other reviews I've seen ima get this wig now lol
xo.leemaaa: I love mine . I wore my brown one (chocolate swirl ) for a week, and I’m about to install the black one for another week
Karlisa: Love how it turned out I need it
Chaylyn Jackson: wow this wig looks great on you.
braxtonn mischelle: use water and fabric softener to bring back curls and reduce frizz
Avii: Just bought mine
Karabo Malatsi: Hey sis, the wig looks great on you Do you know if I can order from South Africa..??
Ria Monae: Yessss I’m sold!
Cutelilvoice: ♥️♥️♥️♥️pretty your gorgeous
Vizian Ummm, That’s Deliciously Sweet: Would of been nice if you would of shown back of the wig. When you attempted, you really didn't turn to the back. You just quick turned from side to side. Other than that. Good review. Thank you for showing us how this hair looks.
Dee Luther: New SUBBIE GOD BLESS YOU AND YOUR FAMILY I WISH YOU ALL THE BEST VERY PRETTY THUMBNAIL THO BEYOND PRETTY YOU ARE UR MAKEUP ALWAYS ON POINT CUTE ASS EYELASHES THO GOODMORNING ENJOY THE REST OF YOUR GREAT WEEK HAPPY FABULOUS WEEKEND AHEAD BE BLESS N STAY SAFE ALWAYS
Pocvhontís: How long did it last babe