Best Way To "Hide Lace Grids" On Lace Wigs No Glue Wig Install
- Posted on 18 August, 2022
- Lace Front Wig
- By Anonymous
Today's video shares which FAKE SCALP products really work to HIDE THE LACE GRIDS on a lace wig. Also, this GLUELESS wig install lays flat and realistic without the hassle of wig glue!
WIG IN VIDEO: https://bit.ly/3QjBPKt
✨ DISCOUNT: Marie
LENGTH: 16 inch
DENSITY: 150%
DESCRIPTION: NO TWEEZING IS NEEDED! This is the BEST hairline on a lace wig that requires no work to get a natural-looking hairline! Paired with our swiss CLEAR lace this lace wig is the ULTIMATE natural-looking wig on the market!
♡ Get Your Slay Band https://bit.ly/3CMaF8Y
SHOP EVERY TOOL AND PRODUCT I USE: https://www.amazon.com/shop/msprecious...
Every product and tool I use will be in this link.
Get the SCALP Material:
Fake Scalp Material https://bit.ly/3mp7qwU
Color I use: Tan to Dark
FYI VIDEOS:
HOW TO CUT EAR TAB ON WIGS https://bit.ly/3AkkyL1
HOW TO CUSTOMIZE A LACE WIG https://bit.ly/3QrGuKM
CUTTING EAR TAB AREA 360 LACE WIG https://bit.ly/3w8zYAp
HOW TO MEASURE WIG TO FIT HEAD https://bit.ly/3A41UXg
NO BABY HAIR BEGINNER WIG INSTALL https://bit.ly/3CdZLuX
TIPS FOR APPLYING WIG ON NATURAL HAIRLINE https://bit.ly/3CcyCZy
SECURE NO GLUE WIG INSTALL https://bit.ly/3c00y8e
8 TIPS TO MAKE YOUR WIG LOOK BETTER https://bit.ly/3w94quf
HOW TO BLEACH KNOTS ON A WIG https://bit.ly/3w7zASY
HOW TO REMOVE WIG & WASH PROPERLY https://bit.ly/3SWCLq8
___________________
___________________
FOLLOW ME ON MY OTHER SOCIAL SITES:
♡Instagram: https://www.instagram.com/mspreciousma...
♡My Website: https://mspreciousmarie.com/
♡ Tik Tok https://vm.tiktok.com/ZMRwbmjdu/
Business Collaborations Email: [email protected]
________________________
*Hair or products shared are my OWN personal and honest experience. This video may contain sponsored content and affiliate links which I get a small percentage that helps invest back in my channel to continue to bring great content! Thank you for your support!*
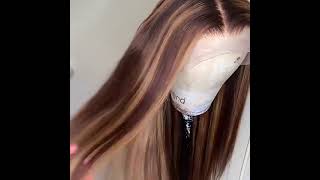
So you're, tired of seeing the grids on your lace, wigs the aka screen porch. Today, i'm going to test out several different methods and see which one is the best: the hot ingredients on the lace wig and we're also going to do a completely glueless wig install this wig today will be linked below in the description box, so be sure to Check there and let's jump right in let's take a look at this wig straight out the box. I want to show you how it looks when you take it out. This wig will be linked below in the description box. So first things. First, let's talk about the color. This is a beautiful brown dark brown wig with highlights going through. The cap is a 13 by 6 lace. Cap glueless. You can wear with glue. If you choose to, however, today's video, i am not going to glue it, so you all can see how realistic it can look without glue. So taking a look at the hair color again, it's a beautiful, highlighted, um wig and it does have like streaks of blonde going through it, but the base color is a dark brown. So, let's talk about wig caps, let's jump right into this, we're going to start off with the wig cap, and this is something everyone use under their wig to try to get a scalp look and also flatten down the hair. When you apply a wig cap. Normally, you can see the wig cap through the lace. If your knots aren't bleached, then they will look like this and, as you can see, it definitely shows the wig cap a lot more when you don't have any tint going on from your knots being bleached. So with this wig you can part it anywhere. You want on that lace. So, each time i part it, you can see my wig cap, especially with the um thin hairline. This one does have that super pre-plucked hairline, so the super free plug hairline wigs are definitely wigs that you need to make sure if you're applying anything under it. It'S not going to be seen. The hairline looks so good on this wig. You don't need to do anything to it, but you do want to make sure that if you're trying to create a fake scalp, there's no line of separation from the cap, you're applying or anything. So today's video i'm going to show you guys different ways or different methods you can use and what works and don't work with the super pre-plucked hairline. So if you did not want to bleach your knots, you can always tint them. The biggest mistake people make is thinking that the lace tints are supposed to completely cover the knots they do in somewhat way. However, they just give the tint of the color of the scalp. So that's why, when using a lace tint, you should always use one. That is closer to your scalp color. That way, you can get that tint, so i'm just going to go ahead and show you guys what it would look like this one right here is the medium light brown, i believe, yeah the light medium brown, so it will provide that scalp appearance underneath the wig. Even if you're using makeup, because some people use makeup to create this, and if you use makeup, you can always go over top of it with a little bit of the adhesive sprays to make sure that it don't smudge and smear and then just dry it. So this is what it would look like. As you can see, it creates the tint to the lace to give it that scalp color. However, this don't really hide the grits for me, and sometimes it hides some of the knots depending on how small the knots are. But, as you can see, you can still see the knots, but it definitely gives that tint of the scalp it's still good to use. If you decide not to bleach your knots alright, so the next option you can use to create a fake scalp in your wig is the silicone adhesive. A lot of people have talked about this. I'Ve done a video demonstrating on how to use it, but i'ma show today how i would use it. So this comes in a color. That is only a color that will be of a lighter scalp, but what you would do is you would take strips of it and you would apply it in the inside of the cap and it's supposed to hide the grits on the lace. This is a good option for that. I feel like this option, though, would be better just for if you're wearing a lace closure, but not actual wig, because applying this on the inside of the cap, while it does hide the grids like it's supposed to. I do find that when washing my wig, i have to reapply this over and over again, so it can be become a bit pricey um having to do that. I mean you can probably find ways where you don't need to reapply over and over again. But for me i usually have to now, as you can see, it does look like scalp under the wig. However, there is a line of separation and this hairline is super thin, so unless you're applying it a little further back, you are going to see that line of separation. You can add makeup there. If you want to, you can do whatever you need to blend it, but rather than hiding the grids, i don't like the line that it leaves. So let's talk about the next option: alright, so the next and last option to hide the grids on your lace is to use a fake scalp material. Now the fake scalp material comes in several different colors, so it has options from you know my complexion to darker complexions. I use the tan color, so this is right here, the first fabric that you would use to apply into your wig, and this actually is really good, because this part is the part that should hide the line of separation from the actual fabric. I will link this material below in the description box. The great thing about the fabric is that you can sew it into your wig and, yes, it will last you don't need to take it out. It won't wash out. It won't come off as long as you secure it in there with thread. You will have that fake scalp material in that wig and you get a lot of material when you use the fake scalp material and do it yourself, so you can use it for multiple wigs. I do have a full video demonstrating how to sew in the fake scalp material to your wigs, so i will link that below or pop it out right here and as you can see, this is the one thing that you can use where you won't get that Line of separation, it absolutely blends very, very well and it gives that fake scalp look without any detection of it and it's very comfortable and breathable. So now that i figured out the perfect material i want to use in today's wig, i'm gon na go ahead and do this glueless install for you all to show you how fabulous this wig is. I just absolutely love the ease of applying this wig, so i'm just taking my hot comb and pushing that hairline back. So i don't know if i mentioned it, but this wig is a 20 inch. It is a body wave texture and i'm styling this wig straight out the box. I have not done anything. I love the fact that it is very easy to work with as far as application. However, if you want a flawless application with this and a scalp appearance, i highly recommend bleaching the knots that way you do not need to try to cover them after you hide the grids, and i do have a current video showing you all what i use and How i bleach my knots, i will pop it out to you right here. Alright, so already you can see how natural the scalp area looks and how also the lace blends. So i'm going to go in with a little bit of argan oil and hair mousse argan oil is the only thing i like to apply to the ends of the hair, just to make sure that the hair stays hydrated and the hair moves. I like to use to flatten down any flyaways at the top of the hair, because we all know these wigs have the little hairs to stick up from them tying the knots, but this definitely helps um. So yeah. That'S what i'm applying at the top of the hair. Now, since i'm not gluing down this wig, i want to make sure that the lace at the front is not visible and it's as flat as possible. So sometimes i will take a little bit of hair mousse and just create just a small baby hair right there and dry it so that that area is laying nice and flat and to finish out this style, i'm just going to add some curls right to the Front because this wig did come pre-styled, but because it was sitting in a box of course, some of the curls are kind of flat, and so i'm just touching it up and fixing what needs to be fixed. So this is the finished result. I absolutely love using the fake scalp material. I will be sure to link this wig below in the description box and also the fake scalp material will be linked below in the description box. For you all, i love this color so very much. It'S so pretty like the highlights and everything just gorgeous. Thank you guys so much for watching go check out my previous videos. If you have missed them - and i will see you tomorrow for the last video this week and i appreciate your support thumbs up. The video share it subscribe if you're new you


Comments
Bev Pryce: Love this wig - coincidentally I was looking at it earlier today so I'm glad you've shown us what it looks like on. Beautiful!
Gail Saizan: Beautiful!!!! Thank you for your wig install tutorials
Beauty by Jay Morris: Beautiful Marie, thank you for all the different tips
Precious Beautyj: Great informational video. So happy it was not a 5-6 mins one bcuz, what can you learn other than putting the wig on the head. . Girl you’re the bomb. Keep up the good work. Btw, your nails are
Shalonda H.: That wig looks so natural on you. Another stunner
Sasha Matamoros: OMG I LOVE LOVE YOUR VIDEOS they are so informative and you give great ideas for installing wigs while be beautiful and SLAYING❤️❤️
supermzbee: I love your videos. Great to give ppl different options. Definitely going to try the last one . Also for me the lace tints and makeup have too much undertone of Red. It say brown or dark brown but dries down reddish. Like the knots was “ over bleached “
Alice Nelson: This looks like this wig is your natural color. I love it!
Crystal Amos: Will be trying this technique SIS your hair is always flawless you slayed today
Carolyn Gamble: Thanks for doing this! I just have several new HH Wigs!
Brenda Russell: How does this gorgeous gal not have a million followers??!!
Carrie Burch: So pretty!!
Angela Truly: @MsPreciousMarie I was looking at old vids and you used a product Perfect Line Swiss. I may have messed up the name but you had to heat it up and brush on inside the wig. It looks like it could be messy, but would you rate the effect on knots higher than the spray? Or do you not use that product anymore? This vid was wig from Ronnie and I think over a year ago. I think the scalp material is too light for me. I am going to watch your bleach vid, but I am terrified of bleach (flashbacks of my moms blue silk top with drops of clorox continue to haunt me ). TIA
modelchiic17: You got wigs on lock ! I need you to do some nails for us ! Your nails are gorgeous !!!!
verrell hanley-moncree: Flawless!!
Traemaxx2000: Always helpful tutorials. Thank you.
L StCl: Very nicely done. I love the wig and the video content. I may try the fake scalp material. That wig is very nice.
Nora Charles: ❤️ Excellent!
Esther Sowell: Do you have a site to purchase your used wigs you no longer wear they are so pretty
DISPATCHER92 DISPATCHER92: ❤️❤️❤️❤️
divadm66: Hello. You said that you would put a link in the description box on how to sew the material onto the lace, but there is no link. Can you please send me the link. If you haven't made a video for that can you make one please . Thanks.
Porsche Walker: I wish I can use the fabric method BUT I don't know how da sew Heck I need da find a way da tape it in the inside on the lace then
Kim M: Is this wig big head friendly ? I love it
Tim Marsh: Well damn