*Start To Finish* Bald Cap Install | Silky 30'' Hd Straight Wig | West Kiss Hair
- Posted on 07 February, 2022
- Lace Front Wig
- By Anonymous
▬▬▬▬▬▬▬▬▬♛#westkiss♛▬▬▬▬▬▬▬▬●
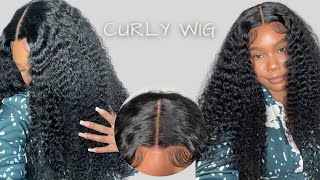
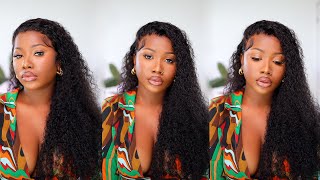
Hair details:250% density HD body wave 13*6 lace frontal wig 30inch (HD,medium cap)
Video Hair Direct Link ➤https://bit.ly/3GzvHJM
Hot selling HD lace wigs ➤https://bit.ly/3GvAJHd
★ westkiss official hair store ➤https://bit.ly/3ns1zII
Affordable 37% Off Curly lace wig ➤https://bit.ly/3GroAmq
Up to 43% off Lace Wigs ➤https://bit.ly/3tykPbc
Hot curly lace wigs➤https://bit.ly/3GxSMfA
#westkisshdlacewig #westkisswig #westkisslacewig
#WestKissHair Official Site Huge sale Big Discount
Join Our VIP FB Group Now (Free Giveaway )➤https://bit.ly/3lzmAA8
❤ Follow West Kiss hair on social media :
Instagram @westkiss_hair_store: https://bit.ly/2OlKstu
YouTube @West Kiss Hair: https://bit.ly/2Ol5U1m
Wholesale WhatsApp: +86 13323741050
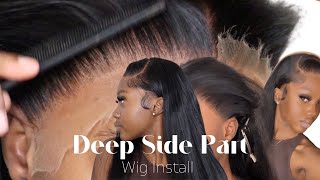
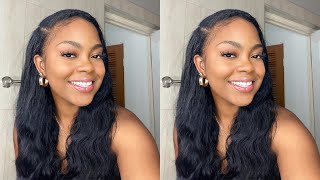
Hey guys welcome back to my channel, so in today's video i'm going to be attempting to do my first bald cap installation and you will see how this goes in the next clip or in the rest of the video, but let's get into it. So this is how i wear my hair under my braids. This is the braid pattern that i always do and it works the best for me and for me it doesn't cause any breakage, but i have heard people say that this braid pattern causes breakage for them, but i just make sure i oil, my scalp and moisturize. My ends and keep my hair nice and moisturized under my wigs, so here i'm just taking a wig cap. I got like a 12 pack or something like that on amazon and then i'm taking this lace bond spray. I think that or no it's the even lace bond spray, so here i'm just taking it and spraying it on my edges to adhere the cap down, and this is always the hard part for me. I think i've done a bald cap like twice in my entire life, and that was probably back in like 2019 and i sucked and ever since then i haven't done one. So this will be my first one technically in a very very long time, and here i am just making sure that it's down all the way, because i know i always have issues with it - lifting and not actually being stuck to my head or my forehead, which You guys will see in the next clip the ear tabs are always my trouble area for whatever reason i cannot get the freaking ear tabs down, but here i'm just cutting off the extra lace, but not the lace by my ear, because it wasn't adhered all the Way so i'm going to take this bold hold. I think it's like bold hold liquid gold. I think that's what it's called to really get in there and adhere down the ear tabs, because the spray just isn't doing it. For me, it's just not working. So i go in with this and unfortunately, if you don't manipulate this product right, it does turn white. So, as you can see, my ear tabs are a little white. I should have put some makeup on them, but y'all. This is my first time in years, literally, i've only done the bald cap method, maybe twice in my life, so yeah i'm trying i'm trying to do better, but here i'm just cutting off the extra lace. One of the main reasons why i do hair videos or wig videos is because i'm not that great at it, and i just want to show you guys how i'm able to work with the wig and finesse it, because i have no idea what i'm doing. But i just make it work, so here i am taking my wig, which is from west kiss hair. They are literally my favorite hair company. Now i absolutely love their wigs they're, always so full and just really really nice and thick from root to end. I never have any issues with it. This wig is 30 inches 13 by 6 lace, frontal and it is 250 density, and this baby is thick okay. I love me a good thick wig and i also did watercolor this hair jet black. As you can see, she is nice and black, so here i'm cutting off the ear tabs and then i'm gon na go back in with that spray, and this is where i made my first mistake, because you can literally see the cap underneath the wig. I didn't pull the wig up far enough and i don't know what i was looking at or i don't think i could really see it from the angle that i was looking at, because i had a little mirror in front of me. So now that i'm back editing the video and the camera is like higher than the mirror was, i can see it. So that's why i had to do the dramatic baby hairs, but you guys will see that in the end. So here i'm just putting on a elastic band to melt down my edges and i'm just going to blow dry it to kind of help it out a little bit, because i did not have time to just sit there and wait for it. And sometimes when i take off my elastic band, it's not dry and then the freaking wig moves and then we got a problem and i got ta. Do it all over again? So here i'm just you know putting the blow dryer to it. To give it a little bit of help, and then i'm gon na take this off to see where we're at and as you can see, it doesn't look that bad. It doesn't look terrible, but it is definitely way too far. Back like where the cap is is where the wig should be at, but i don't know what i was looking at honestly. So here, i'm just taking some of that liquid gold and making sure that the lace is all the way laid down. And then i'm gon na go in and mold down my part at first i was going to do a side part and i was like i'm going to do a little part. So i'm doing a middle part and i need to really really mold this down, because the hair was one i mean not one curl, the hair was hot combed back so that i could put the wig on without any problems. So now i have to mold it to a middle part and i'm just taking some mousse and making sure it is nice and slick, and i'm also going to add some concealer to the part just to make it a little bit. You know more visible because it's looking a little thin and then i'm gon na go ahead and show you guys what the hair looks like air dry. This is the natural hair texture. This is a body wave wig, but i did comb through it. So that's why it looks a little brushed out, but i really do like that. Look as well, so here i'm going in with my straightener and shout out to tasha okay, she put me on on her story. She posted about these straighteners and i went to my local target and got them and i got them on sale, so i will link them down below, so you guys can check them out or go to your local target and see if they're on sale. But i'm just going to go ahead and straighten this hair, real, quick and then i'm going to show you guys the comparison between the straightened side and the side that is just air dried. This hair straightened really really nicely like really beautifully. I don't know if it was a straightener, but it was straightening like gold. Okay, and i didn't even put anything in the hair to help it out. No bio, silk, no, nothing! Okay! I put the bio silk in after i was done because i forgot to use it while i was straightening it, but it still turned out really really good. So here i am just finishing up my last piece and this hair is absolutely gorgeous. There is nothing like jet black middle part straight, it's nothing like it. So here you can see. One side is a little textured air dried. You know a little wavy and then this side still has texture, but it is nice and silky and straight - and i absolutely love this hair, as you can see all the way from the root to the ends. It'S nice and full, and this hair is just beautiful. It'S gorgeous all of my west kiss hair. Wigs are literally my favorite wigs. Those are my go-to wigs every time you guys ask me about what week is this? What wig is this is probably my west kiss wigs because they have the best quality in my opinion, so here i'm just showing you the comparison and then i did both sides really really nice. I wasn't able to see in the back of my head so in the back. It'S probably some spots that i missed, but i really love the way this hair feels. I love the texture, it's just nice and silky and i'm in love. So this is where i had to kind of finesse, because although it doesn't look terrible, i could have gotten away with this. If i would have pulled the wig up where it's supposed to be, it would have looked really good. Actually, if i would have pulled it up where it's supposed to be, i probably wouldn't have even done any baby hairs, but because you can see the capsules okay, the one underneath i had to finesse. So i had to go in and do some very, very extra dramatic baby hairs for this one. This is not everyone's cup of tea. I get it, but i had to do it for this video because i didn't know how to fix the lace like i didn't, want to lift it or mess it up and try to cut it off like. I don't want to do all that. So that's why i just decided to kind of camouflage it by putting the baby hairs and yeah. So if you don't like extravagance over the top baby hairs, then by any means don't do this, but i definitely went in after this video and kind of like trimmed them a little bit because they were a little bit too long. But i really do like the way it turned out so here i'm just making sure i part out all the sections of the hair that i want to use for my baby hairs and i'm shall i say, adult hairs and i'm making sure that they're forward so That they get completely separated from the hair in the back and i'm going to spray some hairspray in the middle as well to kind of adhere it even more okay, because you just want to make sure it's laid and then i'm going to take a elastic band. Again and put that on for a little bit and then i'm going to cut these little hairs to get out of my face because they were tickling, my nose, so i'm going to cut them shorter so that they're not in the way and then i'm gon na. Let this sit for a little bit, so i can make sure it's nice and flat. It'S nice and adhered everything, is nice and laid. So here is where i take the elastic band off, and i can just imagine how great this install would have been. If i would have put it in the right spot, i cannot stop thinking about it. Oh my gosh anyways anyways y'all, so i'm gon na go in with my very, very tiny flat iron, which we all know. We all know the gist. Now you use the little flat iron to get your edges laid in the right direction and i always flip them backwards and that's how you get the little swoop and then you want to just do that to all of them - and this is the part where you Can just you know, do whatever you want freestyle, i didn't know what i was doing. I was just trying to make them as dramatic as possible to cover up this lace, but you can definitely go in and pluck them. I definitely could have went and plucked them to make them a little less dense and also just to kind of cut them and make them a little shorter. But yeah your girl was just trying something i'm just i'm just trying stuff out. You know. So that's what these videos are for for me to experiment for me to learn. I'M really trying to get better at my installs this year and i'm trying to figure out my go-to type of look if that makes sense. So that's what these videos are for, you that even someone who doesn't know what they're doing myself can get the job done. So here i'm just kind of like tailoring them and fixing them up to kind of frame. My face a little bit because sometimes you know edges can make or break everything, and although these were hella hella dramatic, i still really like the way it turned out. Actually so i'm gon na put this on for about 10 minutes. Let them dry - and this is what we ended up with. As you can see, the hair is so silky and beautiful, and i just love it. You guys. I love this hair so much. I actually kind of like the way my edges turned out. It'S kind of giving a little swoopy in the front. That was a complete accident, but it actually looks kind of cute, so yeah you can go in and trim them pluck them cut them. However, you like, but this is just how i ended up doing it, because i was trying to finesse the lace, okay, so yeah. This is what the hair looks like absolutely gorgeous. I did go in and bump the ends, because that's just my favorite thing to do with straight hair, as you can see, the hair is flowing and looks so good. As you can see. I also did kind of forget, like i said i couldn't see the back of my head, so i did kind of forget a little patch in the middle, but you get the point she is laid and this is 30 inches y'all. This is giving 34. okay, i'm 5'7 and usually 30 inches is like at my waist. Basically - and this is like at my butt okay - so this is definitely giving 34 36 low-key, but i will have all of the information listed in the description box for you to check out, and i will see you all in my next one. You
Comments
Amanda Maraga: I watch your videos and they make me feel like installing a wig won’t be as hard as I think it will be . Keep the wig content coming .
Tei Jae: Soooo pretty ! Loved it!
West Kiss Hair: I love your video! Thank you for sharing West Kiss Hair~ So gorgeous as usual!
Anna Nat: The baby hairs came out pretty good. Slay
Lisajstyles: As hard as I try I STILL cannot lay my wigs like you...I guess the girls that get it get it...I give up lol but ima still watch u tho
Nalee Jay: For the ear tabs, after you spray it immediately lay a rat tail comb on the flat side to keep it down then hit it with the blow dryer. I hope that made sense
Nique Jackson: Ok, so normally I hateeee dramatic baby hairs and this was sooo gorgeous!!
Kennedy McClinton: buying this wig for my birthday IMMEDIATELY.
Daybe Baby: i really appreciate the honesty on trying to learn wigs rather than acting as if you know everything about everything
IamJaniel: Can you please share the link to the stocking wig cap?
BadgalMarie: New YouTube idea thank you
Courtney King: Can you link the flat iron?
Kanicha Calixte: what was the tinting spray you used?
Chanel Bell: Update, please if u have had this n for a while (how long the method has lasted & quality of the hair...)
DIANA CODJIA:
Sammy Da Goat:
evee:
daddysgirl42194: Can you link the straightener
Shermaine: Readyyyyyy
Keke Janae: I love watching your videos and went to ask your for some advice I am a new YouTuber and wanted get some advice on how to gain subscribers
Nalee Jay: Anyone know what straightener she used?