Easy Step By Step Tutorial: How To Do Finger Waves On Lace Front Wig | Lilistouch
- Posted on 12 September, 2019
- Lace Front Wig
- By Anonymous
Hello Gang , My name is Lili Michel. Welcome to my channel where you will find Tutorials, DIY, How tos, & Many More!!!! DON'T FORGET TO LIKE, COMMENT, SUBSCRIBE!!! #LILIGANG !
—————————————————————————————
✨LIKE, COMMENT, SUBSCRIBE✨
Raw Hold Foam:https://www.rawholdlaceglue.com/produc...
Raw Hold Gel:https://www.rawholdlaceglue.cproducts/...
Finger Wave Custom Wig: https://www.lillianmichelco.com/collec...
DON’T MISS OUT ON GIVEAWAYS:
FOLLOW & SUBSCRIBE
Instagram: lilistouch
Twitter: lilistouchco
Snapchat: lilistouchco
Business Inquires: [email protected]
Ignore
How to Do Finger Waves on a Short cut
Finger Wave Wig
How to do Fingerwaves for Beginners
Finger Wave Tutorial
Watch a Finger Wave Wet Set FAST
Finger Waves
Drag queen hairstyles
Bomb Finger Wave Short Wig
Vintage Finger Waves Wig Styling Tutorial
Cosmetology Finger Wave Tutorial 2019
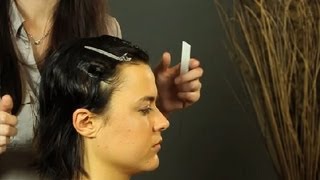
Hey guys welcome to my channel today, I'm going to be showing you guys how to achieve these bouncing away using a lace, front. Wig single wave is so hot right now that a lot of celebrities are wearing them. You know a lot of celebrities like Trina. I have done two single wave units for her heart waiting for two different music videos, so they're hot right now I remember when I was in cosmetology school. I did not know how to do the family. I could not do it for nothing. That was the hardest thing for me, but when I'm wearing apart to the side - and I have done some pushback on my site - I will put the link below so you guys can take a look at them. So I'm going to do a little light. Looking on this unit so that it won't look so big in the front, we want the front to look natural. You know we do not want it to be bulky, so you should be doing that. This is a very important step. Make sure your unit is plucked. Okay, make sure it's blocked, especially for this you got ta, make sure that's pull up. I mean at all times you got ta plug your lace, okay, so those are everything that you're going to need. You'Re going to need fun, you're going to need gel you're, going to need water you're going to need the Vinny cheer believe in them. I'M gon na need a home. Some people use the telephone. I'Ve been using the telephone sometimes, but I find this little foreign to you very helpful. So right now I'm basically shaping the hair. It was a 10 inch. I had cut it right here and I I did color the unit. It was a number 613. I went ahead and I had cut it from eight inch to this. So now I'm basically going over to shape it to my liking, so I'm cutting it basically to have some type of layers and definition in it, so it could've helped me move the hair better to achieve the type of the ways that I am looking for. This tutorial was not really about how to cut so that's why I'm not pretty much learning details on how to cut, but basically I'm my eyes is looking at the wig and I notice areas that want to be shaped so once your visual here will know what You need to do. We are doing especially a short cut, so maybe a little on I will have a video showing how to cut a short cut, a short style, but this one is pretty much going to be about doing the waves now make sure you spray. The hair with water first all over before you apply the foam okay, so the foam is going to help you maneuver to make the wave in the gel you're going to put it after the phone, so the gel could pretty much lock in the waves. So next thing, you're going to do now is pretty much part, the hair to the desired style that you would like to do. In this case, I am doing a side part. So if you were doing a little part, you will target in the middle or if you were not doing any part at all, you would not put part but there's different ways: ways of doing the waves when you do in the middle part and push back so Different techniques, so today we are doing the side make sure you part it and mold it down before you start. Yes, my favorite favorite part. We are getting ready to wait, make sure you continually using your gel because you want your weight to hold once you shape it, so everybody do their waves a little different and I I do mines different ways. Sometimes I catch myself doing it with two combs. Sometimes I catch myself doing it with one comb and using my fingers to on the way. Then sometimes I don't use my fingers to do the wave. So it's like your preference, however way you are comfortable doing it. It'S fine! You just trying to achieve the way. If that's all it's about, you know working the call to the direction you want the wave to go, you see so the direction I wanted the front to go. I went forward with the comb so now I'm going backwards with the comb to make a complete wave see. Just like that. Tell me you guys are going to do this in no time you just like your practicing and that's it. That'S your work. That'S your! The first wave just like that, so we're getting ready to do our second wave. You see what I'm doing now, I'm bringing the the wave that was back towards the front, but I'm using my fingers to hold a hair down so that I could make the other ways. If I am you know, making sense you. So the point is working it at home is just breaking the bestit rate. You'Ll control devote the hair. The hair does not control you, so you do what you want the hair to do. We use the hood to achieve that. This said that and you're gon na continue doing the same thing. Nothing different make sure your leave. So when I started learning how to do the finger waves, this part right there was the most difficult part for me, because I just couldn't understand how to connect the waves and because of how the camera is set up. I can't really show you you know what I'm doing, but eventually, as I turn the head around yeah now, you guys can see what I'm doing you have to connect your wave. You really have to. I have seen waves, that's not connected and to me it doesn't look, you know, you know professional, but it will still look alright, but you don't want your wastin all right. You know in the beginning, you're gon na struggle to connect it, but eventually, when you get it, you're gon na see the difference in your waves and when it's connected it looks clean, it looks, classy looks nice, you know it looks like it. You got your waist professionally done so, as you notice I'm putting gel and places that I see that needs it because I really want them waves to lock in so, let's continue so let's say you want baby hair and all of that then this is the time For you to do it like, I did not want all of that baby hair stuff going on, because I wanted it to look as natural as possible because that's how the client, you know wanted it, but it's I mean. That'S your preference. If you want baby hair, you have to leave them out before you do it always or as you're doing the waves and leave the baby hair out so that you have the baby hair out. So you could do on whatever you need to do with them later. Hope you guys understand what I am saying. So, let's continue so now we are in the back, so we're going to do a little cutting back there, because it's a little bit too long. I don't like when it's too too long back there. Then let's say you get wet or you sweat if you're taking a shower you're gon na have all this hair on your neck and then the wave won't last one is so long back there. So it's always always good. I'M talking about it's always good. To cut the back shorter so that you can achieve that flat, look, that's not bulky, but for that so, basically, as long as you are visual - and you know what you're looking for you're gon na know how to position your ways, you might not do it exactly Like me, I'm just pretty much giving you the formula on how to do the ways you hear what I'm saying but you're going to do it in a way that you are comfortable with in a way that works for you, you get what I'm saying so this Is the finish look, this is the finished look and I have to say that purple is hot. It is ringing like I just love this. You guys see that wow. That'S amazing. That is all anything so make sure you guys go over some of the areas make sure your way.

Comments
theohsospontaneous: When I get to this level of waving, nobody will be able to tell me anything! This looks so good, I wish you had two cameras set up, so we could get a better view at some points but thank you anyway!
Yes Younice: This is the best video I’ve came across! I’ve been searching for months. loool I wish you filmed it earlier but thank you for sharing your skills!
Lynnell Herbert Blessed: Looks beautiful
BLYKE: Love it
Shawanda Howard: Thank u for sharing this video!!!
Ryan Pearson: So perfect
Love Anyce: Love This Issa Look
Shines Designz: Where can I find the lace to try this?
Michelle Woods: So question did you put the hair under a hair dryer to set the waves. Also what the name of the hair gel product
Wiangchai Sungkhasuth: It very beautyful.
Slim ❤️: Just ordered a blonde finger wave from you I’m excited
Quan D: It’s too bad my hair didn’t come out like this, ESPECIALLY because I ordered from the person in this video. Now I’m looking up video’s so I can fix my hair and not look crazy for my bday. I didn’t even know this was her until I noticed the “Lili” in the name. I’m so sad and disappointed.
Mayqueen Selormey: Can you please show the type of gel
Tiffs Isesele: how short was the original hair?
Alesia Murray: Where did you get that wig stand
Woonie Reacts: ❤️
Kanishka Forbes: I wish you were more detailed with how to make the waves and how to connect the waves you are calling out everything that we are having problems with but you haven’t really described or shown how to fix the issue
Katt Elibox: Hi how are you, I have dreadlocks, I was wondering if this would still work. Thanks
Trudy Garner: Where do you buy these wigs from, I want one real bad
Beauty Beauty: No music next time please
Chelsea Aneke: Can you sell them?
Skye Burt: is this a synthetic wig?
Kayla Williams: By foam so you mean mouse
Ethel Davis: Hey can you make my wife one wife