Clear Lace Clean Hairline Feat Xrs Beauty Loose Wave Install And Honest Review Not Paid Promo
- Posted on 23 November, 2021
- Lace Front Wig
- By Anonymous
#Clearlace #cleanhairline #Clearlacewig #Clearlacecleanhairlinewig #XRSBeauty
Want to try a clear lace wig: https://xrsbeautyhair.com/?ref=vvlp0wy...
Find out about my hair line here : https://youtu.be/UqKHIHUg8ws
The new CLEAR LACE Clean Hairline wig is all over Facebook and everywhere else I I had to try it out and give an Honest review! This is not a paid promotion I spent my own money to get this wig and I rated it an 8.5 out of 10!
This detailed tutorial, unboxing and review of the clear Lace clean hairline wig in the loose deep wave lets you know everything you need to do you can decide if this wig is worth the money!
TIME STAMPS:
Intro/ Bald Cap
4:10 -Unboxing
6:00- About this unit construction
8:23- Unit Install
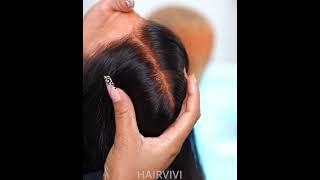
Hello, everyone and welcome, and welcome back to avalon stilettos, i'm crystal and today i'm going to be showing you how i put on this beautiful wig from xrs beauty and also i am going to be giving you guys a detailed review review of this wig and explaining. Why i give it at 8.5 out of 10., so you see i'm starting with my got to be, and so i'm just going to be going ahead and prepping my edges, it's important to slip those edges back in down before you get into your ball cap. Now the next thing i'm doing is i'm going ahead and i'm putting my cap onto my head, it's important to make sure that you pull this cap forward and getting it as thin as possible and make sure that it covers your ears as well. I am going to cut some holes right where my ear is, and this is to make sure that the cap lays flat and flawless around my ear, um part, and so after i do that, i'm going to get my got to be freeze, blasting spray, and i Am going to spray it on my hairline and i'm going to apply a thin layer and i'm actually going to apply this layer twice and let it dry completely. You can allow it to dry air dry or you can use a blow dryer to speed up the drying process. It'S important when you apply the got to be gel, that you only use a thin layer so that this whole process dries quickly. So thin layers is the way to go with this. Now after i use my got to be i'm going to get my needle and thread, and i'm going to sew down the back of the wig cap. The reason that i do this is because i just don't want the back of my whip, clap up and flapping and blowing everywhere so they're, just i'm just sewing along the bottom base of my braids, and so you can do this process quick and easy. But you don't have to do it if you don't want to once i am done sewing down the back and the front has dried. I go ahead and i cut off the additional wig cap, and so with this you just want to make sure you're being really precise. The cap is going to continue to roll back and i even do mine like more forward than i need to, and then i just pull up until i get to where i want my hairline. To start. That'S basically, where you want the front of this wig line to start is where you want your hairline to start that's what you're creating right now, where your hairline will be. So you see, i just keep adjusting and pulling and cutting and making it as smooth as possible, and so the places where the cap is lifting a little bit, i'm going to be using this glue to lay it down and make it smooth. Now again, you want to use thin layers, and i will also say if you don't want to use ghost bond glue for this part or whatever glue you can use the got to be. For this part, i like to use the glue, because one i'm going to spin it down anyway and as well. I believe that this dries much faster than doing it with the gods v, and it gives me a smoother cleaner look for my bald cap than if i was just using the got to be in my personal opinion. Now, after i do this, i'm going to let it dry and i know that it is completely dry when it is completely clear. So you want to make sure it's nice and clean and you can see it's already dry. So i get my morphe powder and i'm going to just put this on the front part of the hairline for my bald cap, and this is just again making sure i have a nice seamless blend as much as possible. Okay, you guys now that i have finished my bald cap. I am going to go ahead and i am going to unbox this baby yeah. Yes, okay, listen, listen, uh! First of all, packaging packaging. We know you care and we appreciate you appreciating the fact that we spent our dollars on this wig. So what comes in the bag? Obviously the wig we're gon na get back to that and look at this it is some straps, it's a strap so that you can connect it. So if you do not want to um, maybe sew down your wig or glue down your wig like i will be gluing mine down today or just to add extra security. You can snap these and you can attach them to the wig to make a band like that also a comb. This is a nice comb. They care a wig cap in case you did not already have one and it's in a nice neutral brow. Color put it to the side for another time we have an edge brush. Yes, yes to the fresh edge brush and i will be using it today, i'm going to use this fresh edge brush today, because nice little ragley in with this fresh wig. I want the fresh fresh okay, so we have that and then last but not least - and i think this probably came because of the type of wig that i got but some rods - some curly rods in case. I need to trim it up if some of my curls lose shape. So anyways, that's what came in the box. Xrs beauty, you care you care and i notice that you care let's get into the wig, let's get into the lips, so i got the 200 density. 22 inch, let me back this. Let'S see, i can see all these inches y'all and just edges. Okay, let's take this off so for the construction of this wig. We have two clips in the front which i'm actually going to remove. We have a clip in the bottom at the back and then remember how i told you you could attach this band. Well, here's the attachment part, so you would just snap it on like that pop up, so i will be doing that for extra security, because you're gon na be aware this week this week um. This is a four by six. I want to say i'll put it in the description so and um right here, but four by six and you have a little bit in the front and these knots are pre bleached pre-bleached, so i'm gon na apply the wig today with the pre-bleached knots, we'll see How that looks we'll see if i need to go in and re-bleach the knots but bleached and absolutely beautiful? Yes - and i forgot the name of this curl but um i'll - put that into the description and up here somewhere as well. So yes, okay, let's go ahead and the first thing that i'm going to do is i'm going to remove these clips because i don't want them. Okay, you guys, and so just so you know the reason that i removed. The clips that are now gone over here is two reasons one i feel like them. Clips plot your edges and two: it's gon na help. My wig lay flatter i'm not using them. I have a ball cap, so those are my two reasons. To make good reasons. Tell me so now: let's get a look at this lace up against my skin. This is pretty seamless you guys, oh enough of that. Let'S look at this list on my head the moment i've been waiting for i'm gon na go ahead and i am going to attach both of these. Here i have a pretty small head, so i'm gon na just go ahead and put it on the you know. Tightest one okay, you guys so i'm gon na be giving you guys a lot of information, basically reviewing this wig for you, i'm applying it, but a lot of the things are going to be self-explanatory. That i'm doing, as you see me, putting the wig on. So i'm mostly going to be explaining this wig to you why i gave it an 8.5 out of 10 and yeah everything about it. So, first things first, this wig is big. I know my head is small, but it's like large in the front more so than anything. So, first i have to go ahead and i have to cut off some of the sides of the wig, and so that's what you see me doing here now just getting that hair out of the way. But one thing i will say is this: wig is definitely all about the lace, because it's it's melting so well into my skin. All ready you guys. This lace is definitely beautiful. With that being said, i would not say that this is a beginner friendly wig. So if you're, just starting out learning how to apply wigs figuring out how to put them on how to melt your lace, this may not be the best way for you to start with, just because one, the transparency of the lace is going to make it a Little challenging for you to see how to um cut it and then also because again the size of the lace in the front. It'S it's weird like i don't even know how to describe it. It'S just like real big in the front, but anyways continuing on. So i did cut some slits in the front to just help manage the size of this lace in the front and make it easier for me to lay. So you see me getting my clips and clipping the hair back. So that will be easier for me to lay this down in sections and when you're getting everything lined up. You want to make sure it's how you want to be before you start really applying the glue, so i'm just making adjustments. I had to move my center over, but that's not a problem and now i'm going to go ahead and i'm going to get my glue and i'm going to start to place the glue on my hairline. Now, when you're placing the glue, you want to make sure that you do this in thin layers. Something happened and my glue came out so fast. So i'm going to be moving really quickly to spread out this glue, because one of the things about laying your lace with glue is you want to make sure you're moving the glue into the thin layers while it's still wet and moldable. If you try to move this glue when it is already starting to dry, it's going to be tacky and it's going to kind of turn into like a sludge situation. So it's important to move quickly once you place this glue on your forehead, so that then you can thin it out easily and you want to apply it in thin layers so that you don't get a white cast. Sometimes, when people have their lace, you can see a white cast underneath and that's because they apply the layers too thick. They didn't let it dry and between each layer so make sure you're applying the glue you're thinning it out doing. All of that. So you don't get a white cast and you don't have glue that is too thick. So you see me here just taking my time doing that so now more about this wig. So i do not know what grade of hair they're saying this is, and hair grades go from like 9a, so i want to say, like 15a or something like that. I personally think that this hair is probably like 10, a 10 b. Maybe something like that! This is not like a grade 15 hair. It'S it's definitely not. I'Ve touched 15 hair before i touched 9a hair before, and this hair is not that high up, and so that's one of the reasons for the score that i give it. The lace is bomb. This clear line, clean lace, is bomb i'm giving them that, but the grade and the quality of the hair is it's not the very best. It'S not the lowest, but it's definitely not the very best. So that's something to keep in mind now something else i'll say about this hair. Is it sheds now i did comb it out quite a bit just to get the style of the loose wave that i wanted, but there was quite a bit of shedding more shedding than i anticipated honestly. The level of shedding for me was equivalent to when i've had like some synthetic wigs. So just so you know it has reduced, but there definitely was shedding. So now you see me laying this wig in various parts, and so i'm starting on one side, and you want to press the hair into the glue once you press the hair into the glue. That'S really setting it in place so make sure the lace is lined up how you want it where you want it before you start to press it in to your hairline, because or you know, in front of your hairline, because once you press it, you are setting It so that's something to definitely keep in mind. Now back to the hair, i will say that this hair is very soft. It'S pretty it's soft! It'S nice! It'S it's definitely quality, i'm not taking that away at all. This is definitely quality, hair and a quality wig. I stand by that and i'm just thinking would i order it again. I don't know i cannot guarantee that. I will order it again and that's just because you can find a wig, that's basically as nice as this, and if you have this skill level, you can still get a very seamless, flawless look and you can get it for less than basically 400. You can get it for maybe 200 or a little less than that. So that's just my little two cents. You see i'm going in and i am trimming the lace off of the hairline now. So i'm making sure i have all my baby hairs out of the way i don't plan to do baby hairs for this week, so you know that's what they call them, but i'm just making sure that i get all those edge hairs out of the way and I'M just having to lean in really close to make sure that i'm getting this lace cut. They did a bit of a like peak like a willow's peak. I guess - and i don't really care for that. So i cut a lot of that off and then i'm going in with some more glue just to make sure that it is laid down completely it's easier to add more glue after the fact and for those just edge pieces than it is to try to remove Glue once it's there, so i definitely say air on the side of caution and just add more glue after the effect, rather than adding too much glue and then having to remove it. So that's what you see me doing there after this, i did go in and just tie my front hairline down and after i took it off. This is how it looks so i do like this wig again, 8.5 out of 10. For me, definitely one of the better wigs on the market that i have tried, don't forget to like comment and subscribe to the channel. If you like getting hair tutorials and i have a lot of lifestyle stuff on the channel too, until next time, peace,


Comments
Zendria Lopez: I appreciate your honesty on the shedding and if you would re-order
Alex Johnson: This was a great review!
Stacey White: You are so beautiful. Your style of makeup should be softened to match your flawless features when you are makeup free.
West Indian Aiyah: Which brands have the 11a hair you speak of?
C.D. G.: Entirely too much product…you can’t see the true benefit of the lace
Lani Kawaii: Please tell.me less than 400 but just as good.......where please?