Long Hold Adhesive Spray: Step By Step How To Apply Lace Wig Adhesive Sprays
- Posted on 24 June, 2022
- Lace Front Wig
- By Anonymous
Bye Bye tweezer, hairline ready to go!
Most beginner-friendly!
Wig In Video: https://superbwigs.com/products/jessic...
Discount: Marie
Lace Type: HD Lace/Swiss Lace
Knots: HD Knots
Hairline: Upgraded pre-plucked hairline
Hair Type: Brazilian Hair
wig Type: 6 inch Lace
Density: 150% 180%
Color: natural color
♡ Products Mentioned:
Slay Band https://bit.ly/3CMaF8Y
SHOP MY WIG ESSENTIALS: https://www.amazon.com/shop/msprecious...
Every product and tool I use will be in this link.
Check Out My Wig Styling Playlist: https://youtube.com/playlist?list=PLDv...
Catch Up On My Latest Wig Installs https://youtube.com/playlist?list=PLDv...
___________________
Get the SCALP Look
Hide Knots & Grids https://bit.ly/3F983Dz
Fake Scalp Material https://bit.ly/3mp7qwU
___________________
Let's Stay Connected
♡Instagram: https://www.instagram.com/mspreciousma...
♡My Website: https://mspreciousmarie.com/
♡ Tik Tok https://vm.tiktok.com/ZMRwbmjdu/
Business Collaborations Email: [email protected]
Want to ask me a question? Email: [email protected]
________________________
*Hair or products shared are my OWN personal and honest experience. This video may contain sponsored content and affiliate links which I get a small percentage that helps invest back in my channel to continue to bring great content! Thank you for your support!*
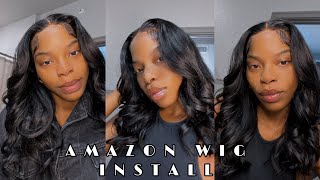
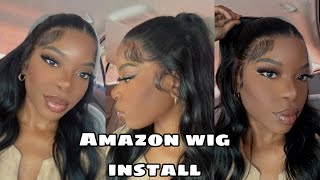
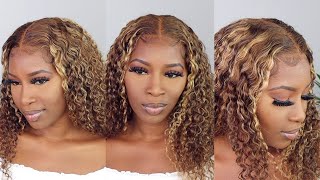
Today, i want to show you how you can get your install to last a bit longer using just the sprays, and i also want to share how you can get the most realistic. Install look a lot of you always tell me all my wig installs look very realistic with little to no effort, so i'm gon na share my best tips that i can in today's video, the wig i'm working with in today's video is a 13x6 cap, since i Am going to glue it down, i'm just going to remove these adjustable bands that they inserted inside the cap, but, as you can see, it comes with combs. It comes with the other, adjustable strap, that's in the back of the wig, and that's what i like to use the most alright. So the wig today comes from super b wigs. It will be linked below in the description box and, as you can see, it has this beautiful pre-plugged hairline. Now, when your hairline or your wig look this good. This wig is very beginner friendly. If you are an expert also - and you just don't like plucking your wigs anymore, this wig is everything okay, so you can see that the hair texture is gorgeous straight out the box. It has this beautiful curl pattern which will turn into like a loose wave later after you wash now when it comes to my wig and stars. I always wear a new wig cap underneath my wigs now i can either wear it as is or i'll do the ball cap method with it, but these do come in several different colors choose one that matches your skin tone so for today's install i'm going to Be using the even wonder, lace, bun, adhesive spray supreme. This is one of my favorite. The black can will give you the longest hold out of all of them, and i'm going to show you how i use it to get the longest hold. So for the ball cap method, i will apply this right to my wig cap to create that fake scalp and we already talked about how i do this, so i'm not going to go over it again. You guys can reference my previous video, since i'm not bleaching. The knots i am going to tint the lace before i glue this wig down so, as you can see, with the ball cap method, all you do is just cut away the extra cap that you don't need and because i tied the cap down with the slay Band, it definitely helps to melt that cap onto your skin. So if you don't like using a stocking cap - or you feel like the stocking - is too small for your head, then this is another way to get that wig cap to melt now, lace, quality and the hairline on your wig is important when it comes to the Hold of your wig adhesives - and i say this because if you have a good quality lace like the one that is on this wig, as you can see, it's very soft and the hairline is not too thick your adhesive spray will last longer. So you want to apply one layer, let it get tacky then spray a second layer and then repeat the same steps up to about three layers and then once it's tacky, you press that lace down onto that glue. Now, if your hairline is in the way, make sure you push it back, because you want the install to hold the lace and not the hair, if that makes sense, so i'm just going to tie this down so that i can make sure that everything is laying Nice and flat, and also just make sure the hairline is where it is supposed to be alright. So once you have that you can part this wig and, as you can see, the ball cap and the actual tint of that lace helps the wig to look like scalp when you part it, so you can part it wherever you want. I'M going to do a side part just because i have a certain look that i'm going for and with this wig since it already came pre-curled, i don't really need to curl it completely. So i am just going to take my curler and touch up the front. So that i can get it more defined, where i you know, separated that parting and it made the hair a bit frizzy, but that's the one thing i love about this texture is that straight out the box is already curled, so you really don't need to curl It and the hair is clean, so sometimes you don't need even need to wash it, but once you do, you will have to restyle it again because of course, this hair is going to be like a slight wave. It is a body wave texture. So you we all know what body wave look like once it's wet, but the hair is absolutely gorgeous and so very soft. I let my hairline stay tied down for at least an hour. I can't stress this enough: if you want these wig adhesive sprays to last or even your wig adhesive, you have to let it stay tied down for longer than 30 minutes, and also you need to make sure it's not getting any moisture on that hairline, at least For a few hours after your install, so what i'm doing now is taking my slave band and i'm repositioning the slay band so that i can remove the extra lace and have my slay band hold the lace down so that it won't lift. While i'm trying to cut away all of this lace that i don't need now, this step is totally optional. You don't need baby hairs if you don't want them. However, if you like them, you can create them, and i like to create mine by curling the hairs at the front first and then using a little bit of that wig adhesive spray to hold them down. I don't like using gel because i do feel like it causes them to be too intense and hard. Looking, i love the wispy soft curl baby hairs. I feel like it flows better with the hair. Now, to be honest, when i see a lot of hairstylist do or create baby hairs on their clients, i do notice that a lot of them like to use a lot of spray, a lot of gels, and i think it helps with getting that extra long hold. For their clients, wig installs, so baby hairs can be a little helpful and they can also help to hide that edge of that lace. So you won't have that box line line up around your forehead. You guys know what i'm talking about. Nobody wants that box. Look! Okay, all right, so i'm gon na go ahead and touch up areas around that hairline where um it's a little bit whitish, and i think that is coming from not the lace, but it definitely is coming from the spray that i use inside the wig cap. So i want to make sure that the lace around my forehead actually matches my forehead and then maybe a half an inch back. That'S when you want to have the lighter color, because your scalp is naturally lighter in color. So if you take little steps like this, it definitely gives the wig a more realistic flow. Okay, it's kind of like when you're adding contour to your face, and then you take the contour or the bronzer up to your hairline and you sweep it around that hairline. This is almost the same thing if that makes sense. Also, let me just point out if you ever glue your wig down and you still notice that you can see the lace even if the lace is supposed to be very invisible, you may need to go back and cut the hairline area a little bit further back. Sometimes, if the hair is not on pieces of the lace, you will see, it won't lay right. So sometimes in my videos, you'll notice that i will take my scissors and i will cut little pieces of the lace that didn't lay down and it makes a huge difference now. This install will last me for at least three to four days, and i do tie down my hairline if i'm working out, but you guys drop me some comments. Let me know: are you going to try out my methods in today's video and also, if you want this wig, it will be linked below in the description box along with a discount, you can use the discount code marie to save about 10 percent off your purchase. This wig is absolutely gorgeous like beautiful, so i thank you guys so much for watching, and i will see you back in my next video. You


Comments
Hairluscious: So beautiful with that old Hollywood Glam! Yes, I love the tips that you give. You definately have this application process down to perfection. Keep them coming. Thank you for the knowledge and the upload.❤❤
Miss K: Just Stunning, I'm definitely new to wigs
Jacqueline Wilson: You do an incredible job and I got that curly wig from superb wig and used the bristle brush and the hair is gorgeous and it the curls are defined and gorgeous. You have taught me so much and I bought the pomegranate product it worked just as you said. Because of you I can really do a good job on my lacefrronts. Thank you so much for your tips and information. I always peep out your videos and also bought the reverse scalp material it really hides the grids. I thank God for your sacrifice of putting yourself out there to educate us. Smoochies
Carolyn Dye: You always slay these wigs always looking like it's coming from your scalp. Yes Sis.
Meranda Lima: Absolutely beautiful! Thank you for providing these informative, easy-to-follow tutorials.
Chan Stan: Just gorgeous, loving the tips because I need all the help I can get to do installs on myself
Beauty by Jay Morris: Thanks for the new tips Marie, you look amazing
40ish Sophisticate: Tips noted and I'm going to give them a try. Thanks for a detailed video you always make your intalls look amazing!
Francesca Lunar: I love how you style the unit….your tips for a flawless style I will be using it….thank you so much for sharing
mashama coger: I love all the tips. My favorite tip was regarding the baby hairs. Like you, I don’t like the hard looking super jelled down baby hairs. The ones you created looks soft and wispy. I’m definitely trying that tip!
Graciously Blessed: Happy Sunday and Good Afternoon Ms. Precious Marie. I did not get your presentation yesterday. I pray all's well. You did a beautiful job, as usual. Your tips are always such a blessing, and you continue to teach us, how to improve upon, what we have, previously, learned. The hairstyle and your overall look, completely exudes "movie star" elegance and "cover girl magazine" beauty.
Safiyah Okilo: I just wanted to say thank you thank you thank you. I have learned so much from your channel and not to mention how much money I have saved from not having to go to the salon. Another great video. Peace and blessing blessings everyone
Lina Lina: Another’s “magnificent” presentation on this hair unit ❣️❣️ Thank you for sharing these “remarkable” hair styling and products beauty’s tips❣️❣️
rac Gillett: Very breath taking looks good
L StCl: That looks gorgeous.
AM's Life Health Success Now: Agreed, a very classic 1940s Hollywood look that's timeless❕✔❗
Julia Shultz: Just Beautiful thanks for sharing ❤
April Powell: Truly a Slay Master!
Lusher Manuel: Love it as always!!!️
Crystal Amos: Late to the party but have arrived for this slay for today huny
Monebyrd: Soo Gorgeous
Holla At The KI D: I saw one of the girls ( it was a reel I wish I had her link for you) cut the cap in the bald method but not the band. She actually cut a hole at the ear , cut the excess around your face and pushed the band up to the top of the head so the back stays snug.
Raquel Martins Rêgo: You´re the best! I'm learning a lot here.
Nora Charles: That hairline is perfection ✔️
Jasmine W: Yasss sis gorgeous
DISPATCHER92 DISPATCHER92: ♥️♥️♥️♥️
modelchiic17: