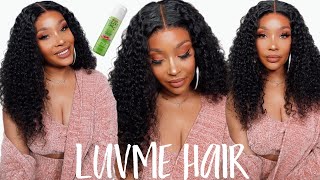
How To: Glueless Frontal Wig Ft Brennas Hair
- Posted on 29 December, 2022
- Lace Front Wig
- By Anonymous
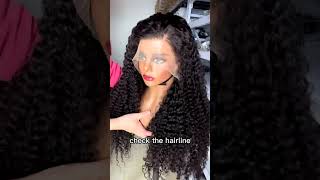
Like guys, can you see this hairline? Can you see this hairline like? I did not bleach this lace. I did not plug this hairline and it's looking this natural like it's giving everything it's supposed to give. Can you see okay cut like? Can you see so guys? The first thing that we're going to do is to take our tape and with my tape, I'm going to measure my ear to ear measurements from behind Okay, so I'm going to place the tape on this ear and then take the measurements. Take the tape down to this other ear to get the measurement okay and this measures 12 inches. Okay. So now what I'm going to do next is to divide this 12 inches by 3 and 12. Divided by three is four inches, and so we are going to be subtracting 4 inches from 12 inches. So if you take your measurements and your measurement is nine, if you divide nine by three, it's going to give you three and you are going to subtract nine. Sorry you're going to subtract 3 from the nine okay so since my measurement is 12 inches, I'm going to subtract 4 inches, which is 12 inches, divided by 3 from 12, which is four. So if I subtract 4 from 12, it's going to give me 8 inches. So that's what I'm going to be measuring on my elastic band, so we're going to measure eight inches on our elastic band, which is this okay. So this is what I'm going to be using for the band. So this is what I'm going to have here to help me hold my wig in place so guys. The next thing you want to do is to sew your elastic band on the frontal lace. This wig was sent to me by Brenner's hair. This is their 18 inches 13 by 4, frontal deep wave wig, and this is what it looks like the hair texture is so soft and so nice and it's so so amazing I'm going to be installing this wig for you guys. So let me show you guys how you can convert this to a glueless frontal, wig you're, just going to sew the band somewhere around here. You don't want to bring it to this part. Okay, you don't want to bring it to the front part of the frontal wrist, so it's not going to be visible when you install the wig, so you want to take it backwards a little bit and then sew its hair. Foreign is looking like. So I'm just going to sew the other one same way. You made the first one and you want to ensure that the band is properly arranged, so it doesn't twist or it's looking this way. Okay, so you want to make sure it's arranged before sewing it on the other side. Thank you so guys. This is what it's looking like: I'm just going to wear the wig now, so you guys see what's like on my head, so you can see how tight the wig is on my head, like so tight, and if I want to install it without using a glue Or anything this is going to still fit perfectly like. If I cut out the lace now - and I just do my baby hairs - it's going to still fit perfect as you can see, okay, so I'm going to do a proper installation now, for you guys to see what wig is looking like, so I actually wanted to Do the ball cap method, but I haven't done that before I don't know how that is gon na be so I'm just going to stick to what I already know how to do or what I usually do. So that's why I'm just going straight into this! I'M just going to wear my stock cap. This cap actually came in with the ridge, so I like to just push this backward and just basically install it like this. Do your baby hairs and you're good to go, but for me I will have to do some. You know additional um gluing because I have lower hairline as you guys can see. So it's not going to really sit well for me. But if you have like a perfect hairline, you don't have to go through all of the stress of green. You can see how properly fitted this is on my head. I have like side beards, not even lower hairline. I can see it so because of these. I can't just leave this like that. Okay, so I have to like still like just glue these points and also these points and I'm good to go. So that's basically what I want to do now, just this two side, this other side, like the middle part and the other parts, are perfectly fitted. So before I do that, I want to like um use my powder to blend the lace into my skin. I'M going to go in with this powder shade here: foreign foreign foreign, so guys this is just basically water and living conditioner foreign. I'M going to trim off the remaining leaves and then do some baby hairs. I couldn't find my small scissors, so I'm just going to try to use this because I can't look for it: foreign foreign foreign guys. Can you see this hairline? Can you see this hairline? Like I did not bleach this lace, I did not plug this hairline and it's looking this natural, like it's giving everything he's supposed to give. Can you see cut like? Can you see? Lastly, I'm going to just use this to help me, like you, know, melt all these extra laces that I wasn't able to cut off properly so and also to help the baby hairs stay in place. Oh guys, this is so cold man, foreign melted, melted, melted, guys. This is so so nice, like wow. Oh my God, please ignore my crazy voice, category bad Beach and the bar aliens. Thank you girl, it's so fine, so guys, that's all for today's video! I hope you learned one or two things from this video. If you did, please don't forget to give this video a thumbs up and leave a comments in the comment section below thanks for watching guys and bye.


Comments
chidera marycynthia: Does Got 2b spray shine white if not properly dried??
chidera marycynthia: Cos I noticed Ghostbond shine white if it’s not well dried.
Earth2Tilly: I thought it was so supposed to be glueless??????