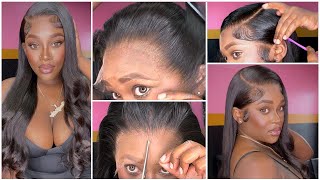
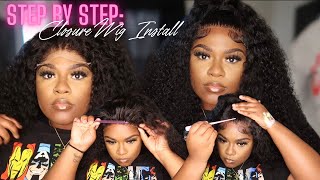
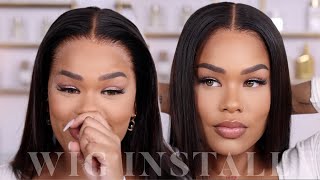
How To Install A Lace Frontal Wig Ft. Megalook Hair
- Posted on 06 January, 2021
- Lace Front Wig
- By Anonymous
♡ a very detailed beginner friendly how to install lace frontal wig Start-to-Finish ♡
●▬▬▬▬▬▬▬▬▬✤#MegalookHair✤▬▬▬▬▬▬▬▬●
HAIR INFO: #Megalookhair in the video:
♥13x4 Transparent Lace Frontal Wig Body wave in 18’’: https://bit.ly/3baLSA7
►Use CODE : destiny10
#Megalook Hair website: https://bit.ly/38JhsnD
$61 for Closure Wigs: https://bit.ly/36tjPrK
#Transparent Lace Wig: https://bit.ly/36CbuCm
Megalook Color Wig: https://bit.ly/38GDLKq
13x4 Lace Frontal Wig: https://bit.ly/3eWv1AQ
Hot #Bob Wig: https://bit.ly/3lsLZJF
Contact us:
Megalook hair E-mail: [email protected]
Megalook Hair Whatsapp: +8618903741680
Megalook hair YTB check here: https://goo.gl/8xk6nX
Megalook hair INS:https://www.instagram.com/megalookhair...
.............................................................................
Business inquires only:
.............................................................................
Hello my loves! Thank you for checking out my video, I hope you enjoyed!
♡Be sure to like and subscribe for more videos
Also..
Comment♡ video ideas and things you guys want to see me do. I'm obviously new to this and love would to do stuff you guys like!
.............................................................................
*FOLLOW ME ON SOCIAL MEDIA*
♡ Instagram: @destinylanay ♡
♡ Snapchat: @destiny_lanay ♡
♡Twitter: @_DestinyLemons_♡
♡ Tiktok: @destinylanay ♡
#wiginstall #megalookhair
There'S nothing wrong with that: it's your girl destiny and i'm back with another video. I hope you guys enjoy this one um. It is my first install and hair review on this channel. So please give it a thumbs up, don't forget to like comment and subscribe and let's get right into it. Today'S video is brought to you by mega look hair. They were so kind and gifted me, with this 13 by 6, 18 inch body weight frontal. I think it's really cool because it came with this kit with practically everything you need to do. An install at home. It came with a silk wrap, an edge brush two clips, two wig caps, and i think i got everything oh yeah, and these are really cute lashes and the wig, of course, which, by the way i'll leave the link to the wig and mega, looks info like Their handles for all of their social media and their website in the description, initial thoughts on this wig soon, as i got it out of the packaging um, i thought it was super soft, very bouncy and very pretty the lace on this wig was actually transparent, lace And the hairline on this wig was pretty thick, but we're gon na work that thing out later so keep watching really cool thing about this wig. It came with four clips and an elastic band already attached, which is perfect. If you want to go for that. Glueless look, okay, trying it on off rip. I will say the hair is super soft, like what crazy soft um it's gon na, be a time customizing this only because the hairline is so thick, but y'all see my hairline right there. That looks like i have to pull it up some and then i'm gon na i'm definitely gon na have to take out the strap that comes with it, because your girl hasn't been good so but yeah, we're gon na have a time customizing this, but it should Be fun, hopefully, the end result is something we like. Okay, let's get into bleaching knots, i use the clear all bleach with 40 volume developer and i use shimmer light shampoo and conditioner to rinse out the hair, but first things. First, i need to cut out the elastic band because it's just not going to work for me, but it depends on what you like and what you want. I also prepped the hair before bleaching it with a little bit of water to kind of protect the hair from the bleach. As you can see here, i am about to put the bleach on the wig. I recommend folding your wig inside out at first. I had it like this, but eventually i flipped it um because it makes it easier to see and get to where you're going, but i, like my um bleach, to be kind of a thick paste um. So it's not too liquidy. So it doesn't go straight through to the hair. Okay, so, like i said before, i like to use shimmer light shampoo and conditioner, but i like to let the shampoo sit for at least 15 minutes. I do this because it kind of tones the bleach knots without actually having to use toner. Our goal here is to kind of cancel out that orange color you get when bleaching your knots. Okay, so knots are pretty much all bleached, but a technique of mine is over bleaching um my knot, so i truly get way more than i normally do when bleaching um. If you're like really good at bleaching, then you probably won't have to do this, but i feel like over bleaching. Your knots actually gets more them and makes my frontals come out even more natural, but the key to success for that is um buying a box of dye and going back in with a spoolie i'm putting y'all in game. Wait hold on. I'M really trying to put y'all on game right now and just playing with me. I might have to go back and um doing um voiceover but yeah. So i try to bleach as many knots as possible. You can see, there's still some black ones in there, but i'm sure they're gon na get plucked out too um. I feel like it gives more of a natural look. If i do it like this, but i'm gon na go in with a spoolie and some box hair dye, i got from the store and i'll show you guys what i am talking about. So the hair that i'm using is the color silk by revlon and black is brown and first i will be protecting the lace by spraying it with this got to be spray, and then i'm going to mix up the color okay. So this is a key right here, so i'm dipping the spoolie and rubbing off the excess on the sides of the bottles and just using that spoolie to like stroke through the hairs that i see are super duper blonde, i'm just going to part through the wig One by one it's kind of tedious, but it will work. It'S really really worth it honestly, like you can see right there. It'S super duper blonde, but whenever i get done with what i'm doing here, you won't see that blonde anymore and i just keep the die on for the recommended time of like 15 minutes and right here. I am rinsing the hair out first and then applying a conditioner that just came with the die um really pushing that product into the hair and then letting it set for five minutes and then rinsing this footage right here, you're seeing i let the hair air dry Overnight and then the next day i started plucking. So that's what you're seeing right here and honestly, that's where the magic happens right here. If you want to see a more detailed video on plucking. Let me know in the comments looking kind of scary right here, but this is key um. I did not tint this lace um. You can buy a tint and tend to release if you want to. But this is the easy version: just get a foundation powder that matches your skin and it will blend like magic. Transparent lace is practically made for you to tint because it comes kind of white. So um make sure you add the powder that matches your skin tone here, i'm just wiping off the excess um gotcha glue that i had from wig cap and the glue i used for this install was go spawn glue. So what you guys are seeing me do now is cutting my lace into sections. I like to glue down my wigs into sections because i feel like it makes things a little bit easier and the process run a little bit smoother. Okay. So what you guys see me doing now is obviously glowing down the way. First coat was kind of messy, but as we move on, we get a little bit neater. I'Ve been doing this for two times so bear with me: um, i'm a newbie when it comes to the wig thing a little bit, but i think this install came out really nice. So you can trust me, but the key to success with gluing down your wigs is making sure you blend that glue down as flat as possible and as thin as possible so that it dries down clear. So this is the point where i decided. I want to push the hairline back a little bit um. It depends on what you like in your preference, but i wanted to cut off just a little bit of the front, so i'm just going to section that part off, so i can cut it off whenever i cut off my lace. So now i'm going to spray! My hair with got to be and wrap it with the elastic band to really get that meltdown that we're looking for i'm using an elastic band at a craft store a hair store wherever um. I think i got mine from a crash store. No, no! I got it from amazon um a big little round of it, so you can cut it off anytime. You do your wigs or reuse them and they really get that meltdown for real, so invest in an elastic band. Now, i'm just hot coming the hair out of the way. So whenever i cut it, there's no extra little hair from the parts that i want to keep in the front. Okay. So now we're getting into this thing: we're cutting that lace, see ain't! No! Turning back after you cut that up, we cut it off, we cut it off um and honestly, i can say i don't regret cutting this piece off. It comes out looking really really nice, so y'all hang on tight you'll, see by the way, i'm also cutting in a zigzag motion, almost just moving it. So it's not perfect, not a super straight hairline. This will also help with the meltdown. Now i'm taking some alcohol just to clean up the edges a bit and to help us get that meltdown, we're um, looking for i'm just going in with that same powder from the beginning and spraying the got2b spray again, okay, so we're getting to the end of Things now the hair is wrapped up. While we wait for that to cook and melt down we're just gon na straighten the hair, i went with the middle part and straight bone straight. Look it's kind of bone straight. I missed the piece in the back y'all gon na see that later, but we got to it. Let'S fix the part up a little bit. Okay, now that we've gotten the part situated so what we get to the edges. But before i do the edges, i'm just going to hot comb a little bit get that thing flat by the way. I don't think i recorded it or the camera pause or something, but i did put some wax on my hair. I used the edge booster wax in the scent peach um just to try to help me out, and then here you see me wiping off whatever excess glue got to be spray or whatever is on my forehead, so off camera. I did one side. I have a little bit of trouble with doing my edges on camera, so i tried to show you guys kind of how i did it on the other side and then i'll show y'all the end result. I just use a bit of foam foaming lotion to um. Do my edges, i've tried edge, control and things like that, but i i feel, like extra control kind of like lifts, my lace, a little bit foam can too, if you leave it on too long, but i've gotten used to using foam. So that's what i use, but you can use whatever you want. This hair came out so stinky y'all ready to get into this transformation and one two forget it yo. We did that we did it. You see me hold on wait. Let me get into it right, quick, baby, all right now, y'all, that's the end of the video. I hope you enjoyed, if you did please like comment subscribe, do all that and thank you so much for sticking to the end of the video um. If you want to see more things like this, let me know down in the comments and yeah: that's pretty much it. It'S your girl destiny and i hope this video helped you today, peace, you

Comments
Shamya Banks: Yess you did that!! You look like a pro I wouldn’t have known it was only your 2nd time. Now I want to get back on my wig game, you make it look so easy!! Love it, girlll
Brittany Bonnett: Yes Yes. Love it! We want to see more! Thanks for the new recommendations on the MegaLook website.
Cecelia Bean: Love ittttt! Always wanted to learn how to install the 4by4 closure, frontal is kinda out of my budget ❤️❤️❤️
RANDA WATS💕: You do your own hair? Pretty ❤️