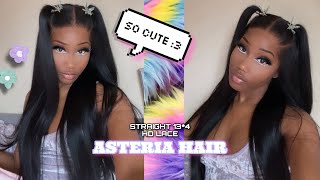
Melted Bang Wig Install On A White Girl| Wigs For White Women
- Posted on 02 February, 2022
- Lace Front Wig
- By Anonymous
Wig Install On a White Girl| Bald Cap Method On a White Girl| Wigs for White Women
Koreejsboutique.com to purchase white girl wigs
White girl wig buying guide
how to install a lace front wig on a white girl
how to install a closure wig on a white girl
frontal install on a white girl
detailed caucasian sew in tutorial
flawless install on a white girl
how to melt lace on a white girl
white girls can wear wigs too
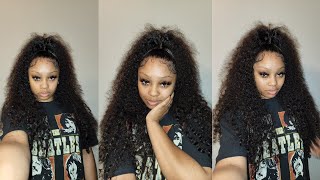
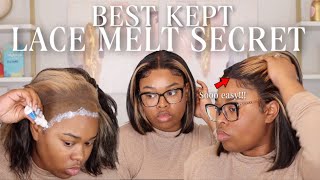
what's up dolls welcome back to corey j's boutique today i am super excited i am finally bringing you all another white girl wig install videos so today we're going to be doing a melted bang wig install on a white girl if you are interested in learning and watching continue right now okay so first things first we're going to braid her hair straight back we are going to create the foundation so that her wig is super flat and it looks extremely realistic i'm going to let y'all know this video is very long and very detailed because y'all cursed me out so much about the last video that i made sure that i included every single step for y'all so step one is braid your hair down you must have a very flat foundation in order for your wig to look the most realistic okay so while i braid her hair i just want to talk about um the previous install videos and the feedback that i have gotten from those videos um first things first everyone who is appreciative of the fact that i am doing um a wig install series on white women you are welcome like honestly wigs are for all women my wigs are for all women so um make sure uh the biggest question i got i think the most asked question was where do we get wigs from so coreyjaysboutique.com is my business i sell wigs for all women i'm actually getting more into hd lace this year um but i have hd and transparent lace wigs you guys are seeing me install a transparent lace wig so this is just to show you that the wigs are going to work for anyone as long as you use certain techniques that i'm going to show you throughout the video so make sure you guys shop corgisboutique.com okay so another thing i saw as well in the comments um there were a lot of women suffering from hair loss so um if you guys are in the orlando area or in the central florida area at all and you're experiencing hair loss and you have you know you basically need wig help reach out to me at info coreyjaysboutique.com info at coreyjazzboutique.com and we can talk about getting you a wig and also an install as well um if you are not in the orlando area and you need a wig i can obviously ship a wig to you i can do a ready to wear ready to ship wig or you can get it installed by a local hair stylist but if you have questions you can also email me at info corey's boutique dot com okay so once all of your hair is braided down you are going to take the ends of your braids and pull them up and basically just sew them to um the part of your braid that is i guess attached to your head if that makes sense so the free end of the braid you're going to attach it to the part of the braid that's to your head um the reason why we're doing this is just because we don't want her hair slipping out the back of the wig you know it's pretty tacky um so we're just going to sew the back up to secure it and then after this part we are going to go ahead and melt her um cap on her head for the bald cap method okay so before we put the cap on i'm going to um push her edges back with some eco style and then i'm going to put the cap on and do the bobcat method okay y'all and while we are here talking about eco style and pushing baby hair back okay anybody can wear baby hair and right now the conversation at me and my model are having is that she wears baby hair with all of her hairstyles so thank y'all very much for thinking y'all know something but yeah anybody can wear baby hair okay but anyways now that's out the way so the cap we're going to put the cap over her whole head as you guys can see she put the front of the cap like down to her nose that's really just to help me lay it flatter um the further you put it down on your face the flatter your cap is going to lay and then i'm going to just take the scissors and cut around her ears also to lay the sides flatter and then i'm also going to eventually cut her eyes out as well so this is just one of my methods of getting the the cap to lay really really flat um the flatter the the cap lays the longer your install is going to last so you want your install to last quite a you know quite a while so that's my little secret um and then we're going to just sew the back of her cap to her braids so that when we cut the front of it off it's not rolling up in the back if that makes sense if not it's going to pretty much come off so you definitely need to sew the back of the cap to the braids as well okay so here you're seeing me um spray the got to be glue free spray on her cap so that i can get the front of it to lay flat and lay down um you want to spray multiple layers of this just for security uh yeah now we're going to move on to the actual wig y'all so this is not my wig by the way um she actually provided me with this wig this was a used wig that i actually revamped i did upload a video of me revamping this wig so if you guys would like to see it make sure you go on my page and first subscribe and then watch the video of me revamping her wig um wig revamps are really important because they're very expensive and so you will want to be able to reuse your wig you know um so knowing how to revamp it is definitely going to come handy so just make sure you guys check out that video as well right now i am using um corey j's boutique scalp blending palette to basically color her lace to the color that her scalp should be i'm also going to do this on the top of the wig as well um however prior to installing i color her entire lace on the back side to make sure that it looks like her scalp um that means that you're supposed to use your color guys so you guys can either use gorgeous boutique scalp blending palette or colors of your choice but just make sure that it matches your scalp and here um so basically we're just cutting off the cap now that it's dry make sure that your your got to be glues free spray dries all the way do not start cutting your cap if it's not dry because it will roll back and your install will not last okay boom so after you cut off all of the excess cap you're going to want to basically seal the edges of the cap so that it's not seen up under the wig right so in order to do that i just take the same glue that i'm going to lay the lace with and i'm just going to take it in small amounts i'm using a small object my my object is my makeup brush you can use whatever um but i'm just using a small amount and just literally like rolling it down in the direction of the cap you get what i'm saying i hope i hope that makes sense y'all but y'all can see what i'm doing so literally just like rolling it down kind of pressing kind of hard and as you guys can see i'm literally sealing the edges away so first you can see the edges and then when i'm done you can't see them not as much anyway so now i'm taking the same color and the same brush that i use on the back of the frontal wig and i'm also using it on her wig cap again this is just to contribute to the scalp-like look of the wig if you want your way to look super realistic these are definitely steps that you should take before applying your wig so right after you um do the makeup i would definitely take a paper towel and some alcohol and wipe around the edges of the wig cap of course do not wipe on the wig cap because this is going to remove the wig cap but if you do it right above um that'll basically clean off the space where you're going to need the lace to stick extremely well okay so now what i'm going to do is i'm going to put the wig on her head um i basically want to measure where i'm supposed to be putting the wig at as far as so basically measuring placement as far as the ears and the front of the wig go um so you'll see me having her push her head back into the wig excuse me you'll see me um pulling the wig forward i'm just trying to make sure that i get the wig on her hairline where i needed to be in order to be above her natural hairline but still in a natural space for the hairline to look natural i hope that made sense but yeah now that her wig is in the proper place i'm going to go ahead and put four layers of um glue on her head yes i use four layers to make sure that your wig is not coming up in two days um oh that just made me think of another question that i was asked a lot of you guys asked me do how long do the wig installs last wig installs last two to three weeks with proper care um it just depends on how you care for your wig install you know keep in mind laces of material is being held together by glue if it gets wet it's going to um basically loosen the glue um you know essentially so you have to make sure that your wig isn't getting wet in the shower making sure that you're tying it up at night so that you don't have friction pulling your hair as you're you know moving your head on the pillow um this is not something that you take off every night if you decide to get a frontal wig the difference in a frontal wick and a closure wig is that a frontal is going to go from ear to ear just like this one is right here and a closure is going to be a piece of lace sitting in the middle of your head you can move this closure to the side if you want to for a side part you can wear it in the middle but while the store you can wear it glueless but if you do um get an install like this one you cannot take it off every day that was a really um highly asked question i would say so two to three weeks for lace installs with glue otherwise you can get glueless wigs but they will not be the full lace on the front they're going to be maybe a 4x4 or 5x5 closure okay ladies so make sure when you're applying the glue that you guys are applying very thin layers you want to do four thin layers i know i said four layers but if you guys can see i'm spreading little dots of glue equally on her head i'm not using big globs of glue and i'm waiting until one layer dries clear before adding another layer so that's a really really big thing when it comes to laying your wig correctly make sure you use four layers if you wanted to stick for two to three weeks and then also making sure that you use thin layers and letting the layers dry in between um now you're gonna see me just pretty much laying her lace so i'm just gonna be pulling and tugging and laying and having her help me hold until it gets where it needs to be which is on the hairline that we created from the glue okay so now that her lace is placed in order to actually melt the wig i'm going to take my tool which is another makeup brush and i'm going to use the end of it to basically um melt the lace into her skin making sure that it looks as natural as possible um so this is just another technique that you can use you can just use something that's flat i just chose this makeup brush probably because it was the closest thing to me and i'm just making sure that i really really push her lace into um her scalp make sure you guys do not do this prematurely if you do the glue will seep over to the other side of the lace and it will not look good it will look nasty um unclean unprofessional yeah to make sure the lace is dry before you guys do so a good way to do that is again doing the thin layers and waiting for them to dry in between so now i'm just brushing her hair out remember we are doing a bang wig install so what i did um you guys will see in the other video as well i actually prepped this wig so that the bangs were already laid um i did not want to have to use a hot comb on her head so much to lay um bangs as it might have might it could have burned her so i just didn't want to take that risk um okay so now i'm just combing the hair out getting it ready and we're going to be laying down the sides um with some heat using a blow dryer and this comb and the makeup tool just to make sure that the wig is melted in the manner that it should be okay so before we get the blow dryer i'm going to basically make sure that there's no piece of her lace that is not glued down any piece that is not glued down i'm going to glue it down um and make sure that it is set so that i can then blow dry it as you guys can see now look at her lace though this looks like scalp so this just goes to show y'all um when people so okay another question i get a lot do you have wigs for white women and here's the reason why i tell you guys that my wigs are for all women and if you watch this entire video you guys are to see further um no matter what color you are you need to color the lace to match your skin color and your scalp so you can use again corgis boutique scalp blending palette or you can also buy you can use your own foundation whatever foundation you have at home right um so when you do that you color the lace no matter what kind of lace it is so my transparent lace wigs will absolutely suit a white woman my hd lace wigs will absolutely suit a white woman just make sure you guys remember that okay looking at the lace i just had to get that off my chest because so many people um reach out to me daily actually with that question do you have wigs for white women i absolutely do i have wigs for all women and here is how you guys can install them and make them look natural so again i'm just taking the little edges whatever is not put down and i'm gluing it down before i do a full blow dry on her lace so now it's time for me to style the wig um i'm going to basically be cutting the bangs making the wig look more realistic and also more of what um my model wanted her wig to look like okay so cutting the bang is going to take a while um i basically just made a very detailed video as everyone requested i had a lot of comments asking me why didn't i finish the video why didn't i show this angle why didn't i show that angle so this is a very very detailed very very much so a step-by-step video um so right now i'm just going to hot comb the bangs after hot combing the bangs and making sure that the part looks good i'm going to cut the bangs and also put some tint on her lace to make it match her scalp more okay so please let this be exam an example of why my wigs are for all women because just like this lace although this is not my wig i sell transparent lace wigs so this is how your wig can look as a white woman um as long as you just you know make sure your foundation is flat make sure you're taking all of the steps that we took in the video and as well as as you guys can see right now i'm putting that same color that i put on the bottom of the lace and on the top of the wig cap on the top of her lace so that it looks just like her scalp literally so i'm going to start cutting the bangs very long i would highly suggest that you do as well if you are cutting bangs i just always want to make sure that i'm playing it safe um i rather have more than not enough for sure especially with the bangs um so when you guys are doing bangs if you do not want a straight across the look you're going to want to cut upward just like i am right now in order to create a very um fringe looking bang okay you don't want it to be straight across like that it looks well you know what you might want to if that's the look that you're going for but this that's not the look that she was going for um we were going for a fringe bang so in order to do so we kept the sides longer and then we cut the middle shorter as you guys see me doing right now but all of the bang is going to be fringed and in order to do that again you cut upward as i'm showing you guys in this video so um again if you want to skip past the bangs go ahead and do so because it does take a while if you want to speed it up you can do that as well um but i'm just giving you a detailed look at how i have created her bang look i would suggest if you guys are doing a bang look that you get a small flat iron um to make sure that you guys are able to style the chinese bang the fringe bang you want to make sure that it's not too flat but you don't want it to be too bumped either so i would suggest using a small flat iron such as the one that i'm about to use right now i got this at my local beauty supply store so they're probably pretty easy to find as well and you just kind of want to do a flat bump to the bang after you make sure that the roots are flat with the hot comb another thing that you can use to style your wig and to make sure that it's laying flat is our corey jazz boutique.com wax stick um black sticks are really great for styling so i'm going to use the wax stick and the comb to make sure that her part is very very much so straight and that it looks like scalp so again you guys i'm using my makeup brush and my corgis boutique scalp blending palette to make sure that the part looks very realistic and do it looks so good wow okay boom so the last thing i'm going to do to complete her look is just make sure that i flat iron her hair um i included this because again y'all got on me for not finishing the last style and just you know cutting it off so um fun fact my camera did die again but i just use my phone this time so here i am just straightening the wig and then in the next few clips you guys are going to see the final final look okay boom and we are finished so right now you're just gonna see me doing the finishing touches but you guys can see that we have completed our melted bang wig install on a white girl i'm thankful that you guys have watched this video i hope you were able to watch the other videos that i've done on white women as well as the how to revive your wig video as well um make sure you guys subscribe to our youtube channel follow us on instagram tick tock and facebook at corey j's boutique um you guys we sell wigs and women's clothing again our wigs are for all women so if you're interested in a wig and you don't know where to start do not hesitate to email me we can set up a consultation make sure you guys shop the best wigs period that's core jazzboutique.com and again subscribe to our channel thank you all so much for watching um if you guys have video suggestions or questions do not forget to comment below thank you so much and i'll see you guys next time you

Comments
Melissa Petzold: Again...THANK YOU!!!! Your 'white woman' videos make me so happy and they are extremely helpful. As a young woman who lost enough hair that I had to 'resort' to wearing a wig...and live in a small town where NO ONE knows anything about wigs....THANK YOU!!!
MsBecca8oh8: this white/asian girl finna get her wig on! Haha..thank you for sharing! Now I just got to figure out how to sew the back by myself since I don't have anyone to help me.
Bbarbie365: Beautiful
Annie Lee: Wow! Wonderful job. New subscriber
Bbarbie365: You did that!!!
Dusty Brown: Great job
shayna buhs: the voice in my head the entire time I was watching this video: not the bayang the bayang woaaoooaoahhhh