How To Glueless 13*6 Lace Frontal 150% Density Body Wave Wig !!! Unice Hair
- Posted on 09 June, 2019
- Lace Front Wig
- By Anonymous
How To Do A Glueless Frontal Lace Wig Install!!! In tihs video,you can see everything you want .It's an amazing job.Don't miss it!
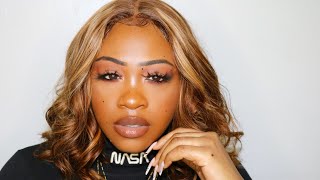
Hair details: 13*6 Lace Frontal Body Wave wig, 150% density 28 inches
Direct Hair link in the video: https://www.unice.com/unice-hair-long-...
5*5 HD lace wig Amazing Lace Melted Match Skin Color Direct WIG Link: https://www.unice.com/unice-hair-pre-p...
★Save Money Get $$$ 10% OFF Use Code: loveunice
UNice hair official website: https://www.unice.com/?utm_source=yout...
The Best Hot Sale Brazilian Body wave: https://www.unice.com/unice-3-bundles-...
Affordable high-quality Lace Frontal human hair wigs: https://www.unice.com/wig-1.html?utm_s...
Top-selling on UNice Official Website: https://www.unice.com/lace-closure-1.h...
UNice hair on Aliexpress: https://goo.gl/2hYxy3
African mall UNice hair: https://goo.gl/UoEhd4
Amazon UNice hair store: https://amzn.to/2zxP2gm
Ebay UNice hair store: https://ebay.to/2LioQuG
Address of New York:962 Flatbush Ave, Brooklyn, NY 11226
contact with us:[email protected]
phone:347-789-8880;347-789-8881
Contact us for promotion?
Aliexpress UNice hair email: [email protected]
UNice mall email: [email protected]
Follow UNice on social media
IG @unicehair: https://www.instagram.com/unicehair/
FB @UNiceMall: https://www.facebook.com/UNiceMall/
Twitter @unicehair: https://twitter.com/unicehair
#unicehair #bodywig #Bettyou #UNice
So first I want to get into some details about this way. This is from unis. Hair unis did sponsored this video. So thank you so much to them for sponsoring this video and sending me this wig. It is a 28 inch, Brazilian, a body wave wig. This is the natural state of the hair. Once I got it, it came in natural black and I believe it is a hundred and fifty percent density. So as far as construction of the cap, it is just a lace, frontal wig, so the back has the adjustable straps that you can adjust to fit more tight or more loosely and then, of course it has the clips in the back. It also has a clip on both sides of the wig, and then it also has a clip at the very top of the wig that I'm going to show you the parting space on this particular wig is 6 by 13. So there's about 13 inches, going from ear to ear and then 6 inches down the middle for like a middle part of parting space. This wig was also pre plucked, as you can see, and then it has a little bit of baby hair. But of course I like my hair line to be a little bit more thin so that it has a more natural look, and so I did do some customizing of my own. So this is before I customize and then this is after. I just did quite a bit of plucking to make the hair line look more natural and then of course I bleached the knots as well. So, as you can see right now, the wig is very beautiful, but even still then with me having the straps adjusted to the tightest capacity, the wig still does not fit snug enough to wear it. For me, it can be considered glueless, where I need no adhesive at all to keep it down. So let's go ahead and get into how I make that happen. So first thing that I like to do is cut away the excess lace that is around the ear and the sideburn area. So what I do for this is just take my fingers or a comb and trace around the outline of my ear, to where I feel the lace needs to stop or be cooked. And then I just sectioned that part of the hair off once I section that part of the hair off I'll go ahead and use my scissors and begin to make the cut, and then I typically take the wig off to finish the process. Just so, I can see exactly where I'm cutting and I can be more precise and I don't cut off any hair that doesn't need to be cut off or any lace that doesn't need to be cut off. You want to take your time with this particular part of the process unless, as always more because you can always cut away more lace, but you can never put it back after you've cut it off. So take your time trim a little bit at a time and then just continue to measure. So once you finish with that, you just want to go ahead and put the wig back on and kind of make sure that you have trimmed off on nothing. It'S exactly how you want to look, you want to Center the wig, and then you want to go on and you want to do the exact same thing to the opposite side. The next thing I'm going to put focus on is the placement of the band. This part is very important. I place my fingers inside of the wig and I'm going to pull on it, so that I can see exactly where I need to place the band so that the wig lays down perfectly without the help of any adhesive. And so once I figured that out, which, for this particular wig, was kind of like right behind the ear area which is typically going to be, then you want to place the band exactly where it's going to be, laying and the nape and around the ears and Measure out exactly how much band you will need. I, like my bands to be pretty tight, but this part is also personal preference. You just want to make sure that you do have a tight enough band so that the wig is secure and doesn't come off and lays flat against your head without the help of any adhesive. So the next step and the single most important piece of this method is sewing on the stick ban. The direction you saw the elastic band on is very important because it's going to determine how your wig is going to lay. I have found that if you sew it at an angle, then the wig is gon na lay more natural and more flat opposed to. If you sew it going straight across where that usually causes bunches in the lace, it kind of pulls at the sideburn area, and you just want the wig to look as naturally as possible. So so at an angle, and that will kind of provide you with a better lay for a glueless wig and then just keep in mind how your fingers replaced. When you were pulling on the wig to kind of determine the best place to put the elastic band. And typically just sew the band on in my lap, but you can use whatever method works better for you. I just used the mannequin head for the purposes of this video. So then, you're gon na do the same thing to the other side and then once you're finished, you want to try on the wig to see how it fits, because this is your opportunity to literally start over with the band. If it's not fitting right and as you can see, it fits perfect, I still have the sideburn area to work with and it's laying flat against my head. So I don't like to do the ball cap method anymore, because it's too irritating to my skin and my hairline plus. If this is a glueless wig, I just take it right off once I'm finished with that the end of the day, so here's the wig after I have put some layers in it, and then I have added some curls to it with my flat iron. I have also cooked the excess lace off in the front and what I did is I went ahead and trimmed more lace off around the sideburn area, just because I like to use some of my natural hair on that area, to make it look more realistic. In my opinion, but you can cut how much ever you want, so that leads me into the next step, which is just perfecting your hairline on your wig, so for this wig in particular, I am going to kind of create some sideburn areas, since I cut off That extra lace so that it looks a little bit more natural, but for you this could mean adding baby hair. It could mean thinning the hairline out a little bit more. It'S personal preference at this point so for the sideburns I'm going to section off a small piece of hair, then I'm going to use a razor comb to kind of cut to the length of my natural sideburns. Then I'm going to take a little bit of edge control to kind of lay down and smooth out that sideburn area. You can just take your time with this part. There is no rush after I kind of get it to the length I want it to be. Then I'm going to take some tweezers and I'm just going to pluck it, so it's just a little bit more thin and then I'm just going to continue to kind of smooth it out until it looks exactly the way. I want it to look so once I'm finished with that, then I'm just going to take some styling foam or mousse and just continue to work with my hairline so that it's exactly the way that I want it to look, I'm a tweeze a little bit more. I may do some baby hairs, whatever the case may be, and of course you don't want to forget to shape your sideburns on the other side of the wig as well. So I've already done that and then once I finish getting my hairline kind of the way I want to I'm going to take one last layer of mousse and I'm going to just put it all around my hairline and then I'm going to lay it down with Either a silk tie or a headband so that it lays flat adding the foam and tying it down. It'S gon na help the lace look more realistic and lay more with my skin, so I never skip this part even with a glueless, wig and so I'll. Leave that on law do my makeup and then I'll show you how it looks after I've done my makeup and, as you can see it has that really laid down slick. Look like edge control. Look you can brush it out. If you want to that's personal preference, I love this like lay down slick. Look, so I'm gon na leave it that way and, as you can see, it turned out beautifully of doing glueless, wigs and installs. I hope to continue to perfect this method, because I am done with the glues and the tapes. I need my forehead and I need my edges and I'm done with the bald caps. So let me know what you guys think. Let me know if you have any tips or tricks, of course, I'll leave all the information about this wig and the hair and all that good stuff down below


Comments
Theresa Crawford: This looks so beautiful great job
God's Daughter I loves Jesus: Beautiful! Hands down perfection!
E Turley: This is an art, so pretty! Amazing job
Vee Patterson: Looks very nice sis. Thanks for sharing!
CHERYL HARBOUR: Great job I am going to try this because I never wanted to glue anything on my forehead lol
Yes to Your Will: Lovely. Great video. When you came back with your make up all done I was like fierce honey fierce lol I was not expecting that. ❤️
Faye Nguyen: Absolutely Beautiful.
Lisa T-Wright: Pretty impressive. I've never seen someone lay baby hairs without cutting them first.
Carol Commissiong: Looks great, I've never glue a wig before and since I just bought a Unice wig I would like to wear it without glue. I am anxiously waiting for my wig in the mail. I'm afraid of glue and other hair products pulling out my hair and hair line which is thinning from perms and hair color. I want to look as natural as possible without looking like I'm wear a wig. I have weave my hair for years and want a break by wearing a wig I can remove at the end of the day.
ambruce love: Wow it looks really great
Maya Thompson: This is exactly what I need
Aisha Israel: You look absolutely amazing!!!
Julie Lambert: You are just beautiful! I don't think you could do a thing BUT be gorgeous!
Karen Delaney: You did an amazing job.. How do you learn to do this???.. As for the gross comment.. Jealousy is gross.. You look amazing
Alisha Murdock: You look outstanding‼️ You cracked me up with, “I need my forehead.”‼️ What a hoot!
Avanti Wingate: Love it
Donna Byrd: You really surprised me! You are very talented. I wish you the best in your endeavors! God Bless you!
Cherry Rose': Stunning!!
love imani: Girl... You look amazing.. That's alot of work.. Your makeup is fire.. You should do a makeup video.. If you haven't already..
Beverly Jacox: Awesome girl you really fixed that hair style.
Greco: Wow, beautiful
Janita Cesar: Beautiful
Bests Lyrics: I love it can’t wait to try my wig on ❤️❤️❤️ but I love urs a lot
Shy Symone: I got my curly frontal wig from Elva hair and it had a weird smell that doesn’t wash out and the frontal is a different texture than the back but both curls are pretty
Glamorous Ace: Dangggg sis, you’re a naturally born gorgeous Queen
Kristin Koyon: I just subbed to ur channel girl!!!!!!! yeassssssssssss ❣ flawless
KJ JEWELRY: Yes girl... this is
Nicole M: I love your lashes. What brand are they?
Cookie O'so Beautiful: Pretty
Ivanna Ellis: amazing!!!!
Yeon: Omg it's a lot of work. I am too lazy to do that.
Ariel Shikoba: Fucking gorgeous!!!!!!
Kristin Koyon: I just hit thumbs up and I hit share and like ...this was great,!
Kasie Kayy: You slayed that
S Edwards: So nice. Please please tell me how did you do your makeup? ;)
Shenequa Chandler: beautiful and talented and I know what that's mean and light weight of showing your talent.beautiful.
beautybrainslogic queen: So pretty stunning aueen
Zoey Jaskson: girl u on fleek
Angela Aguilar: wow thats alot of work but really pretty in the end.
Jay Henderson: You did that girl pow looking like you foreign
Gilda Martinez: Why dint you just tie the hair up so you not flipping it everytime you switch sides
Cynthia Williams: ❤
Sinickas Davis: You're beautiful love your calmness, I'm learning
Tara Douglas: If you look at the thumd nail it shows that she has a clear kind of yellow dress. So kids don't watch this.
Bonnie Sengchareune: How long can you wear it? Can you sleep with it on. How do Wash it,on or off your head.
T boogie wit Da bun: Forget the hair I like those lashes!
my melanin popping: You looked better without the make upbut the make up was cute.
Kristin Koyon: Wow! Sis...nice yo!!!!!
Breakthrough Moment: You would also look really good with an Afro! When black women wear their hair natural, it makes them look even more beautiful. Wear it proudly.
JadaAleesha Mind Expert: Is it human?
TheKremlin: Cute
Browneyez Mzs: Whats her youtube? Make up is so pretty
Sneakers O'toole: You look like LisaRaye to me
daisy guzman soto: And she is pregnant !
Lilean Mitcho:
Shariyah.VIBESSS: I was wondering can u sponsor my next video soon
Tennillie Smith: Not being rude You look like Jordan Craig
Kymberrlie Michelle Cason: Who is this in the video?
ashley hicks: Follow back if I c a quick way every reason the game gets very x no but very cool
daisy guzman soto: Her YouTube is ambre renee
Nat Walls: Natelyn Bae walls
Cinderiy Dusk: Okay.
Vjhh Hhjjj: MORE FAKE HAIRIT WILL NEVER LOOK NATURAL!!!