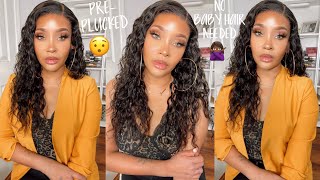
Slay Your T-Part Lace Frontal Wig Like A Pro!| You Need This Wig! Ft. Myshinywigs
- Posted on 30 May, 2021
- T Part Wig
- By Anonymous
Hair in the video: MyShinyWigs
Hair info→Meave | Glueless Undetectable Lace T Part Lace Wig Bob Wig
Shiny Bob Wig →https://bit.ly/2ROKXyj
13x6 Lace Frontal Wig →https://bit.ly/3wMpuF4
Colorful Wig →https://bit.ly/3i1b1Rr
Shop same hair (free shipping) in video→https://bit.ly/3yIy6Oy
Use Code "Alanna" will get $25 OFF
Instagram @myshinywigs →https://www.instagram.com/myshinywigs/...
Contact Us:
website: https://myshinywigs.com/
Email: [email protected]
Follow US:
Instagram: myshinywigs
Youtube: myshinywigs
♡ ♡ ♡ ♡ ♡ ♡ ♡ ♡ ♡ ♡ ♡ ♡ ♡ ♡ ♡ ♡ ♡ ♡♡ ♡ ♡ ♡ ♡ ♡ ♡ ♡ ♡ ♡ ♡
♡ THANK YOU FOR WATCHING! ♡
Hey, loves and welcome back to my channel! In today’s video I show you all how I slay a T-Part wig! Very quick and easy Bleaching knots, plucking hairline, styling, and more! This wig was provided to me by Myshinywigs and I must say this hair is
Thank you all for the love and support it means the world to me
❥ DON’T FORGET TO LIKE, COMMENT & SUBSCRIBE XOXO
Hit that bell to be notified every time I post a new video!
❗️BUSINESS EMAIL (For business inquiries, reviews, and promotions contact)
—————CONNECT WITH ME—————-
♡ Instagram ➔ @llovealanna
♡ Twitter ➔ @llovealanna
♡ Tik Tok ➔ @lovelyalanna
♡ ♡ ♡ ♡ ♡ ♡ ♡ ♡ ♡ ♡ ♡ ♡ ♡ ♡ ♡ ♡ ♡ ♡♡ ♡ ♡ ♡ ♡ ♡ ♡ ♡ ♡ ♡ ♡ ♡
*Watch In 1080p For The Best Quality*
#myshinywigs #tpartwig #tpartlacewig #hairreview
So so, hey my loves and welcome back to my channel if you're new here my name is alana. I'D love you guys to hit the subscribe button down below to become a part of the family, return subscriber hi and welcome back to my channel. So, as you can see my channel today, i'm doing a lace frontal install, but this is a 13.5 t, part wig, and this is a ombre lace wig and you guys i just want to say that i'm so obsessed with this hair, i love how everything came Out i love the color, but i will be talking more about this hair later on video. So if you guys want to see how i got this look here, just continue watching hey my loves and welcome back to my channel. So, as you guys can tell by the title today, i am doing a tea party lace, wig install and this wig was provided to me by my shiny wig, so just want to say thank you to my shiny wigs for sending me over this beautiful teapart wig. This is a 13x5 t-part and it is undetectable swiss lace, 14 inches and it is ombre colored, and i just want to say i love this hair. You guys will hear me say that a million times in this video, this hair was just so soft. It was easy to work with the knots bleached very easily and i honestly have no complaints about this hair. It is a tea party wig, so you guys know what tea part wigs. It is a little more. I guess you can say easy to. I guess install compared to a full lace, frontal and i'm actually really starting to like tea part wigs. So i had no complaints with this hair. I love this hair so much so you guys will like. I said you guys will literally hear me say that a million times in this video - but here i'm just showing you guys and just unboxing the wig from the package and i'm just showing you guys what it came with. I'M just really just trying to show you guys all the specific details of this wig. As of how many combs they came with what the knots look like before bleaching, just basically the overall construction of this wig and it does come with an adjustable strap in the back. That is detachable, which i thought was so amazing, because you guys know those days. You don't want to use glue on your lace. You can always use a strap, an adjustable strap. So here i'm just bleaching my knots and you guys know how that goes. I do this in all my wig videos, i use my 40 volume developer and my bw 2 powder here, i'm just applying that bleach. All over my knots, you guys can kind of see on this t-part wig. The middle parting is a little bit thicker than a lot of my other um tea part wigs that i've had. So i actually really like that here, i'm just showing you guys how it looked after bleaching, and this took to bleaching very well, and i really did love how easy this hair was to work with here. I'M just plucking because with my teapot wigs like i always stay, i always just try to get as much as a natural look as much as possible, even though it is a tea party. So there isn't really much you can pluck, but i just always try my best to just pluck as much as i can just to give me that natural look, because you guys know with my wigs. I always love to get that snatched bomb natural scalp, giving installs. Okay, we want our installs to be close to our real hair as much as possible. Okay, so here i am just plucking plucking plucking and you guys plugging takes me a very long time and i just try my best to show you guys as much as i can of plucking, because it can get repetitive. I mean you're. Just basically doing the same thing over and over again but, like i always say my main tip with plucking, is just not staying in the same spot, because i've done that plenty of times where i've stayed in the same spot with plugging. And i literally get like a huge, bald spot and it's just the worst thing ever so my main tip plucking, like i always say just don't stay in the same spot and you should be good now. Moving on to the styling i use my she is bomb wax stick and i do use my hot comb, and this just helps me get a way flatter look than when i just use my hot comb by itself. Also, the cheese balm wax stick also helps any flyaways that i have, and it just helps, maintain the hair and just gives me that sleek look, which i love and i'm just styling this hair, basically just parting to where i want my hair to be because i Want my middle part to be as flat as possible, so i'm just using these two products here and these two products together y'all. These are like the perfect duo, but i did learn to not use as much wax on my wigs though, because sometimes it can be a little too much and it can kind of wave the hair down. So when i use my sheets bomb wax stick, i do try to lessen the amount of product i use, so you guys will see that here i don't pass it through the hair as much as i do in my past videos. So i just wanted to state that, because sometimes she is bound box, it can definitely weigh down the hair, and i really don't like that. So here i am just using my hat comb and i got this from walmart and just trying to make this as as i guess perfect as i can get it so yeah, it's the lace for me. So at this point i was so excited because this was coming together so well. I was just so happy with how everything was coming out, and i was just i'm just so excited to put this hair on y'all, because this hair is kind of giving me like summer, vibes honestly because of the bob and the length that it is and the Color is amazing, so it's kind of giving me summertime vibes. I was just so excited to install this hair y'all, so here i'm cutting the hair, and i cannot tell you guys how long this took me. I was honestly in my bathroom for hours trying to figure out how to cut it, because i would definitely definitely advise using like a like a razor, not like a razor but like yeah a razor. I guess you can say and just kind of get like a blunt cut, but i don't have a razor, so i just had to use what i had so i just use these scissors and i just try to get this to be as even as possible on Both sides, but i just want to state that this took me hours, but it honestly was well worth it because it did come out really really well. So i'm just showing you guys the color up close how nice the ombre is because it goes it's just perfect. So i'm just showing you guys up close mainly how everything was turning out. So here i'm just installing the wig and i did do a ball cap method and i used my ghostbun glue and now i'm just applying my makeup to my cap here. I'M just i guess, measuring the wig to just make sure um that everything's just aligned, because sometimes the wig cap can be showing so i'm just making sure everything is just kind of lined up. So you guys will see me going a couple times and cut off some extra wig cap, because some pieces kind of like peeking through so i'm just going in and cutting some extra pieces off to kind of just make sure everything is just you can't see it. Basically, i just want everything to blend in because that's my biggest things, my biggest things, what that's just my biggest thing when i do these wig installs, i just want everything to be melted, blended because that's how everything ends up being such an amazing install. So i'm just trying my best to just cut off any extra pieces because, like i said some pieces were just just not working out so here i go again trying to measure the hair. Then i'm going in with my ghost bun glue and i got this from amazon and y'all i was running out - i didn't realize, like i didn't realize, i literally had no glue left in there, so i was using the end of my razor to kind of just Get as much as the glue out as possible because i literally had no glue left, but it's okay, because i ordered some more on amazon, literally like the night before, so it's all good, because everything ended up working out perfectly. So at this point i let my glue dry and i'm just pushing the hair into the glue making sure everything is tacky and that it's not going to move and i'm going to use my razor again to cut off all that extra lace that we do not Need so you guys will see me doing that right here, i'm just going in cutting as close as i can to the hairline as possible, so so i'll, let my lace blend in a little more with this elastic band, i'm just going in with my flat iron. Just fixing any bumps or just any pieces in my hair, just making sure everything is nice and sleek looking. So you guys will see me doing that here and i, like heat, styling, my hair. While my edges are kind of laying down, because it kind of just helps everything just lay down more and gives it more time for everything to settle in all that glue to just be able to melt and dry into your lace. So that's what i'm doing here, as you guys can see. Now i took off my elastic band and we're gon na get started on these baby hairs and yeah, i'm so happy because i finally finally remembered to use my flat iron before doing my baby hairs. I always say that i'm gon na do it and i never remember to do it, but this time i remember to do it, so you guys have seen me here using my flat iron and it honestly made a huge difference like it was just able to help Train the hair kind of go in the direction you want it and it really did make it way easier. So i really really love this tip. I don't know who i got this from, but i've been seeing people doing it all over youtube and i just had to try it and it definitely definitely makes a huge difference. So if you don't flat iron, your baby hairs before fixing them, i definitely would advise doing that because it makes a huge difference. It just kind of just helps the hair just glide into the hair, better, not glide into the hair, but it just helps the baby hairs kind of swoop better into the hair, which it definitely makes a huge difference and i'm so happy. I remembered to do it, so you guys will see me doing that here. I'M just fixing my baby hairs. I didn't do too much baby hairs because i really didn't want that much baby hair, so i just did one at the top, and i just did my sideburns. I just wasn't. I just didn't want to do too much baby hair, so yeah. I will see me doing that and later on, i will talk more about this hair, so i will see you guys in the next few clips, okay guys. So this is a 13x5 t-part wig and this is a lace ombre. It is 14 inches, as you guys saw in the video. I did go in and cut this a little shorter because the length i wasn't really feeling so i did cut it kind of almost like a. I guess. It'S a bob. I just could say it's kind of like olive oil length, which i did go in and cut myself, and i'm just too obsessed with this hair. I honestly have no complaints about this hair. This hair is very soft, even though i did run my flat iron through this hair, a million times it still took to heat very well so flowy, i'm just. I love this hair honestly, you guys and it's the color for me. I never had a wig. This color, so i'm just too obsessed you guys it's kind of like a blonde kind of brown. I don't know it's just too cute, so you guys can see it's kind of goes into like a nice little ombre. The wig did come like this. I didn't do any dyeing bleach the knots, that's why i said i'm bleaching that i did bleach the nuts in this hair, but i didn't dye it this color. It literally came exactly this color. I love how the ombre, nice and neat we've had other wigs in the past, where the dyeing of the hair wasn't too it just wasn't really working, but this hair, you guys, can see it's dyed beautifully like i'm just so obsessed and after i cut this hair, It just became so much more flowy and just just beautiful. I have no complaints about this hair. It'S just beautiful, i'm loving this color on me. I love the blonde. It'S kind of like a it's kind of like a ashy blonde, almost which i love. I feel like it complements my skin tone a lot and i just i'm just so happy with this hair. So this hair is from my shiny wigs and i did send me over this wig. If you guys want to know more information about my shiny wigs, i will have all the information in the description box down below, so you guys can go and get this way, because i'm telling you guys, you will not be disappointed this week is amazing. I'M so obsessed, i just think it's so cool and they sent me this wig. It did come in this cute little packaging and it does have a little hanger on it, and i've never had a packaging like this, and i think this is just so convenient because, obviously, when i'm done with my wig, i can always put it back in this Bag and literally like hang it up, i just thought that was so cute. I'Ve never had a wig come in a package like this, so i just want to say that that was like really cute, but i like that. I have no complaints about this. Hair took to bleaching very well. You guys seen me bleach the knots earlier in the video. I did pluck the hair a little bit and i did cut the hair myself um. I think i did a pretty good job honestly. I really really love the way. This hair came out, and i really hoped you guys enjoyed this video and if you did, please don't forget to like comment and subscribe, and i will see you guys in my next video and if you guys want to go, get this wig. All information will be in the description box down below, because i'm telling you guys, you will not be disappointed with this wig, because this week is just two five to look good in it too, and i'm telling you guys, you need to go get this wig because It is a tea party wig, so that means it kind of is easier to. What'S the word you to install and kind of maintain compared to like a full lace, frontal which i really before i didn't know too much about teapot, wigs, but now working with them more. I kind of do like tea party wigs now, because they're just so easy to manage and really work with it's not too much to bleach, not too much plug. You could literally keep it on your head. The only bad thing is you really can only keep it in the middle part. That'S the only con to tea part, wigs, but other than that i love today's video. I really hope you guys enjoy. Please don't forget to like comment and subscribe and i will see you guys in my next video


Comments
llove alanna: Don’t forget to check out MyShinyWigs all their info will be in description box!
Dee Luther: Great Video QueeN Stunning thumbnail tho Fuckn Baddie Alert You Looking Hella Gorgeous Sexy Makeup Always On Point Happy Sunday Hope you have a Spectacular Productive Week ahead Stay Bless N Be Safe Always
Myshinywigs: So amazing
Andrea Sherrie:
Catherine Jackson: Yesss it’s the long video for me this hair is so bomb you look beautiful I hope I’m not too late commenting you know I enjoy watching your videos that’s never changing I hope that you have a great weekend and be safe