Extremely Detailed U-Part Wig Tutorial For Beginners Ft | Queen Weave Beauty Ltd Body Wave Hair
- Posted on 06 October, 2017
- U Part Wig
- By Anonymous
Instagram: @seunokimi
Foam head: https://amzn.to/3el2Wm8
Wig cap: https://amzn.to/2XyhsBh
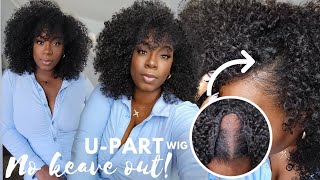
How to make your own U part wig. Very easy, slow, step by step tutorial on how to make a upart wig. This is a side part u part with leave out. The way I demonstrate ensures that your upart wig will not be too big or too small because I use clear packaging tape and cotton balls to make the foam mannequin head the right size. You do not need a measuring tape to measure your head to make sure that your u-part wig fits. All I use was a piece of string and it worked well. I do not have a clamp or stand for my styrofoam mannequin head, so I just taped it down to a stool to work on and it made sewing on to the net weaving cap very easy. This how to tutorial is perfect for beginners, and I mostly used simple materials that I already had laying around the house to make this custom u part wig for myself, so its very possible for anyone to be able to make a upart wig yourself. You can use the same techniques on to swe any hair onto the weaving cap, whether its long, short, in a middle, or a side part. I did not use a spandex dome cap because I wanted my hair to be able to breathe underneath which is important if you want to know how to take care of your hair under a upart wig. I also used needle and thread instead of the hot glue gun method to attach the weft just to make the wig last long. This works with any style, including a bob, a lob, a deep side swoop, long, wavy, curly or straight hair. Styling a part wig is easy. You can also choose to do this style with little leave out or no leave out if you use a lace front closure.
Techniques Shown:
-How to customize a Styrofoam head/ how to make a styrofoam head bigger
-How to work with needle and thread to sew onto a mesh weaving cap
-The Fold Over Method: How to fold the weft over instead of cutting the weft at each row
-How to braid your hair down under a wig
-How to prep hair for a upart wig
-how to blend hair with a wig
-How to install a upart wig - how to sew a upart wig onto your hair
Hair info:
Website: https://www.queen-weave.com/
Body Wave 4 bundle 18/20/22/24
link: https://www.queen-weave.com/brazilianv...
Body Wave Closure Link: https://www.queen-weave.com/brazilianv...
Body Wave Frontal Link: https://www.queen-weave.com/brazilianv...
IG: queenweavebeauty910088
FB: https://www.facebook.com/queenweavebea...
Email: [email protected]
Hair Tools Kit:
https://www.coralbeautysolutions.com/
Height: 5'4
Age:19
Hey guys in today's tutorial I'll be showing you guys how to make a u-part wig, it's gon na be very detailed and step-by-step. So let's just get started so yesterday was the beauty supply store and picked up all the supplies that I will use. So maybe? U part wig you're gon na want a head to make it on. So I just picked up this styrofoam head is like ten dollars. I think we will need. Oh a cap. I picked up two because I can decide which one I was gon na use. The other side today and then, of course, you're gon na need needle and thread to sew to here onto the cap and also you need your hair and the hair that I'm using in this video is from the Aliexpress vendor, cleanweave Beauty. So far, I'm really liking. This here and I'll leave a link to it down below so now, I'm getting into this tutorial, I and first I'm going to measure my head. I don't want like a measuring tape or anything I'm just meeting sistering and see if it's like close to the size of this foam head. Since I look like be transferring the way from this to my head, I want to make sure it is not too big or too small. So I'm just gon na start by measuring my head with this string. So I'm gon na I'm gon na go around from the back just like slightly above my ears and okay, so my hair, my head, is that big around now over get this and see. If it's about the same size, I should have known. I have a big head, so it's actually. My head is a lot bigger than this, so you're going to have to find a way to make this head be closer to the size of my big head. But, or did you try and make the market head a little bit bigger, I'm going to try it using some cotton balls and some tape to wrap around the head and make it bigger, I'm just getting dry tape and then I'm gon na put cotton balls directly Onto the sticky side of the tape feel like this is like an art project or something that should be good enough. So I have that I'm going to get my mannequin head and wrap this around the, and since this head looks significantly smaller than my head. I had to end up wrapping a lot around the head, which I guess is a good thing, because if your head is really small, you're, not gon na have a problem with this head being too big, because, like these foam heads are literally tiny. But if you have either like a more normal to big sized head, then you will probably have to wrap it around, at least a little bit with the cotton balls and the tape wrapping. It will sometimes to try and make it like, and then so I just continue to wrap around until I feel like I smooth down the cotton balls a little bit and then I start adding in more cotton balls in those like empty spaces. As you see when you doing here right now, so I'm just attaching the cotton balls onto the sticky side of the tape and then taping it down and just like smashing the cotton balls in the tape done with it. And then I just continue to wrap it and then flatten those parts down and then I just add more cotton balls as needed, wrap, add cotton balls wrap and I continue to do that until like it gets more round and liked where there's more cotton, balls and Tape evenly like distributed around the head, I'm filling up staff area and I'm not adding more cotton balls for now good. I like this, a little bit more lumpy, but it's also ok for it to be lumpy because you're just trying to get it to be bigger. It doesn't necessarily have to be perfectly smooth like at the moment now, I'm going to measure my head again and see if it's, if I'm on the right track and making this the right size and right now, I'm just measuring my head, which you can't see, because I'M out of the frame, sorry, but so I mark where how big my head is with my fingers and then I'm wrapping it around the mannequin head now and seeing if it's the same size hold on, I got it adjust that yeah, it's like almost perfect. Actually, I'm just gon na wrap a few more layers of tape around this just to make this slightly bigger, so that whatever, because, whenever I break my hair, my head will be slightly bigger than my head is right. Now it won't be like everything is just laying flat like my hairs now, I'm just gon na wrap this I'm also gon na be trying to even it out as I'm wrapping, but it is still kinda lumpy. I also forgot. I want to measure it from front to back as well to see if it fits that way. So you guys can't see my face, but I'm measuring my my head perfect continues. There'S a few more layers, you can everything and I prefer using tape and cotton balls as opposed to just wrapping the head around the tape, like some people do because, as you guys saw in the beginning, this head was a lot smaller than my head. So if I was wrapping it around with only tape, I would have to gone through layers and layers of tape, which would probably require more than just one roll of tape, but using the cotton balls makes this process faster and saves tape. Now I'm just trying to make it possible, it honestly doesn't actually perfect smooth times. One cannot be too bumpy. Okay, I think so, once I'm done making the head bigger, I can finally go on to actually making the wig so not too leaving or two way caps and I'm not sure when I want to use I'm just gon na open them both up this one is Like see this, this one's like deluxe weaving cap and it's more well done I'll, open it. This is what it looks like it has like that's like um, where they called straps and things like that, and then the other cap I have that I bought is it's just like a mesh than even you, a cap. You see it looks like, and it looks like this. Okay, that's how you're winning is the other one. This one looks very flimsy, which yeah I think this one, this one's more sturdy, so I'll go with this, but I um I wanted to pick out one that had holes in it like this. That was more of like a net, because I want my my hair to be able to breathe underneath. So that's why I didn't get like um like a spandex cap or anything like that, so I'm liking this. It doesn't really stretch as much as the other one, but that should be okay. I just have to be get more careful with my measurements, okay. Well, that fits my head like perfectly so so now, I'm going to put it on my my head, okay and now so I'm getting ready to sow so I'm just threading the needle make it pretty long. So don't have to sorry. I wasn't speaking in full sentences. I guess, though, saying or I try to get out the fact that I'm I try to make them pretty long so that I don't have to stop and we've tried. So often I think there's an I stop saying. That is because I made this one short on purpose for demonstration purposes. Just I could more easily show you a little your thing so uh never mind. So, yes, you did thread the needle and you make a knot at the end and then you cut off the little part after the knot with scissors, but generally the longer the thread and more convenient. Because you don't you keep on three threading. But you don't want to make it too long, because if your thread is too long it just it's harder to work with, sometimes in a contango and so yeah just do it works best where you start from here, so I'm going to grab the needle and I'm Going to put it through the left, I only put the needle through the left for them when I'm starting it off, just because putting it through the weft can make. It can weaken the left. But I want to make sure that this is extra security for the at least when I'm starting off this. So I'm going to start sewing onto this part, and now the left is hanging from the thread I'm just going to sew onto the edge of the wig cap like so I'm going to pull that up except before pulling it all the way back up. I'M going to pull the thread back out from the other side of the weft, like that. You can see I'm going to open up the thread from here, I'm going to open it up and then I'm going to put this through this loop. So that and not will form and it will hold it up - I'm going to put it in like that and then just pull it up and then there you go. It stays in place so that just makes sure that everything is extra secure, because I do plan on reusing this multiple times. I just want to make sure it's nice and secure, so I'm just gon na go ahead and sew this on to the perimeter of this. Then, as I continue to so I just go under the weft and through that little thick black and of the weaving net, and then I loop the thread once and then I just repeat so. I go not through the weft under the left and then through that black band on the edge of the cap, and then I loop it and then I repeat, just looping the needle and the thread. Then, whenever I get to the end of the thread, as you can see this one's running out, I loop it around like three times to get excessive here and then I cut the thread to remove the needle, but I don't cut it too close, because I want Some thread left, so I can form a knot to make it extra secure. So I just tie it once sometimes twice to make the knot and then after I make the knot, I just cut off that little excess string left and then so I'm ready for a new thread. So I just thread a new needle, like I said before. If you make your threads longer, you won't have to do this house opt-ins yeah, so you just thread the needle and then begin the same process. So I'll show you again putting the needle under the weft and through the edge of the cap, then I'm opening up the thread and tooling the needle through and see it's kind of long, so good be sure the thread doesn't tinkle in the process. Then you do it again going under the weft and through the edge of the band, and then you loop, it out drown, and you continue to do that over and over again and sometimes a bit twice sometimes just once. It really just depends on how I'm feeling, honestly it doesn't relieve, but you can do it once you can do it to place price makes it extra secure, but it's also just it's an extra step that can make it take longer. The yeah talk to you. Oh yeah, so anyway, so it's getting kind of hard working with the phone head in my lap or like on the table not attached to anything. So what I decided to do - let's tape it on to like this stool, that I have laying around the house, because I don't have one of those like fancy - clamp things for your foam heads like some people do so I just had to make dudes what I Had around so I went ahead and taped the foam head to this stool and now because the net was also moving around so right now, I'm just sewing like one stitch like two, so the net onto the foam head, because I also don't have what do they Call pins so like I'm just trying to like make this work, that's just using what I have with me to make this easier, so yeah, if you don't have pins just so the the cap on that's long head like just it's okay, it works pretty! Well! Actually! So, just that one stitch was enough to keep it in place throughout the whole process of me sewing it's odd, but you can go ahead and stitch it like in the back too, if you wanted to to make it extra secure, but I mean that was enough For me and then so now, I'm just going to continue yeah, so this stool. The reason why you can see me like being able to spin it around is because I put it on top of a spinny chair, so it made it really convenient to be able to spin around. But if you don't have a spinning chair, you can just like walk around the head too, but yeah there's nice little makeshift setup that I did came up with on the spot. So I'm just continue to go around. I'M just continuing to go around the edge of the cap and so directly on to the edge of the cap when so underneath this drop is just on to the next just below it just so I don't mess up like this truck. I don't think I'll use the shop. I still want to be able to use it in case. So now I'm gon na continue just sewing along the perimeter. The only time that you're gon na do something different is once you reach the end of where you want to sew so, like I've reached the section of where I want to have my leap out so now, I'm just gon na show you what I do differently Here at the edge to sew the left onto the wig cap so before I flip the hair back over because I won't be cutting the hair at all in this installation, I'm going to loop it around like for three or four times and make sure that that Knot is pretty secure and then I'm going to fold it back like so and now I'm just going to continue the cell in the same manner and the reason I did a couple extra loops before I flipped it over was so that it can lay as flat As possible, because you don't want it to be like clumpy every time you had to flip over the weft and so you're gon na continue to do the same process as before. But it is a little bit different now since you're, not at the edge of the cap. So what I do is I, like sly, my finger up under there and use my finger to prop the net up above so I'm not sewing on to the styrofoam later on, though I got more comfortable with just sewing onto the neck, without accidentally getting the styrofoam With it - and I didn't have to use my finger but like at the beginning, feel free to use your finger to help, you prop the net up off of the sky and yeah. So I just keep on going until I run out of thread which is about now and I cut off the needle and tie it once or twice to make it secure. And then I cut off the excess string and repeat the same process back in Port. And that's: I'm sewing I'm not sewing onto this truck, I'm just showing onto the net above it and, as you can tell here, I am sewing these webs pretty close together and I like to sew the left close together at the very bottom and at the top And in the middle I spaced them out a little bit more and the reason why I like to make them closer at the bottom is so that since the bottom has the longest here, I want to get like the fullest of the link. So I want. I don't want to sew the webs too high up and make it shorter, so I want to like have all the long pieces be as long as they actually are, so I'm not going to go all the way up. I'M gon na go ahead and fold it over now so that I can fill in the back before I fold it over I'm going to knot it and triple knot it so that it can lay as flat as possible when it slipped okay. So now I'm going to flip it over and I'm going to go ahead and double left it from here. So all I did was fold it fold it in half and I'm going to sew this down. So this piece down to that other piece. I'M just doing this to make this process go by faster. I didn't double knot it from the beginning, because I wanted it to be flat along the perimeter, but now that I'm not working on the perimeter, I can do this. I can double the left. Doubling the web's here also helps keep these this longer bundle closer to the bottom of the wig and like keeps it long, and you see how much faster double lefting makes it like. I'M already almost done with this entire bundle. So now I'm just flipping it over again and sewing down this last few tracks that I have left just using the same method. I showed you earlier with the fold-over method, making sure you like triple knot it to make it secure before you flip it over. Just to make sure it's flat, especially since this is double wefted, you want to make sure that it is still flat, but then, once you have sewn it down, you can move on to the next weft, I'm just using the same needle like you. Don'T have to use a new needle for a new left or anything, so I just went through like I actually went through the actual wet for this new weft. To start it off just the same way how I went through the actual left to start off the first bundle. So, as you can see me here, trying to pick it back up, I think it fell but see yeah. As you can see. This is also double wefted. All I did was fold it in half and I am sewing and that whatever I sewed through the web, sighs OH layers of the left, and now I'm not sewing through the left - I'm just sewing under the left and so with now. I'M starting to space the wefts a little hat like add a little bit more space in between the webs. Now that I'm approaching the middle, and from here on out like especially for this middle section, it's a very repetitive process. It'S just the same thing back and forth and go one side you secure it flip it over go to the other side. So that's just all I'm doing here for this middle section, as you can see, it's getting almost finished. Just me going back and forth by now, I had moved on to the third bundled and I attach the third bundle the same way I attached the second bundle just going through it when I started it off and for this third bundle we actually lime. I think this is definitely the fourth bundle, so in this whole install I use four bundles, so in that middle section that I like moved quickly through since it's very repetitive, I did go through two more bundles, so this is a fourth bundle. I double wefted. The second and the third bundle, but this fourth bundle I did not double wet just so that it can lay as last possible on the top. So I'm always just sewing the tracks, like I guess, in a u-shaped motion going up and up and as I am getting finished, I'm moving closer to the section of my leave out. So at this point I'm basically just sewing onto like the edge of like where I started that first perimeter of weft and I'm sewing back and forth just until I fill in this section. So I'm basically just eyeballing where I want my part to be. If you want to be more like precise about this, all, definitely like actually measure where you want your bleed out to be and how much lis that you want and how far back you want it to go because like if I had to redo this, I would Actually, measured out where I want my leave out to be exactly, I made my part area go back too far, so I mean it wasn't like that big of a problem or like anything but like if I like had to choose, I wouldn't have made my move Out go back that far just so, I wouldn't have to leave out that much cleanup, so yeah, that's definitely like um. Some advice for you guys is just to like actually measure out where you want your leave out to be, and not just eyeball it like. I am doing right now and so this West didn't make it all the way up to the other end. But that's okay, because I am finally finished now, so I'm just cutting off the thread and tying it and voila. So once you're done, you can just remove the wig from the head. I just cut off the little stitch that I had like attaching it to the head yeah. This is how it looks. I am so proud of this. I feel like it looks like an actual wig but yeah. So once you have that you can just go ahead and cut off that um remaining piece of lace in the middle, and you want to be very careful as you're doing this, because you want to cut off all the lace that's showing. But you don't want to cut the actual the Reds holding your wig together and here I'm just getting into the part where I'm preparing to braid my hair down for this u-part wig, because I'm planning on keeping this in for a while. So I am just gon na braid, my hair, as if, like I'm doing dis irregular, so it so I'm just gon na quickly show you my braiding pattern that I use for under you part wigs is pretty simple. I just do two like anchor braids, going straight back right along my leave out, and this was actually my second attempt at braiding, because the first birds that I braided did not go far back enough, because I just didn't leave out enough leave out like I didn't. Have my leave out go far back enough, so that just goes just say that um make sure you test that you left out the right amount of leave out by placing your wig on just braiding those two anchor braids, so that you don't have to redo the Whole thing later, it's easier to have to redo those two anchor braids. If you didn't section out the right amount of leave out and I did decide to leave out just a tiny bit of hair sort of from the perimeter, you can leave off all of your perimeters. None of your perimeters, it's up to you! So now, I'm just gon na quickly show you the rest of this braiding pattern. It'S very simple, I'm just after I braid those two anchor braids going straight back and connect them. I just braid braids going down and into the middle like so and as you can tell, these are by no means neat braids at all they're, just braids I just wanted to quickly get in. So I could have my hair out of the way and I could put this wig on, but they're still good enough to last me like the two months I plan on keeping them in and once I get to that part where I had my anchor braids. I just connected them and braided them down in the same way, I'm braiding down the other braids, and then I just decided to do one big braid to finish off the end of Ella and by the way, if you're wondering how I grew my hair, this long, You can check out this video up in the right-hand corner yeah. I am finally done with the braiding pattern. I I just made this really quick. They aren't very good right grace. I said earlier, but now what I'm doing is. I am just like sticking them in between each other and between the gaps and I'm sewing them down, making sure to sew them down like as they lay in between the gaps. So so you just stick the noodle up under all of the braids that you want to get and then, instead of like pulling the needle all the way through before you pull all the way through open up the thread and stick the needle through that thread. So that it forms like a little like not that encompasses all of the braids and then once you do that once you just continue kneeling the needle through the braids and looping as you go as I'm showing you right now and yeah, that's how you just sew Down the brace and then once you finish, sewing down your braids. You are finally going to be ready to put your you part on so next, I'm just gon na show you guys how I attach my new part to my head and I sew my part down. I do not use Clips, you can use Clips, but I prefer to just sew it down and so so that you part down I'm just starting from like one of the corners and I'm sticking the needle through the wig and then type of stitch suck it through. I'M singing it through the beginning of that first anchor braid so that they connect to each other. As you see me do here, and then I continue sewing and the process of sewing on two braids is the exact same way. I showed you when I was just sewing onto the wig cap. It'S the same looping process except now, instead of going through a net you're going through your braid, so that's just all I'm doing to braid or to sew along this anchor braid and then once I finish sewing onto this anchor braid going around, I start to sew Along the perimeter - and those are the only pieces, were I sewed the wig on just along the anchor brace here at the top and the primitive rates so yeah. Now I'm just sewing along the permanent roads, just making sure to show you everything that I'm doing just to make this video as detailed as possible. Even though this video is gon na be really light, I have a feeling but yeah. This is just exactly what I'm doing just like moving the leg and sewing it down and, as you can tell it like fit so well, and that is because um one because of the way I did the mannequin head making sure to like make it the same Size as my head and to make it was because I, after I braided those two anchor braids, I put the wig on and made sure that the way I bring in my hair would fit the wig like that. I left out the right amount and leave out but yeah, so that's why it fits so perfectly in here I am finishing up the last few stitches and yeah. This is so it's I'm so excited. I think this turned out really really really well. It lays super flat. Everything is so nice, like a real so in, but this is a you part that I can reuse. It'S like a reusable so and that's what that's, how I think of you parts but yeah. This is how it looks. I'M just showing to you it from different angles as a guitar lays so flat and a tiny bit of hair. I left out around the sort of perimeter, allows me to have my little side scoop here from queenly Beauty off of Aliexpress. This is actually the longest here. I'Ve ever had. I'M really feeling this here and my cheeks hurt from smiling so much in this video that I really enjoyed making for you guys I really do enjoy making these it is for you guys. I hope you guys enjoy them too, but yes, that visit. Thank you for watching and I'll see you the next one.


Comments
leesway: This is super DIY! It's a real example of not needing every material to get started on something and to trust your ability to improvise and get it done.
Rachel: You have such a great way of explaining things! Love your video hun
Ada67: Her personality is so nice most YouTube gurus be doin too much and they’re just not interpersonal at all ...
Mataya H.: This is my favorite hair! I’ve been ordering this hair for years . I wish they would send me some free hair
loveanpeace4eva: You did a wonderful job! It looks sooo good and natural! I am doing my first wig head now! Also, you are GORGEOUS! Great work! You earned a new Sub :)
bobomee: your natural hair looks great
ms.chelle: Thanks, i learned some different skills to make it easier to do my next you part. Beautiful results.
Karla Agee-Seldon: That's beautiful little queen, proud of you.
Kisha George: Wow this looks amazing sending this to my hairdresser. GREAT JOB x
ForeverFarrah: Very detailed! This was so useful, I picked up some great tips
Latena Ross: This was very detailed and helpful
Sunflower Bae: Wow thanks for making this detailed video it was good
Ny…ny: Great job always be yourself I love it
Nina Doncheva: you are one of the best people I've seen on youtube doing things like this , I am wondering if all those tips and techniques can be used on a caucasian/ european hair ? Which do you think it's better for european hair , a saw in weave or a u- part wig ? I am trying to grow my hair out , it's just above the shoulder , I want to do either a weave or a wig I just don't know whcih one it's best for my type of hair since it's not as coarse as black people's hair. Thank you <3
Happy Lady: Great video, thanks for teaching!!!
denym42: great video very easy to understand and follow the steps thank you for your time
Șerban Gabriela: Very helpful video. You explain so good step by step all. Thankyou very much. Have a beautiful Friday and weekend. Love❤❤ you
projectbeutay: Hi, just curious how you began to sew the perimeter track to achieve the sort of flipped up angle at minute 30 and 34 seconds. Did you sew it differently than the other tracks? It seems upside down.
Linda Darling: Girl you have an infectious smile.
Joyce Herrington: another way you can measure your cap, if you don't have cotton balls and tape, is to put your wig cap on your head first and draw where you want you leave out, put it on the foam cap and start sewing. No matter the size of the foam head, your wig cap be a perfect measurement for you.
30deblanc: Turned out pretty, what is your long term care for your hair and the wig?
Sharon Osei: Omg I loved this video
Judah Daniel: Best tutorial ever!
Dana Johnson: You are awesome!
MeSoVegan: good job sis!!!!!!!
Hope: Omfg your beauty store is robbing u!!those styrofoam heads are like .50c!! Gheez $10 is highway robbery!!
Nadine Aldridge: Great job love it....
Rachel Bryant: Very nice and detailed video! How long did this take you?
Raini Lew: You are so damn smart lol thanks for the tips!!! Great video!
Queen Adora: girl this looks good but you paid to much for a foam head its like 4.99 here in ny
Deajani.Nicolee: So with a u part wig I could wear it a side or middle part? Or is it a different way you sew it on the cap for a middle part?
Val: How many times can you reuse this upart wig if you were to install it as a sew-in each install?
Qara Anna: Wow. You are so helpful. Thanks for sharing.
nyx: You remind me of a cheetah with your cute square button nose and almond eyes. You're so pretty !
Kitty wuvscissors: That turned out gorgeous
traci shirley: Thanks, I'll definitely try that. I like it.
TheLandIsGreen: I understood the going under and pulling the other end of the thread open to put the thread through. Is that what you mean by looping in the rest of the video or you were just wrapping it around and pulling. I got lost there
Pinkpetals 83: Your natural hair is Gorg!!....no need for the wig but great video! Your personality is shinning!
Nyesha Mayers: I am sure you figured this out since this video, but you can wrap plastic wrap too...great videos, love the quality...no unnecessary talking...straight to the point and professional...love..love.love....
Zena McFarland: When it's time to take it down, how do you make you cutting the thread, and not your hair (since they are the same color)?
Terri Harlan: Best video!
sweetcountrybear: Awesome vid thank you!
Zakkiyyah Id-Deen: Even though you wore it as a side part was it created with a center part? Does the part position matter when making the wig?
J G: Ur hair is naturally nice and long
The_ Koo: A styrofoam head is usually a 21/21.5 small, you need to get sawdust heads. They come in all sizes and you’ll be able to find one in your size. You also need a mount to hold the head in place. The head is going all over the place. My fav is a tripod stand that I can work standing or sitting
The Real JanahMonae: you did a great job
The Mask Lady: I was going to say Wow.........to ur hair,At first I thought it was extension but omo Yoruba u get hair,Am so watching that hair tutorial,i trimmed off a huge chunks of my hair in 2012 n ever since,it either it breaks every time I loose my braid or weave,it is till neck length,i love long hair,nice tutorial though
Meek Spears: Shoot your REAL hair is pretty & damn near longer than the wig wow
Shaniqua J: Can this be achieved with short hair . I made one before but the sides kept coming through I guess because my hair is thin
LaShondra Robinson: How do you wash your hair? Do you cut out and reattach when done washing and conditioning?
Tisha Hart: foam head 3.99 in nj
Amanda K: Your real hair is beautiful though
Natasha Peart: First to like... Looks great
favour chigazu: who else was looking at her fine dentition
Beautician Bourne: very pretty girl
Dr. Mimi: nice one
Lee Lee Bytch: When I did this my cap was tighter than when I started idk wtf I did wrong lol
Adrian Wilson: gir ypu did that
Ana De Assis: Ok
Ruth gebreyes: Do you still have the wig ? Can I buy it off you ?
Angela Smith: Hi friend I misses u
jane doe: yes this is truly beginners your camera is not focused I CAN"T !!!!!!!!! NEXT