How I Achieve A Flat V/ U Part Wig: Start To Finish Application
- Posted on 16 June, 2016
- U Part Wig
- By Anonymous
READ DESCRIPTION for DETAILS!
Watch in 1080p HD!
Contact Inquiry: [email protected]
Hey Beauties!!!!
Welcome back to my channel..
HOW I MAKE MY U/V Part Wigs: Tutorial
https://www.youtube.com/watch?v=szYYGO...
This hair’s Update Review:
https://www.youtube.com/watch?v=24pzx2...
This hair’s initial review:
https://www.youtube.com/watch?v=pMJpim...
Hair featured details:
VIP Beauty Hair: (video start time: )
7A Peruvian Straight Hair 20 22 24 24
Price: $158.73
Hair Link: http://www.aliexpress.com/store/produc...
Store Link: http://www.aliexpress.com/store/527560...
All Products Used in Video:
Conair Infiniti Pro 259Y Blow Dryer
Silk Elements MegaSilk Olive Oil Heat Protectant Spray
Weaving Thread
Curved Thread
CHI Flat Iron
Diane Straightening Brush (Amazon)
CHI Keratin Silk Infusion
In that case, I hope you all ENJOY! :)
Thanks For Watching!!!
..... don't forget to Like, Comment & SUBSCRIBE!
Inquiry Contact: [email protected]
INSTAGRAM: Chrissycous
TWITTER: Chrissycous
SNAPCHAT: Chrissycous
FACEBOOK: Chrissycous
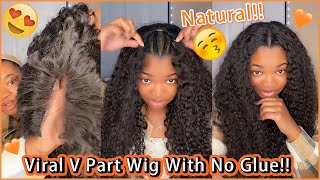
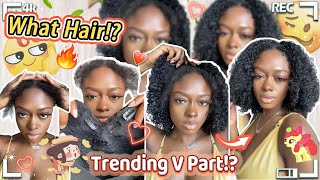
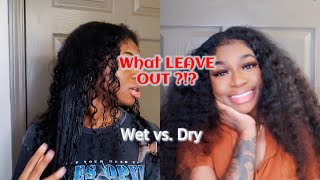
Hey dolls and welcome back to my channel, so today's video is going to be on how I lay and apply my wigs from start to finish. So if you all are interested in seeing how I do sell just keep on watching, ok, so the first thing, of course, I'm going to do is blow dry, my hair, as straight as I can get it and I'm using my con hair flat-ironed. All of that will be linked in the description box below so check that out, and I just try to get it as smooth as possible just to have it smooth and flat and all that stuff, and then I go into making my part. This will be a middle V, part wig, so I'm parting, my hair, and how much you leave out. I want and then we're going to get to braiding. So then you're going to start the braiding process, and I just want to mention beforehand that I am NOT a breeder, I'm not a pro grader. This is just my method. I learned from just constantly just braiding my hair for my you parts and it just got better over time, but sometimes I still don't know what I'm doing, but it's working and it's flat and tight. So I'm sticking with this, but as you can see, this is my anchor braid. This is what my wig will be holding on to, so I just want to make it as neat and flat as possible, because this is the base for my weight, and I just want you all to see how I'm going to do this right here. So I'm going to connect the first braid and merge it into the second braid just so it can have a flat base. So, instead of just showing multiple braids down, I'm just going to connect the previous one to the next one. So, as you can see, I put the first braid into and linked it with the second one and then just continue. Braiding like you did the first one and then just continue to join that on this half of your head. So once you go to the next braid you're going to get the tail from this braid and just link it with that one and then the next one you're going to link it again and that's just going to give you a flat base and that's the easiest Thing that I can think of right now and it's working for me, so that's just what I go with it as you can see. This is the finished result, and this is one half of my head. I'M going to do the exact same thing to the other side. Okay, so, as you can see, this is the finished result of both sides of my head and, as you can see, there are two tails. So now I'm going to show you how to sew it down and you can use a black or brown thread. I chose to use Brown this time and a curved needle - and this part is super easy, as you can see. All I did was flip that first tail to the opposite side of my head and it's just when I make it super flat and I sew it tightly down just making sure it's secure and then I'm gon na just keep sewing upwards until you see that little Part sticking up is sewn flat down and then I'm just going to do the exact same thing to the other side. It'S pretty much self-explanatory. If you just watch what I'm doing it's not hard at all, so I'm just going to let you all watch and see how I do this and then you can get a general idea. You and another way to just get your bass superflat just make sure that you're pulling that brain super tight on the other side of your head to slow it down, because if you slow it down loosely it's going to be lumpy and then, when you apply your Wig it's going to have like bumps in the back and your nape area. You don't want that. You want it to lay as flat as possible, and this is the finished result. It'S super flat. It'S laying so well. I actually love this method better than the tiny, tiny braids, because it's easy to take out also, but, as you can see, my hair is brown right here. So yeah, I'm just going to show you all that I did dye my leave out black and this is the wig. I just cut all of the extra mesh cap off just to get it to fit perfectly on my head, and you see how perfectly my wig just fits so nicely and snug on my head, like it's just a perfect fit and look how flat it is. So now we're going to sew the wig onto our base, braids and you're, going to sew it through the cap and make sure that it goes into the braid under the cap. To just make sure it's super secure and your wig won't go anywhere and also be sure to secure your first time going through the wig into the braid, with a knot and you're just going to keep doing that onto the other side and just comb out any Flyaways, so it won't get caught into your thread and you will have a flat surface throughout the entire thing, and this part is also self-explanatory. So you can just see how I do this and I forgot to mention that I am pulling the needle through the thread. So when there's a hole right here, as you can see, I'm pulling it through that hole and it just gives it an extra look and also extra security. So your wig won't go anywhere and once we're done sewing the top part, we're just going to show these edges down and we're going to do this the exact same way, but I'm just not going to sew it. As close like, I did at the top because it's already pretty secure. I just want to make sure that in case the wind blows you won't be able to see my braids, so I'm just sewing this down flat also and by that anchor braid being super tiny in the front. It makes it super flat as possible and that's what I love about this technique and just continue doing this until you reach the back of your hair and then just cut the ends of all the loose thread that you have back there and then you're going to See the end result of this process and, as you can see now, we're finished with the installation process and now we're just going to blend my natural hair with weave. So I want to use my Qi iron and I want to use the chase method. This is the only way I can get my natural hair super straight, and the only thing I put in my nature here was cheese. Keratin, silk infusion in this stuff is just the bomb it works wonders it makes my hair so silky and it blends perfectly with the weave. You all will see that in the end and as you can see, it just looks so flawless. I just love it. So much so I'm just going to do that to one side of my head and then I'm going to brush it down and press it down, just to make sure lays flat, and you can see the difference from side to side and then I'm going to do The exact same thing to the other side, okay and now back to the lead. So now we're going to try to get this hair as bonus tree as possible, as you can see, is super fluffy and has so much luster, which I love. But it's not going to work with bone straight leave out in this big poof ball here. So I want to do the exact same thing and I want to use the chase method. I don't have any type of product in this hair. All I did to the hair was wash and condition it with my Aussie seven and one conditioner and in the Aussie moist shampoo. So that's all I did to the hair no product whatsoever. So it's super weightless is not there's no product to wait a hair down. That'S how I like my hair, because once you start putting product in it starts getting crazy and just sticky and dirty, and I don't have the time for that. So no product is the way for me for now. So it's working and I'm just going to continue doing that throughout my entire head and just get it as straight as possible with one to two passes and you will see the results of that and I kind of just wanted to sneak in how I bone straight. My hair in this video, but if you all, want a more in-depth video um just on the flat iron, my hair bone straight. Just let me know in the comment section below and as you can see, this is the result I got from just chasing it with the flat iron and brush. What'S the one to two passes and it's so pretty, I absolutely love it, and here I'm showing you how I flamed my face with some layers. I am NOT a pro at all. I just kind of chopped up a lot of people were asking me in my previous video was that the length of the hair, or was it layers that I cut in? As you can see, it is layers and you can enough see the difference and also I wanted to kind of give it more of a blunt cut. I didn't want the straight ends at the bottom, so I also trimmed the ends of the hair, and this right here is the wonder product in this video to kind of help. My natural hair have a little bit more longevity to last, with the leave a little better and just to have it blend and have that silky finish and then I'm just going to go back with my chi horn and flatten that out to give it just a Flawless finish and just be sure to comb everything together, just to make sure everything blends and has the same looks, and then you will have this when this was my finishing look, it was super easy. This is my routine when I want to straighten my weave um. If you all have any questions or concerns, leave it in the comment section below or you can ask me on Twitter and snapchat. Thank you all so much for watching. I love you all. So much don't forget to Like comment and subscribe and I will see you all in my next video bye, guys.

Comments
Nakira Tiara: She's honestly my favorite YouTuber ! She works so hard and her content is so good!
Pitts Twins: Yassssssss hair is Flawless
ACRK: Great job! Instead of sewing it down have you tried sewing clip onto the wig so you can take it on and off whenever?
Lola anibaba: This was an amazing tutorial. Thank you so much! Definitely helped me do a U part. Im getting tired of sewing each track down. Thanks again and keep doing what you are doing.
Shawn Plus One: Absolutely beautiful just flawless we have similar hair types and length I can't wait to make this wig.
Monica Lewinsky: girl you are just so pretty and your videos are always informative, i can really tell you really take your time with them. i appreciate that
Coley Coleee: I love watching her videos it's so relaxing
Blessed Person: thanks so much. you made it so simple!!!!!!! I spent all day looking for something like this because I'm planning on making allot of wigs to have different looks. Grl god bless you. I'm so happy I pressed play
A Girls Ambition: Everytime I try to corn row my hair myself, it is a hot mess, I guess I will just keep trying because your braids came out really well.
ReRe83 R: Thank you for this video. I have been looking for a braiding pattern for a u part wig. it's fit me perfectly.
Ebynie LaShay: this hair is soooo beautiful! you're sooo beautiful! i've been wanting to try wigs to give my natural hair a break but I probably wouldn't be able to do this. you make it look so easy!
LexxSharde ': The hair is beautiful. You should do a video on how you take care of your wigs and your hair under the wigs.
Emani Jenkins: Omg this just helped so much, I'm about to get this done to my hair and I had no idea how it worked!
1947dhammond: Lovely video and a fantastic job! However, you made everything seem too easy. How tempting!
Starring Shameka : I love this!!! Your wig turned out so nicely!
Cray Zeez: Now that's...how you blend a weave
BeautifulDisaster: This is so flawless!!
Judith Enu: Why haven't I been subscribed to you all this while?! You're def one of my faves.
keisha vanessa: This was sooo interesting! As someone who has never had a weave I found it so informative! You're super talented and u must save a fortune as u can do you're hair yourself x
JADIAH JACK: every time i watch your videos I learn something new.. lol i literally have bundles of weave just sitting around my house and never thought to make a wig! You really inspire me, im going to try to make one and send you pictures.❤️❤️
Marie Reay: I love this video. I will definitely try this method in the next month when I sew in my u part wig
Natural Beth: you make me wanna buy my first wig and try to do it myself
Tonisha R.: Your really one of my fav YouTubers now❤️..I love every video you do!!!
Bridget: Wow this went up fast! Thank you girl!
Taylor Parker: Love this
Miss Baker: how do you make your upart wigs, I would love to see a video on that
Blandine: you don't know how excited I got! love you!!
Picaboo76: Love this install❤️❤️❤️
Bree Braxton: I really love all your hair videos!!
Ashley Britt: Love the look keep up the good work !!!
Jermeyah Beauty: Do the nails make it harder for you to braid? I always end up getting my nails taken off before I do any braiding and it sucks !
Crystal Diamond: wow, this gave me a whole new outlook on wigs because last time i tried to make one i think i bought the wrong type of cap and it couldnt fit on my head at all and i basically gave up on trying again .. but thank you so much for this tutorial yu look gorgeous
Rae Rash: Your braids are fine ! For braiding on yourself they look good
Sandy Moreno: Amazing I love it
Harry Styles: Can you do a video on how you wash your wigs? Please?
LifeWith Tobi: I love the finished look
Betterme4lf: great video how do you keep wig part from slippin back or to side away from part on your head? I've tried bobby pins.. & elastic bands give me a headache..
HeyyJade: I want to use this braiding style for my U part wig, but if I want to switch to a full wig, can I just braid down the leave out? Or will I need a whole new braid down for a full wig?
Jakaria Edwards: I get my hair like this all the time & it's simple & time consuming.
A. Alexis: Tfs! Btw your hair looks healthy and nice.
tonifab01: first vid to show the entire sew in process. thankyou!
Jasminn Yvonn: Soo pretty ❤️❤️
Maya Ramirez: Hair looks so silky!❤️
Lucy Tommy: This is no crazy glue. You looking good. I am glad I watched your ideas. Thanks
Prissy Krissy: I love your nails!
Kayla Tulloch: I'm new at weaves and I think I might wanted to try one. I wanted to see if a weave/sew in is the same thing as a wig
KP: That flat iron is so cute
Its NoVee: I love you & your videos. & I was wondering what kind of camera do you use ?
Brianna Jaliyah: This exactly how I do my hair
BrownBeatss: I love this,, so pretty Going to do this. New subscriber ❤
Bernelle J.B: how long do you usually leave your u parts in for ?
iheart Cocodior: Chrissy just dropped another one (in my Khaled voice) yassssss :) lol at work watching this on my break
Jasmine Coram: You have the best videos on YouTube omgg!!!❤️
Lexi L: Can you do a video of how you made the wig including all supplied (for beginners) please this look is flawless
LovingMG: Love it lol , Yasss new subieee !
Sabria Jones: love this. so informative
Nunu Marie: you are seriously so stunning
Stacy: Girl i love it!
Marissa E: omg yes!! you did that!!! thank you!!
Amanda Pasmore: Love this video...What kind of wig cap do you use and do u cut the side off the wig cap???
Lele Chiduba: Stunning!!
Amiya Wilson: Can you do a tutorial on straightening curly/deep wave hair?!
Main Stream: I wish you had a video showing us how you made this, V- Part wig
The Truth: Very beautiful.
Latarna Mcsheen: can you make a tutorial on how you made your v-part wigs please
Tranise Grant: You're soooo beautiful
Quita: so pretty
Lulu: amazinggggg! did you make the wig yourself?
Arianna: wow this is so coooool..im 14 and im gonna try this on my mom..yay
Jayla Red: It's so flat a easy to do
Allie Mitchell: once again you slayed lol i don't even use that word but you definitely did!!!
Rissa Stacks: Did you make this wig? If so can you do a video on how you make your wigs. Thanks
amberatta faulkner: can make a video on how you make your v-part wigs please and love this video
Ashy Lee: That hair is everything
Mahogany G: Yesss girl you better
Cee Jay: Yassss girl I was waiting for this lol!! Good job boo! ❤️
Carmen Luna: You are so pretty
Nona Morton: your natural hair is life!
C.E SWEETS: You are the Bomb ❤
Chanell Victoria: can you please show a video on how you made your middle part wig please?
Fey T.: I was unsure about getting this hair with a middle part, but I am definitely getting it now! Loved this video so much!
lovesme24: your real hair is gorgeous and so is the wig u made and the bundles too
Teresa Vu: perfect hair!
si759: is there a tutorial on how to make this middle part wig?
NashayMarie 25: Cast iron flat iron that you have to put in the stove will get your natural hair straight
Dionna R: Omg this video was soooo helpful, new sub here
Catherine Z: You are so good and pretty~~
Tamara Jones: Wow goals!!!
TheHareLife: L A I D
Angel H: Never seen a person use 2 flat irons at the same time
D.Chris-Cherie:
nancy breaux: Your natural hair is awesome.
Too Much: I love it girl!! You did that
mariaj985: Damn this woman is beautiful
GPA _: salutbelle vidéo merci.
Cammy S: I want a U Part wig now
tamara gabriella: loved this videoo
Lyric Desuze: What camera do you use ? I wanna start a channel but I don't know what camera to get
Jasmine Carter: Would You Recommend This Wig To Anybody ? Like Is It Good Quality Hair ?
whipschic: perfect