How To Make A U-Part Wig For Beginners
- Posted on 31 March, 2020
- U Part Wig
- By Anonymous
This video is for beginners who may want to make a u-part wig without spending a ton of money on equipment.
Music is by Treymxn
To purchase extensions: www.tajmeanscrown.com
***If website is down, you can place an order through Instagram @tajbeautyco
Materials for U-Part Wig:
Extensions - Taj Beauty Co
Dome Cap & Clips - Your Local Beauty Supply Store
NYX Jumbo Pencil - Milk https://www.amazon.com/NYX-PROFESSIONA...
Canvas Head https://www.amazon.com/dp/B00W1BT192/r...
Curved Needles https://www.amazon.com/dp/B010KPETZ6?r...
Nylon Thread https://www.amazon.com/dp/B004A6CV0C/r...
IG/FB @tajbeautyco
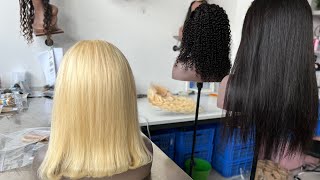
So first you're going to need a spandex dome cap that fits your head and then an eyeliner pencil. This is just a white one by nyx and also a block head that has the exact circumference as your head. Mine is just a 23 inch, circumference and also needle and thread, and the type of thread that i'm using is nylon thread. So the first thing i'm going to do is i'm going to take the eyeliner pencil and mark out where i want my part to be on my: u bar weight, i'm doing the middle part. So i'm just going to use my comb tail as a guide and figure out where the middle of my head is and then i'm also going to mark out where each area is so now, i'm drawing a line that will connect with my ear marks and then I'M going to extend my part line to meet that line that i drew now, i'm just using one of my fingers as a reference to figure out how much leave out i'm going to need to actually leave out on each side of my part and then i'm Going to extend both of those lines and make them meet and i'm going to make them meet into a shape. You always want to have a curved leave out, it's more natural and it's easier to get a seamless blend. That way. Now i'm just going to take about two and a half bundles of raw indian curly from my hair extension line, which can be purchased at my website and i'm going to start sewing these into a slightly curved line so think of um. A smile line with no teeth, showing that's how you want your first few tracks to go until you meet both of the earmarks on each side. Now i'm just threading one of the tracks and i'm making sure that i put the meter through the back of the track instead of the front, because if you put it through the front you'll be able to well depending on how big you do or not. You'Ll be able to actually feel the knots when you comb through the hair. So that's why i'm just putting it on the back, so you won't be able to feel any knot at all and then i'm just going to start sewing. [ Applause ], the one trick that i use - and i actually do this with sewing clients as well - not just with my - u part wigs, but i use a small silver clip to hold the extension in place, so both of my hands will be free uh. Yes, i don't cut my trace at the back. I may cut the last two towards my part, just because i want to extremely flat look, but when it comes to folding my tracks, i use my thumb and my index finger and i try to pinch it as much as possible. So it'll be flat, and then i stick my needle as close to the fold as possible, but not actually at the fold so go as close as you possibly can and then continue to thread. Then, once you thread through the cap about two to three times then wrap the thread around the needle to create a knot, so it'll be more secure right. There, [ Applause ] also make sure you're pulling your cap down. So you don't get any scrunches in your cap while you're sewing, because that's going to be a huge problem later. If you have a bunch of scrunching in your cap, your wig is not going to fit correctly at all and you'll just have a very bumpy two. So i, like my extensions to fall more towards my face, so what i'm going to do now that i've reached the airline on both sides, i'm going to create deeper smile lines. Basically, i'm going to start sewing the tracks so that they'll fall more in my face with these smile lines, streamlined, hey, livewire, so right here, i'm just showing you what i do when i run out of thread on a needle i'm going to wrap the thread around The needle about three times and then pull to create a knot and then, after that, i'm going to use my fingers and create two knots, so it'll just be extra secure. Now i'm going to take my new needle and thread and i'm going to go back about two stitches and that's where i'm going to start my new needle in so once. I put that needle through i'm, going to actually put the needle between both of the threads and pull. So that's going to secure that and we're going to make a stitch and then wrap the thread around the needle three times and that's going to create a knot. So that thread won't go anywhere so now i'm just going to continue sewing from there. So so i'm at the top now and i have to move everything on the right side over just a little bit because even though the lines were on the middle of my head, it wasn't on the middle of the cap. So i'm going to move shift everything over just a little bit so that everything will just be in the middle of the cap, because that was just going to aggravate me within knocking in the middle of the cap. Basically, what i did when i got to the top was after i created that last deep smile line and reached the edge of the cap. What i did was i created two more behind that that looked the exact same way, so that'll just create fullness, and after i do that, what i'm going to do is i'm going to start sewing in more of a u-shape. Instead of doing those deep smells. [ Applause ] and then another little trick that i do before i actually get all the way to the top i'll go ahead and also in my last track. So i'll know how the tracks behind that need to fall. So it can look the most natural and the most blended, the most seamless. So that's what i'm doing now, i'm going to use the last smile line as a guide and i'm going to make my track go from smile line to small line. Basically, so now that i have that last track sewn in i'm going to actually pin that out the way and i'm going to fill in the spacing. But i'm going to continue sewing my tracks into a u shape to fill in the spacing and there you have it, i'm all done. So this is the completed wig. Now, if you want to see how i styled it just go to my u-part part 2. Video to see exactly how i styled it into a short blend off


Comments
MISICK MONICA: Love everything. You are so DETAILED. Thank you
Shannon Watson: Best u-part tutorial ever! Thank you so much. You did an awesome job. What kind of blow dryer did you use in part 2 of the video?
Sean Alexis: Man, everyone on here makes it look so easy! Lol. You’re video however is very informative and helpful. Wish me luck!!
oreoluwa Ayeni: Hey did you double up your wefts? Also how do you keep the cap from scrunching up? Like when you pierce the needle in the cap does it pierce all the way into the other layer or just the top layer.. If you get what I mean
katherine s.: Great work sis! Thanks for your help! Can I ask what song this is?
therealRAIN: Omg
Lele Mia: Thanks for the video and you did great. I can make a u part wigs but I always run into issue installing it by myself. Do you mind making a video on sewing down a u part?
Kimberly Campbell: Good job!
Kaley Shi: Best upart tutorial! Thanks!
Alexis Keonia: Best video! THANKS
ClumsyDaSmirf: Good job... u have links to the thread?
Emmanuella Georgina Cox: Could you please tell me how many bundles or packets of hair you used xx
Cianna Smith: Cutee
MISICK MONICA: How much space between each track?