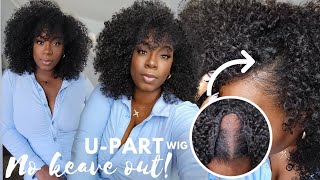
How To Make A U Part Wig
- Posted on 23 June, 2017
- U Part Wig
- By Anonymous
Wondering how to make a u part wig? Well Glamfam, in this video I will show you how! This is not as much for beginners, but it is still beginner friendly! If you need a more in depth tutorial, click here: https://youtu.be/yN-eMXW-uMY
Here is the camera I use to film: http://amzn.to/2sussQK
HERE IS THE HAIR (all other products will be listed afterward):
- VOGUE HAIR 100% VIRGIN HUMAN HAIR BRAZILIAN BUNDLE HAIR WEAVE 6A NATURAL STRAIGHT
LINK TO HAIR
- https://www.samsbeauty.com/service/pro...
COMPANY STORE LINK
- http://samsbeauty.com/index.beauty
SAMSBEAUTY IG & FB
follow samsbeauty on instagram
https://instagram.com/love_samsbeauty/...
like samsbeauty facebook page
https://www.facebook.com/love.samsbeau...
ALL OTHER PRODUCTS USED:
*Weaving Needles: http://amzn.to/2t0Gfzo
*Weaving Thread: http://amzn.to/2t1COIq
*Canvas Wig block: http://amzn.to/2s1mov0
*Mannequin/ wig block Stand: http://amzn.to/2swByM9
*T-pins: http://amzn.to/2s1vkAk
*U part wig cap: http://amzn.to/2tzXuEy
*Wig clips/combs: http://amzn.to/2tA58ig
*Nylon Bristle brush: http://amzn.to/2rXkJvl
I hope that you found this tutorial helpful! The hair I'm using in this video is virgin hair suppled by sam's beauty. The hair is Vogue hair in natural texture and can be colored, permed, curled and shampooed, like any other human hair. You can make a U part wig with any texture of hair, just make sure you are able to blend it well with the clients natural hair and you will be good to go! As always, thank you so much for watching, you are simply amazing!
The background music in this video is called Skyline by Ukiyo, and is copyright free music for use in the background of your youtube videos.
GlamFam
Glam fam today we're going to be making a? U part, wig with this hair, here's the vogue hair if they're virgin hear from Sam's Beauty. This is the natural straight hair in 24 inches, I'm also going to be using needles and thread and t pins. And a? U part wig cap and of course over here I've got a towel for all of my needles. I have my wig head wrapped in plastic, because I am trying to get cotton all that now. Let me let you have a closer look at this hair, as you guys can see here. It'S rather silky. This is 24 inches of here, and it does stand out a bit on the end, but it's not excessive. It does do a little bit of shedding, though, but I will tell you the wefts are nice. Here is the cap on the mannequin head. I do have it turned inside out and I have a tee pinned on each of the corners as well as on the ear tabs. Now on the top, I'm really not overly concerned. They do have a string that kind of holds together across the front and you've got your u parting along here. Now we do have the elastic tabs, which is why it's turned inside out. So that way, you can easily position that wig on your head and tighten it up if need be. So I'm going to start and by the way, if you guys are looking for a more detailed tutorial, I'll put a link to my other wig making tutorials. So you guys can see more of the inner workings. This one does kind of zoom through it. So while it is in some ways beginner-friendly, I would not consider it completely for beginners, so you're going to start off by just attaching this to the nape of the unit and I'm going to stitch directly across that bottom line. You'Ll want to kind of see it evenly go across there all the way. So that way, if they're trying to pull the hair up later, anything like that, the very first thing you see is that hair underneath and not have it little eye beautiful, because that's not cute can't have that all your business shown in fact, so we're just going To stitch this across, and I am doing a lock stitch, which basically means so me just sewing through I'm, actually bringing the needle underneath the thread and allowing to kind of help lock in place. So if it starts to loosen up the whole effect, isn't just popping out so we're going to speed up a little bit because ain't nobody got time to watch all it is alright, so still continuing that all the way across the nape and you'll notice. Once I get to the end section, I'm going to tie it off, but then I will take that track and turn it over. I'M not cutting the tracks because every time you cut you have another section where the hair is going to be more likely to shed, and this just kind of helps the hair to last longer part to stay. Fuller, look better! All of that loveliness, so you guys can see here I've gone ahead and tied off and then we're just going to take that West and turn it back around I'm going to place another pin in there, which is why I like to work on big kids, because I can't stab real people for some reason: it's still against the law and from there we're going to go ahead and stitch on back the other direction, which I'm really not going to show you guys the whole thing we'll skip forward from here because yeah, I know You guys are not trying to watch every single step. I mean making this wig like I love y'all and of course you love me, but let's be real. Did you really want to watch me? Do this for like two hours, yeah? That'S how long it took me about two hours to make this unit and I'll apologize now, my lovely daughters and my beautiful wife are walking around the background in and out of the refrigerator all kinds at the whole video so be glad I'm doing a voiceover. Alright. So once I get up to about where the the ear line would be, I'm just going to go ahead and continue coming right on across, and you guys can see. I'M just moving those pins on up to what I feel like it's beneficial for me to have it, so you guys can kind of see there we're bringing it right on up now. You want to be careful not to sew through the elastic on the sides. If you're sewing through it you're making it to where that cat cannot stretch very well, and here we just begin to bend it back and go the opposite direction. So it's not overly complicated, but I felt like you guys, would possibly see a bit better from this angle. Hopefully it helps and loki abu. We ran out of the first bundle. So what i do is i just keep that same thread on there. I'M going to go ahead and feed another weft on and then we just continue stitching like nothing ever happened. I know some of you are like who was that in the bottom right corner? That'S my wife holding our youngest daughter back there and for all of you who be those hateful comments on my videos: no she's, a real woman. Yes, i'm a real man and no, we are not in some sort of open relationship in all that we are a real couple. We'Ve been married for almost 10 years. Oh thank you for your congratulations. You'Re, amazing. So right here around the ear tab, we're just going to go ahead and tilt down and i'm going to go with the curvature of the unit same thing along like with the nape. I want to make sure that we are getting a very clean line. So if the wind blows, your tracks are not showing, it just, looks seamless and gives you a better blend, so i'm going to bring it up like that and stitch before I bring back around so of course I sped it up because I didn't want to cut It out, but it wasn't necessary to do it in slow mo even then from there on one side, rounded that out, I'm just going to go ahead and continue curving it and sewing it on towards the back. I talk so much you guys so now. We'Ve done that on both sides and I've brought it back, I'm just going to go ahead and bring it up to just beneath that's what happens when you pray for people a little too hard, they just sling on back we're going to go just beneath where the? U part portion of the top stops, I'm going to stitch it down and then we'll bring it back down to curve away from that line. So we don't want it to be too bulky up there and create a massive amount of lumping. So I'm not going to take it all the way up, we're about half an inch off and then we'll just bend it back and bring it back round. Do the exact same thing on the opposite side? Don'T act like you, don't know. What'S going on the other side, it's same thing to smear it a bit if you have to but staying down, flip it and reverse it, alright, so we're up here to the top. This is how much we have left just want you guys to see nothing too. Major and we're just going to continue our same process on this cap: okay, so stool stitching and we're just continuing that from there we're going to go ahead and get all the way up to the top, and once you get along here, you're going to fold it Across and I want you to go all the way along the edge of that seam, this again comes down to it, lying as flat as possible, creating this little gap as possible, so you are not showing as much of your business, so I tried to have Allison Hold the camera here and that we could get in really close, so you get way too far all up in the business you can see here. I end up running out of thread. Usually it's best to make sure you have enough thread. So you don't have knots and bumps and things in there, but thankfully this nylon thread is not like massively thick, which, by the way, links to everything to include the hair will be in the description box below. So, if you're interested in any of this just check out down there, if you leave a comment, I'll just refer you back to the description box, I love you, but I think it's hurt from type and responsive sometimes, and you know I need these thing - is the Fall off because, obviously they're making money look at these wigs, yeah, okay! So we're just going to continue on all the way to the edge you can either snip it at the end, or you can fold it under and fill in that gap that you guys saw at the beginning, which is exactly what I ended up doing once we Finish with that, I'm going to put these side combs. Well, these wig combs really into the unit, I'm going to put it in the nape, we'll put it at the top of the. U part they'll end up being one on the other side, one in the center and then they'll be two by two ear tabs. So a total of six combs and they'll be stitched in like so and honestly. This part's not that difficult. But I knew someone was going to ask me so I was like you know what I know. I'Ve got my visual learners here. Let me go ahead and show them how it was sewn in, and this is how I recommend holding it cuz. You guys see letting it lay flat and trying to do it was it was giving me, oh so we're just going to continue sewing right on through here and once we have that done, we're going to continue it like five more times. You know. I latched my little elastics in there. You can see how the columns are attached. I did end up adding three more and I'll. Show you how those are in a moment from there you're going to cut that thread in between only do this when your wig is finished, or you are going to need a lot more tee pins to hold that baby in place. What happens when you have cheap sheers? Okay? So here we have six combs, I'm wanting you to see where they are. I'Ve got one of the nape one by each ear, just above and then you've got the one in the middle and the two initial on the corners. I have a really lazy, braid down pattern, which you can just do a French braid across or you could do Kwan rows. Kronos will give you the most security but she's not wearing her hair like this today. So I just was like cut me. A woman sit down and she was like ooh yes, and so this is what happened. So I want you guys to can see that I did leave out her perimeter just so. If the wind blows, it looks more natural, you can see her natural hairline and justice bomb because you know she's bomb, alright, so we're going to start off by placing a middle comb in there. I'M sorry, you guys can't see everything. What I promise is nothing overly special and you're just going to slide that the columns into that top anchor braid. I had there same thing with the ones around ears just biting into his anchor braids. I did already have it latched where the elastic was and you're just going to make sure to insert your comb at the base from there. The section that you left out up top and around the edges with honestly that you shaping can be any size. I know someone's going to ask it's totally fine if you want it to be a smaller section, the wig will mold and all that Here I am brushing her hair in with this unit with a nylon bristle brush now here, if you want to get more of A seamless blend this is where you would go in, and layer, the wig and honestly. I just wanted to show you guys how to make the unit in this one I'll probably show you a separate video on how we curl and style this, but I do want you guys to kind of see how it goes on I'll have her turn around in Just a moment, so you can see all the lovely curves and edges and all that it's like a grand reveal, but look at this here. You guys it is really nice here. It does do a little bit of shedding, but it's nothing massive and yeah. So I have her turn around and that way you guys can kind of see what's going on all right, so the thing I like about it is this is something that is very minimal tension you guys can see. It holds up pretty well in terms of like being able to stay in place, all that you can take it in curly, and it's something that basically pop on and go. You can take it off so get to the scalp. I was worried about it being stitched on how F a comma, if you do want to stitch on like a sewing. That'S always an option. That'S available to you, which would allow you, like those clients. So just don't follow instructions. Well, you can't get them to keep stuff on their head yeah. This is what to do now. You can put it in a ponytail, like you guys, can see here off to the side, to the back. Whatever that's why I left our edges blue, because we will not be edgeless in Seattle, not at all, so hopefully you guys liked it. If so, give us a thumbs up and subscribe. We love, you guys, take care, bye, bye and stay clam.

Comments
Forrest Whittaker’s Eye: Your wife is so lucky to have a hair stylist for a husband
Yombati: You got me at, "...can't stab real people, for some reason t's still against the law..." Hahaha, I'm dead!
thefutureismine: I literally said congratulations when you said you and your wife has been married for 10 years lol.
Cherell: You guys are such a beautiful couple. Congratulations on 10 years of marriage, such an inspiration.
Fay Samuel: I'll say it again; you have been blessed with such a beautiful family. Them haters are just jealous!!!! Thank you for sharing xxx
M. E. Dixon: Love this! This is like the first one that used a U-part wig cap and it didn't look crazy! Thank you so so so much!
Kyng Senio: I'm Learning So Much For All Of Your Videos. Your Honestly My Hair Guru God. That Wig Looks Amazing. I Love Your Techniques Of Sewing. ❤️
Camillia Lindo: Your work is always detailed and extremely helpful! Your humor really makes it really enjoyable to watch all of your videos. Amazing work!!!
Shannell Rivera: Your wife’s hair is beautiful! Thank you for this video. Going to try this but with curly hair❤️
shameonyou17: I've been watching wig videos all day and this is definitely one of my favorites. You explain it so well and you're really funny. I'm definitely subscribing to your channel. Greetings from Germany :)
Ariell: I loved this demonstration! I’m currently doing my very first one and this helped me a lot , thank you
Becca 42: Best tutorial I’ve seen yet, and I’ve been plenty. I’ll be making my second wig. Watching this I know it’ll turn out better than the first one. Thanks for this vid
Sophia BijouRoyale: Your personality is everything and you slayed this wig! Best wig tutorial ever!!!! Thank you
Patricia Segage: Thank you for all of your wonderful job and for keeping it real & generous. Love you guys!
Tisha Hart: i love how you took the time and did it step by step thanks. this weekend im going to try to make my first wig.
Vanessa 🥰: Thank you for this video, I needed this because every-time I get a upart wig it’s to baggy lol and congratulations on your marriage (:
Lola anibaba: This was sooooo amazing thank you for the clear break down
Katie B: Sad you have to explain/defend a REAL 10 year relationship!!! And YES congratulations
Miss Overcomer: Can you please do more wig making tutorials? Specifically frontals and lace closure wigs
Rushell D: This was bomb!! I am definitely gonna try. Best tutorial!!
Barbie Love: Love your personality to pieces❤❤
sharhonda griffin: Just found your video totally love listening to you! Your funny and congrats on the 10 years I hit the follow button !
Bianca Garwood: Hi! Okay so making my first u part. After you wrap it around the front and leave about half inch away from the u part, do you continue to wrap it all around to the front? Or you go back to just doing the middle until you reach the crown ?
bia-july: This video helped me a lot. My question is, the wig cap that I have doesn't have an opening at the top like yours does. Can I just cut the top of the cap? It has the flower lace look at the top and then the rest is more of a mesh look... I'm new to this as you can tell lol..
Ayonnaz Glam: Thank you for this video!!! The best one I’ve seen. Going to tryn make my own now
Rowena Sanders: Omg! I hollered when you said "I said come here Woman!..."You are too funny!
Bianca Garwood: Your voice is so soothing lmao
Robbi: Your so amazingly talented.. awesome stylist., professional... love how you adore you wife ❤ Love when you said shes fabulous... lol ☺❤
Danielle McFarlane: Thanks for the video but I'm a little confused. When you get to the top section how do you end up with it in line with the literal u-part? I ended up with lots of bumps near the u-part and having to cut the tracks vertically to fill the awkward space left it didn't come out like yours ☹
CurvaceousQT4U: LOVE THIS!
Aisha Davis: ten years that is life I love it. sending blessings and love ur way for many many years together
S M: ❤️Yasssss looks amazing
Nikki Simone: I couldn't click subscribe and bell fast enough. I have ALWAYS fought with the straps... it never dawned on me to turn it inside out ♀️ THANK YOU!!!
dmccoy825: Yes, you are a good teacher. Learned a lot! Thanks'
RADIANCE247: This is very helpful. Your work and explanation are very clear and precise. You are very witty and easy to listen to... Cheers..from the UK
Livi Parker: This wig is so beautiful. Can you make a tutorial on how to make a half wig?
KIM HAINES: I love both of your channels. Are you still teaching at a beauty school?
Dana Dover: Loving your videos! Your wife is stunning and your daughters are just adorable! AAAANnnnnddd where did you get that shirt??
Forrest Whittaker’s Eye: This is the BEST tutorial I’ve ever seen!
Yolly 17: Another great video. It looks beautiful
Leiie Star: You really take care of your wife's hair. Wow. Her natural hair is on point!
Saucy: You are so talented! Your videos are so helpful. You helped me do my first French braid. I love you! ❤️
Sonja Suracha: Omg you sound so charming and wonderful. I can watch your videos all day long. I tried to teach my husband how to do hair because I think that's so sexy but that didn't go well. He tried though. Anyhow. You are so inspiring .Doing my hair and watching you.
Tamika Hatton: This tutorial had me dying
Mandi Thrush: Ok you are adorable. I love your personality. Screw the haters. You two are an adorable couple.
Ashley Brock: Beautiful
Mel60 Sumerose: Very detailed video thanks . Congrats 10 years
a Radden: You just saved me from the hot glue gun.... . You explained and slay'd to the God's. Thank you
Martita Brown-Goggins: Just subscribed off this one video. I think you and your family are amazing.
Aisha Davis: I love love love u, ur vibe is amazing and a blessing for me this morning. gm wifey and miracle babies. ur wig is fly and I'm so happy I found u
Selina Jade: Hi! Thank you for this video! Would you please tell me.. can I make the u part wider by cutting the lace part of the cap? Thank you!! I bought a u part wig that is wayyy too big for my head and it’s driving me crazy! Thank you!
Poindexter Auttumn: This video was so enjoyable thank you
Sincere Presence: Amazingggg!! It blends so well with her hair, color and all. luving it
Tanae': Because of you I just slayyyyyed my upart ❤❤❤❤
Seven Witherspoon: God bless him and his lovely wife he’s gifted
iAmDreaCarter: To have a husband that can do hair is everything. The money we can save to vaca thank you for the tutorial
TheJazzie6: Love it!!
Tisa Young: I enjoy watching you... Im not brave enough to try it .I have lupus and lost hair but Im hot headed. What kind of wig would you suggest please. Thank you so much
sash Luv: Omg I love you, simply amazing! O how I wish my fiance could do hair.
RULA MARI: Thank you. You taught me well.
Gail Hopkins: New to your channel. Discover u about a week or so ago. Lovely family. Puzzle why people would think u was in a open marriage or if u was a real man.why?. Grace to u & many more marriage life. Grace to all gh
Attia Brown: Yassssss thanks for the video
freckledkay_luv: Man I really appreciate this video. I also like that you get straight to the point not all that unnecessary talking. I will for ever fallow and watch your videos.
Tawana Thompson: I'm still wondering y we can't stab people!!!
Dannie: I LOVE this video omg and congrats on making 10 years well 11 years now bc this video is a year old lol.... Please stay together forever!!!!!!!!!!!! ❤
rita mcfarlane: You make me want to make my first u part wig ever I love this video it’s my favorite one
Lisa Lisa Shellman: U DID THAT ON FLEEK!!!!!! GOD BLESS
Leslie Luxury: "Oh thank you for your congratulations. You're amazing!" NEW SUBSCRIBER!!!!!!!!
Lace: Wait why do you turn the cap inside out again? Would the tightening part lay on the nap instead of above it?
Tawana Thompson: I love u guys, so its a pleasure and not a problem for your family to b n the video. U guys r happy and that's all that matters to me and the rest of your true subscribers.
randall gadson: Best video ever❤️❤️❤️
rcrp7: I luugh yo personalitay! Lol.... smooches...great vid so helpful! I have all of my supplies on deck now im feeling like I just want you to do it! Lbvs!
KiannaD: Congratulations on 10 yrs
Jcoyia Davis: I loooooove it
Joneshia: When you got to the top of the cap, did you continue to do the flip over method or did you cut the tracks?
Lit Learning: Yassss beech you did tf outta dat
Ashley: Thank you soooo much this was VERY helpful
Karen Oliver: So glad I found you!
Sincere Presence: Congratulationssss on 10yrs and growing . Woohoooo
Luvin Melly Mel: luv all of your videos Mr linwood you are sooo funnyand talent!! Iearning so much! one of my fav you tubers!!
genia sutton: "you still can't stab people for some reason it's still against the law " omg im on my back right now lmao
Classy& Caffeinated: Ran across your videos by accident but you do slay I love it I will be glued to your channel and nice family by the way
Queenofweaves: Gorgeous
QueenLaporscha: I wish my husband can do this I’m jealous anyways good work new subscriber
Janet Watley: Wonderful Instructions!
Chycon Petty: Nice work!
Nelly Nellz: Great video. Thank you
Kelly Villanueva: That's so cute love ur videos ❤️
MISICK MONICA: Omg, your voice overs are funny
Lit Learning: Shit poppin like a full frontal
Tysha Ward: I just used your video to remake one of my old wigs and put it on a new wig cap like the one you used in this video
Ifedimma: Amazing
REJ: Really nice!
sunnysideup: Shit I wish I could find a husband that knows how to do hair lol
Gregory Proctor: I love thee drama in every word #newSUBBIE
Camille Ward: I love this guy! I'm completely entertained. He's funny and real. LOVE IT!
Christine Theodore, BSN-RN: awww SHE'S LUCKY HER MAN CAN MAKE HER WIGS
Shani Richardson: Ugh can she be my sister wife I need a man to make wigs with me ❤️
Angela Scrivens: Very nice
Sharyn Rose: Love this I was making my wig and cut it before I was done what to do can I fix it?