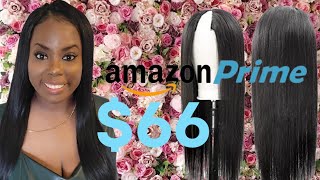
No Lace No Glue No Dye Most Natural U-Part Wig Review Ft Ali Pearl Hair/ Beginner Friendly
- Posted on 25 June, 2022
- U Part Wig
- By Anonymous
Welcome and welcome back to the channel my loves. In today's video, i am going to share a detailed tutorial on how i achieve this natural hair look using alipearl u-ppart wig. Alipearl is a hair company that i have used in the passed and have really enjoyed. The quality of their hair is always great and i never have an issue with them which is why i was more than happy to collaborate with them. This hair style is beginner friendly ( if you know how to braid or flat twist) and can be completed in about 20 minutes tops. I had a lot of fun recording this video and hope you all enjoy it. Support the channel by dropping a like and a comment down below. Dont forget to subscribe and turn on your notification bell if you havent already, to be notified when i post future content. See you all in my next one xoxox
CONNECT WITH ME ON SOCIAL MEDIA
Instagram: https://www.instagram.com/kieara_celin...
For business inquiries : [email protected]
Time stamps
0:00 - Intro
0:45 - Unpackaging the hair
1:57 - Hair washing
3:25 - Braid pattern
8:25 - Handling the leave out
10:25 - Wig texture check & application
11:57 - Straightening
15:40 - final result
FAQ
Nationality : Canadian
Background: Grenadian & Nigerian
Birthday : April 17Th ( Aries)
Favorite color : Green
Favorite food : Egusi soup & Eba or Okra soup & Amala
SHOP NOW !!! ➤https://bit.ly/3Q7sIgO
Hair Info: 22 inches body wave u part wig, 180 density
❤#AlipearlHair Official Store:➤ https://bit.ly/3NO0jdx
1.Join FB Group, Win FREE HAIR➤https://bit.ly/38YYagy
2.Lace Front Wigs for Sale!➤ https://bit.ly/3zkD7PY
3.Invisible HD Swiss Lace Wigs:➤ https://bit.ly/3wVy060
#alipearlhairwig #alipearlbodywavehair #alipearlhdlacewig
Instagram @alipearl_hair: https://bit.ly/34I3Oyd
Youtube @Ali Pearl Hair: http://bit.ly/2H0Gmmc
Facebook @Ali Pearl Hair: https://bit.ly/3aKwxX3
WhatsApp: +86 15890076489 E-mail: [email protected]
OTHER VIDEOS YOU MIGHT LIKE
My 4th BIG CHOP :https://youtu.be/7UDUgPqhz1Y
How i grew my hair FAST in 6 months :https://youtu.be/hcb-idt3AIM
The most natural headband wig install :https://youtu.be/WVbJ5wywxMI
DIY SILK PRESS on type 4 natural hair :https://youtu.be/ZOgQVnb8Bjw
2 MONTH OLD knotless braid removal:https://youtu.be/nY8rNjzk8CI
EQUIPMENT USED TO FILM THIS VIDEO
Mount dog soft boxes : https://amzn.to/39HIXht
Newer ring light: https://amzn.to/3tjqU8V
Canon M50 camera kit: https://amzn.to/317fNGl
Macbook pro
Keywords : Upart wig install, wig install, natural wig install, ali pearl , ali pearl hair
Is foreign? What is up you guys, welcome and welcome back and, as you guys saw in the title, i'm gon na be showing you guys how i go from this to this right here with no dye or anything like that. Today'S video is sponsored by ally pearl. They were kind enough to send me this hair and i will leave the description right here, so you guys can see as well as in the description section. This pack comes with two wig caps. It comes with an extra alley, pearl bag that you can use to store your wig. It comes with these super glam eyelashes a little too glam for me, and it also comes with this edge brush. So you guys can see, there's a little parting comb as well as the brush part and there's an extra little band that you can use to put in the back of your hair for extra security. This is what the hair or the packet that the hair comes in and you guys can see this beautiful, beautiful body. I love these curls. I believe it's body wave. So this is what the wig looks like when you turn it around. There'S three clips around the center as well as two on the side and one in the back. So there's a lot of security and you guys can see that this is a u-part wig. So i will have a leave out in today's um hairstyle or video personally, when i get new hair, i personally like to wash it. I always like to wash my hair whenever i get new bundles or a new wig. I just feel like it adds a little bit more of a shine, and the hair just has a lot more body later on a lot more bounce and movement. When you wash it prior to installing it, and also it is coming from a factory, so it's just for hygienic purposes as well. So i just go ahead and thoroughly wash that and rinse it off with some cool water and i'm using the aussie miracle. Curls shampoo, but i will leave all the items or the products that i use down below so after shampooing twice, i always shampoo twice, i'm going in with the aussie miracles conditioner. This is what the texture looks like and i'm just going to go ahead and apply that onto my wig one time, detangle and then rinse off with some cool water all right. So now we're moving on to the actual parting of the hair and guys. I know you guys see flakes in my hair, but i promise you my hair is freshly washed. I literally made my hair washing video, which was a video before this. I did that video the day before this, and the only reason why you guys see all those crumbs is because of the gel that i used in the front of my hair, if you guys, can relate to this disgusting crust on your hair after you use gel. Let me know down in the comments, but i really didn't have the time to wash this hair again, because i had to be out of the house, so we're just gon na have to bare with the gel. But anyway, you guys see me parting out the front section of my hair and i'm just braiding that down and that is going to be my leave out. I really don't want to leave out too much leave out, because i don't want my hair to start reverting back, so i'm using as little as possible and you guys could see that those flakes in my hair are literally like colored. So it's definitely gel, not dandruff. Okay, dandruff is not that color and since i'm doing a leave out um, i'm also gon na leave out a little bit of hair on the sides, because i just feel like that gives it a much more natural look and when your hair kind of blows in The wind or, if you decide to kind of put your hair back um that will cover the tracks and just make the wig look a lot more natural. So i'm just going to allow you guys to kind of just watch what i'm doing and see the pattern that i chose to braid my hair in all right. So you guys are already starting to get a little idea of the braiding pattern that i'm doing here. So i'm pretty much just going to be doing braids going from the top of my head straight down, but then going all around my head. If that makes any sense you guys are gon na see in a second. So all the braids that i braid are gon na be going downwards and the two here on the side, i just used the second one to pull that first braid in and bring it behind my ears. You don't have to do this. I just think it's easier. This way, and yes and your parting doesn't have to be straight, your braids don't have to be perfect. Nothing like that. You just want it to be as flat as possible. Obviously, the smaller the braids, the better and the flatter your wig will lay, but i was in a rush, so i just did it anyhow. Once again, the point is just for the hair to lay flat. You don't have to have perfect lines or perfect braids, or anything like that. So so so, once i was done cornering my hair loosed out the two little twists on the side as well as the middle braid that i did to separate my leave out and i went ahead and washed it. Obviously, with the same shampoo and conditioner, i used on the wig now i'm using this l'oreal thermal protection spray, and this is a heat protectant as well as like a serum, and i love this stuff because it is so light. So i can apply a good amount of it. I could be very generous with it and work it through my hair and make sure that every single strand is evenly coated and protected, and it's not going to weigh my hair down or anything like that. It'S a very light oil, so i love this stuff and it smells amazing. Next, i'm going to be using my hot tools blow dryer, and this is more of a blowout machine than a regular blow dryer, because this is really meant to stretch your hair and just pretty much prep your hair for um, a silk press or anything like that. And i love this blow dryer because it gets my hair quite straight and i don't have to do that. Many passes with the flat iron once i use this, so i just put it on cool setting and i just went ahead and used that all over my leave out to try to stretch it as much as possible so that i won't have to put too much Heat on it with the flat iron, if you guys want to see a silk press video of mine that i did flat ironing my entire head as well as prepping, my hair with this hot tools machine then go ahead and click on the link. Above or i will leave the video down in the description so so to those of you who have had weaves before um, you might think like a u-part. Wig is new to you, but it's not actually new. It'S really just the same concept as like a weave. So they would do the braids and then they would leave a section for your leave out and you would use that leave out to cover the track and it's the same exact concept, except that you don't have to sit down and sew it all over your head. There'S three clips and you could just use those so you clip this part. You clip the middle part which would go at this, this part of your hair and then you would click the other side which would go on this side. So so the wig is not fully dry, but this is what it's looking like right. Now, it's just a bit. Wavy um! I probably should wait for it to fully dry, but i actually need to run some errands. So i'm not even gon na bother, i'm just gon na dry, the top part and make sure that's thoroughly dried, because i don't want the humidity or the wetness from the hair to curl my hair, but as for the bottom, i'm just going to leave it. So here i'm just going to go ahead and cut that string off that you guys saw in the wig in the beginning, i'm literally just going to go ahead and throw it right on my head. You guys saw that i have those two side braids, so i'm going to use the two top side clips to clip onto each braid as well as the middle one, i'm going to clip it on one of the back braids. This one wasn't a perfect you. It kind of ended up being a bit of a half wig situation because of the way i did the braid. I don't think i'll use this pattern in the future, but it still worked out. I'M going to be using the two side clips to secure the sides and then i'm going to go ahead and secure the back of the wig, which you guys are going to see in a second now all right. So now it's time to officially flat iron. Your leave out and you guys could see me flat ironing my leave out. It is not perfect, i know it's not, but at the end of the day the most important part is that you have enough hair to cover those tracks. As long as you have enough hair to cover the tracks, you should be good to go. What'S going on underneath really doesn't matter, you guys could see that that mist that i applied the l'oreal one is just oh. I don't know it just does something to my hair. It just makes my hair straighten so well, and i just really really love it. I know you guys are wondering how i got the color to match the wig, and i cannot wait to show you guys this little trick that i use to really achieve that natural. Look, i'm just going to go ahead and straighten my entire leave out, and then you guys are going to see that step in a second also. I know some of you guys are going to want to scream over the fact that i am flat ironing my hair or passing the iron more than once baby trust me, this heat protectant that i applied is going to protect my hair and one thing about me. I am really not scared of cutting my hair off. I will chop it off if my hair starts to act up, i will bake chop. That is one thing that i am really good at and that i'm not afraid of so don't worry about my hair. If you want to do one pass, you go ahead and do that, but i'm really not afraid because i know my heat protectant got me and worst case scenario. I'M gon na just chop it off. So here i'm just gon na go ahead and add in some layers and i'm really not a professional at this and i'm not using the proper shears. But i know a thing or two shout out to my hairdresser mommy shout out to you mommy for teaching me what i know but yeah i'm just going to go ahead and add a bit of layers and i just feel like that's going to give it a Lot more of a fuller, more voluminous and more natural look, you guys could see, there's like my hair on top and there's like a layer right underneath that and then another one right underneath that so when you cut it that way, it just makes it look. So much more natural and then it's a lot harder to see the difference in length between like your leave out and the weave, because it's cut in layers. If that makes sense, you guys are gon na see what i'm talking about in a second. So now my layers are done and it is time for the final transformation what you guys have been waiting for, i'm just going to go ahead and put a paper behind and i'm using this l'oreal spray dye. This is in the color black and i'm just going to go ahead and spray dye, my hair with it, and that's really how i achieved that. Look how i was able to turn my hair from like brown to black so that it can blend with my leave out, and i just go ahead and do that all over. You guys are going to see at the end that there will still be a little bit of brown, but i didn't mind it too much. It looked a little bit like highlights like a little touch of highlights and it still looked pretty natural overall. I really like this braid eye, because i don't know why it made my hair, my natural hair, a little bit stiff, which you guys are probably wondering. How is that a good thing, but it just kept my hair straight. It made it a lot harder for my hair to revert, which i love, so i'm just going to go ahead and add some feathers, as you guys could see, feathers are literally, i just feel like it. Just it just takes it to another level. You just go from body to bombshell real quick and i'm just going to go ahead and add some light. Curls. You guys can see that i'm really not trying to be too defined. I'M really just curling the ends just for some extra body and some extra bounce. But i'm really not trying to do anything perfect or have perfect curls, i'm really just trying to create some body once again, so that is it for the hair. I am loving it. I think it looks quite natural. It honestly looks a lot better than i thought it would and honestly i didn't think that the spray dye was going to work as well um, it's still a little bit wet, so i i still did get a little bit on my hands from just touching. Just now it get a little bit of the spray dye on my scalp, which will come off easily and you guys saw that i had spray dyed on my fingers and i was able to easily get it off with a hand brush so yeah. This is the final result. I absolutely love it if you guys like this tutorial, and you guys want to see more like this. Let me know down in the comments subscribe and turn on your notification bells. If you haven't already to be notified when i post your content like this, and i hope to see you all in my next put your sweats on me -


Comments
Iam Sharlene: Stunning! Love how it turned ❤️
Ijay K: Love the volume you achieved for the hair.
Shanis Oussel: It came out really lovely.
Ali Pearl Hair: Thank you so much for trying Alipearl Hair.
COBRA TATE: 1. Ignore her words focus on her actions 2. Don’t chase women become the man that women will pursue 3. Women you previously pursued and got rejected by Will later be interested when they see you have a different woman 4. Women think about marriage as a wedding day and not a lifetime supporting and respecting their man 5. Embrace rejection it will make you stronger 6. Disdain women who rejected you, ignoring them is the best revenge 7. The more attractive she is the harder you have to be, DONT SIMP 8. Stay away from single mothers 9. Prioritise your appearance no matter what’s 10. Never fully commit 11. Don’t share your weaknesses with a woman, seek professional help in a serious rut 12. Women cheat more than men, don’t let her accusations blind you 13. Be low tolerance, be ready to walk away at any given moment 14. Don’t be bitter, accept female nature and adjust 15. Keep playing the game and make it difficult. People come back to difficult games to try and beat it, easy games get played once and put on the shelf✨ !
Johnny Martinez: Tebonita❤❤❤❤❤❤❤
Chris Orton: *To get Financial FREEDOM, you have to be making money while you're asleep*
jasmin: why can’t y’all stick to your own hair instead of wearing wigs