How To: Afro Kinky U Part Wig Tutorial (4C Coily) | Protective Style | $23 Outre Hair
- Posted on 02 May, 2020
- U Part Wig
- By Anonymous
I love big, curly hair! I named this one “Diana”. Do you name your wigs? Let me know down below!
Products used:
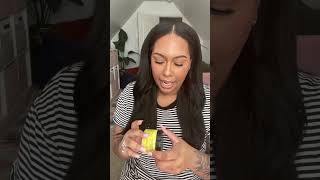
- Outre Big Beautiful Hair (Purple Pack) 1 Pack Solution, 4c - Coily ( Colour # 1)
- Dome Cap ( Beauty Supply Store)
- Hot Glue Gun (Walmart)
- Vigorol Olive Oil Mega Moisture Mousse
Links to hair:
https://www.samsbeauty.com/service/Out... ($15.99!)
https://tisunbeauty.com/products/outre... ($7.99!)
Follow me:
IG: https://www.instagram.com/__lindseybet...
Twitter: https://mobile.twitter.com/__lindseybe...
Snapchat: LinziiLuv
TikTok: __lindseybeth
Email: [email protected]
Watch in 4K!
Thanks for watching!
‘Til Next Time!
Xoxo
Lindsey
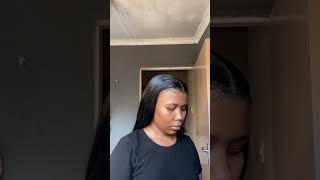
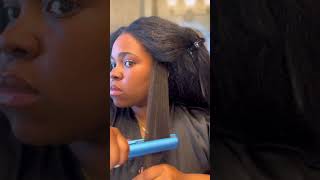
One people glad for soon, oh, come back. Welcome back to my channel, it's a girl in C, and you don't know how we do it's over here with slant, save a ball on a budget. First of all, don't forget to subscribe and like this video now, as you can see, we're doing a big, bold and beautiful. Now, let's go so I'm starting out with this dome cap. It'S just a regular, don't cap, I got from a beauty, supply store and I'm just showing you how I'm going to line it up on a mannequin head where the two seams are, I'm just going to put it at the front. Now you can use the men or women's, don't help me personally prefer the men's anyway. So that's how I line it up and they here that I'll be using. Is the outer a big beautiful here, purple pack in 4c coil II and I'm going to be using ombre one and it does come in 1b and other colors as well? Now, I'm also going to be using my glue gun. I got this glue gun from Walmart. I think it was a $ 3, maybe $ 10, but I'm going to be showing you their hair. It comes in like four bundles and it's a one-pot solution, and I mean it's pretty soft and this hair cost about maybe twenty three dollars. So now I'm just unraveling, it's one bundle and showing you how it is, and one pack trust me is more than enough. So now what we're going to do we're going to just start from the back. No me personally, I do not like to do on the elastic band, as you saw I'm showing you that I'm going to be starting. My first track above the elastic band because later in the video, I'm going to show you how I remove my elastic band. So, that's how you see me do it I just kind of just measure any top right there and then I'm going to take my scissors and just cut. Please cut away from yourself not to worry yourself. I don't want anybody stopping itself, then I just want to make sure I line it up properly. Then I'm going in with my glue gun honestly, I prefer using my hot glue gun over the you know. The black beauty supply store here glue because it's less messy in my opinion and I've been doing this for a while and it dries really fast. The hot glue gun it's clear, and it's just neat, sir to me. You know, and it holds really really well. It holds so much better and I personally prefer puts in the glue on the cap instead of a track and just position in the truck on the cap, because it's less messy I've done it before I put the glue on the truck and it's just yeah. So this is how I do it, and I just take my time you know because it dries really fast. I just go section by section with the glue and hold it down. Please be careful not to burn yourself. You see me just doing that hand motion because it basically instantly and I kind of pull on its own or do the aerial think if anybody try pull off machaca and it stayed pretty well so now here's this fun thing. That'S a learns. A couple years ago I like to flip my wigs inside oats and glue, maybe one or two tracks on the inside because sometimes well most times are more in my wigs. I don't do I leave oats at the back, so just in case maybe you know, I puts up my hair and like a low, bun or something you know it doesn't look obvious. That is a you know, wig or two obvious. So I'm just going to do the same thing and glue above the elastic band, as you can see me sure any right there, because I'm going to show you later in a video as well. When I hold up the hair, you can see what I'm talking about. So I'm just going to do the same thing with the glue gun and just put, I don't think I did more than two trucks over elastic band. I just you know. I discovered this method a couple years ago from from another youtuber. I'M sure lots of you guys know her Pete mill, one of my absolute favorite youtubers, her wig game is crazy and ever since she showed us how to do that method. I never looked back since I thought it was genius. You know, especially if you're not comfortable, with leave work, because I remember when I used to do sew ins and I had leave outside a bath, and this wasn't. My hair was relaxed and it used to make like the back of my hair super like break off, and you know we want to have as little leave out as possible. So there I'm just showing you how it looks when I flip up the hair. So now that's I flip it up and I'm like satisfied, remember to be cut enough. The elastic, but I'm just going to flip it over again on the right side and continue with the rest of the trucks. Okay. So now, therefore, this trucks on for the history minutes, I'm going to do I'm going to start by positioning it from seam to seam. So you see how the wig cap has those two seams going back. Those will be my markers, see, I'm showing you how I'm doing it's at the front, because I'm going to be using that point. You know pato later in the video, so I'm starting the glue where the seams, where the seam starts and then I'm going to go. Our row and colleagues are on a whirl around the head. Keep going then I'm just going to go all the way to the other seam. No, you can do this from the first strap. Honestly, I usually do the first track. I did alright guys. I don't know why. I started see that one so short, but I mean it's not about that. I had nobody is going to see it anyways, but you know by doing it this way, kind of doing it so close it makes the hair fall nicely aronia face. You know if you want to go for that framed face finish as well, and then, if you have literally vote it just kind of make, it fall in our way where it's not so obvious that you know you know it just hides that little evil. Well, if you get what I'm saying for all my wig wearers out there, you know what I'm talking about. You know when the hair just have that fall. So you see how I do. I don't know it's just kind of going from like where those where the wig cap starts kind of like where your brow bone is and then I'm just going to keep doing the same thing for each track and then remember guys. Key key points that I should tell you guys and I've made this mistake already, is when you are positioning the tracks where you want to start say, because, where I have those trucks starting, you know, remember I'm going to be cutting in the middle to do the You part, please try to do it as narrow as possible, because when you cut the you the wig is going to get. Why remember, the goal is to have as little e-vote as possible and then, when you cut the you, it's going to make it wider. Yet so you don't want to leave a big space, even if you leave something just a tiny bit bigger than our slits as they leave out you're fine, because it's going to spread. So just follow me now, as I go around the wig cap and then as I go with the tracks. Another point that I should tell you guys when you're going at the back of your head, you can spread out the trucks why there, because your head back? Nobody going to see your head back, your main focus is to make sure the front looks. Ok, you know what I mean, so you can't have the trucks at the back spread out wider and, as you get closer to the top, then you start bringing them closer together, especially if this is maybe a first time making a wig on you're, not a hundred Percent sure, maybe I don't have enough hair, maybe at all you know, you're, not too confident in doing it. This allows you to make sure like okay, you didn't waste here at the back and if you need extra hair, you use it more. So on the front just to cover camouflage any mistake or if you have any spaces, so you see me showing you the little piece that I have left out with my finger right. I just leave what sorry it's a bit. It'S a how much little bit I leave out just a little bit right there and it position the we kept the seams over your mannequin head knows, and you can also do this on your head as well. So you see me getting almost at the top of my wig, I'm going through. So with my trucks. No, I mean if you have a great supplier here in finite someone's eye here and you're, not worried about saving here, maybe spaces in your hair. Then I mean you can go close from top to bottom, but me personally, I just want to make sure I'm using the hair as it's a word. What efficiently, I guess as possible. So now that's how much here that's I have going so far. I think this was about three out sort of four bundles, so it's pretty full. You know pretty full and then I just have that circle left at the top of the head and remember said this is not gon na go at the top way ahead. That'S just going to go really like at your head back so now, just taking the last bundle and then I'm going to go in a circle, so we're closing in on the circle right there. So just use a glue, gun and form that circle shape until it gets smaller. Then I'm gon na show you what we do as it gets smaller. Okay! So now that we're closing in on the circle, we can just grab our truck here and just go up like a staircase as I'm showing you just as I staircase. So I'm going to measure it cut the track and then I'm just going to lead straight across from this point on and then it can close the gap. No, you might be worried or you might be saying. Oh, it's a magic square show one. This is going to be a tobacco ahead when we come all this head's going to be pretty big and your trucks aren't gon na show. When you have enough hair, your trucks aren't going to show and by the time we're finished position in the trucks and everything they're going to be hidden pretty well, so we just go up one after the other. So when we're finished with that, no we can cut all the you know. I am just holding it right there, that's all I had left and I'm just going to cut. Please don't cut the track cuts alongside the trucks, and just in that you motion. No, I mean, if you have our slips left, you know I could have caught it straight up and lift it like that as our slips, but I just want it to just cut so the extra cloth that's I had left and then I'm just cutting that little Extra piece and in voila Loudmouth concentrate hard with the scissors. You know it, so that's how much we have left so now. I realize that I had a little bit of space left at the front above the elastic band, so I had a little bita harelip. So I'm just going to do one extra track under there. Just so you know make it nice and needs, and now we're going to be cutting away the elastic band. So you can just cut along like under the truck, and it will be when you're finished it away. You see what I'm saying when you have it just cut directly under the truck, it will come off pretty well and no. It won't like unravel the dome cap or anything. It was pretty awkward trying to film on cuts and try not to cut myself. Was I tried my best guys to show you but sweaty men do we use? What'S I mean, and then there should be another elastic band at the back of your head in between those tracks that we used. You just cut it off same like we do to the ones on the side. So then, that's how it looks when we cut the elastic band. It was pretty neat because I cut directly under the track and then I went ahead and I added some wig clips. Now you don't have to add with clips. If you don't want to, you can sort on your wig, you can secure it with bobby pins, but I just wanted to add some clips just to make it. You know easy, that's the braiding pattern I use and that's on the leave. Oh that's I have you. Can corner you here as well, but I just couldn't borrow so now you're just going to secure the wig. I really want to see how it look see if I'm happy with the amounts and leave words. I have left and leave what's hard on his sleeve that good, you see, I'm not open summer classes guys I am my vision is so terrible. I had so much glasses just to see in the mirror, and I mean so now - I'm just securing the wig it fit perfectly on my head. This dome cap - that's I use is one size fits all, so it it was pretty good. It fit pretty snug and pretty well. I was pretty comfortable with its on my head so and I know some people when they're doing are you part week they like to anchor braids for the two week clips? That'S our our only votes at the top, but I mean this wig. I didn't really want anchor braids you don't have to. If you don't want to, then you can just each attain or use bobby pins. So now we go in with our early votes. I'M just going to separate the new votes spray it with some water Gus is in the way again separate the leave woods at the side and then I'm going to be taking my moose after spray it with some more Sun. Just try to blend my leave votes with the wig using just water and moose combination. No, I really did like this hair from my hair type. I don't know how true to foresee. It really is, but I mean it, it did a job. I really you know. I really do love this hair, especially for the price. You know what it sing, something quick on nice and easy. I was pretty impressed with this hair. So when I'm done with my leave votes, I'm just going to spray the hair and I'm going to use my big paddle, brush and brush it out know when I brush out this hair, I was like okay, alright. Now I see because I mean you'd think I realize, but I realize eventually all right go so no finish. Brushing are just going to grab our scissors on shape of the hair and, yes, we are done. Yes, I mean just kind of pretending to have a Beyonce fan, breeze thing going on and just showing you guys what the hair looks like with our leave odds. So those all of you enjoyed this video, don't forget to Like comment, share and subscribe and follow me on all social Instagram, Twitter and tik-tok at underscore underscore Lindsey birth. I appreciate you guys so much for watching. Oh, this is out of here, looks by the way at the back, and this is how the hair looks to the side. You can put this center part left right side which ever way this is so fun and versatile. So I'll see you guys in the next video till next time, bye

Comments
Shanique Francis: I love this! I really do. Been wanting to make a wig from long time!!
natilue: This was and is very informative always wanted to know how-to make a wig. Thanks Lindsey beth
natilue: This is really big, bold and beautiful i love it
Lola: You did a great job!