How I Make My U-Parts | Ft. Sophia Hair
- Posted on 11 November, 2014
- U Part Wig
- By Anonymous
My tutorial on how I make my u part wigs with a deep side part.
Things used in the video:
- weaving thread
- curved needle
- scissors
- Deluxe weaving cap purchased from
Sally's
- push pins
- Styrofoam head also purchased from Sally's
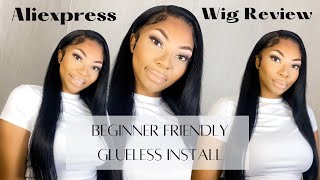
Hair used in the video is from Sophia hair on aliexpress.
- the hair was very manageable while making this unit
- not a lot of shedding
- the bundles are pretty large so you would have to place your tracks very close together to fit more than 3 bundles
- the closure is also really nice and dense, but I did not use it for this tutorial.
Link to their aliexpress store :
http://www.aliexpress.com/store/104881...
Link to where you can purchase the hair :
http://www.aliexpress.com/store/produc...
Any questions feel free to ask me down in the comments !
-----------------------------------------
For business inquiries/ product reviews only :
Hey guys, so I got sent some hair from a company called Sofia hair on Aliexpress. They sent me four bundles of their Brazilian body wave in the length 22 s a 20 and an 18, and they also sent me a 16 inch closure um. Here'S all of the bundles together, the bundles, are like a really nice size, so that's cool and the closure is really big. I like the fact that it has a lot of space on the edge so with I doubt that I'm gon na use it for this install, but I'm pretty sure I'll save it for another one. I did notice that the hair kind of has like a residue on it, so I would suggest co-washing before you install so before we start making our wig we're going to need some thread. We'Re going to need a needle and the needles come in more than one size. I prefer the bigger ones because they're a lot easier to use than the smaller ones, you're, obviously going to need some scissors to cut the thread. A weaving cap, I'm using one that I got from Sally's for like 4 bucks. It has like the adjustable straps on the back and you're going to need a styrofoam head and some pushpins. I don't have any of those. So I'm using nails so yeah. That'S all you're going to need to start so next you want to take like a white pencil and Mark out where you want your leave out to be and where you want your part to be um since mine's a deep side part. I did mine deep on the side if you're not used to making your own, u parts, yet it's better to do this on your head, but since I've made enough, I kind of know where I want my stuff to be and don't mind my no makeup face. I know I look gray, so yes moving on alright, so this is the part where those push pins or my case nails come into play. Um, you're, gon na put them on all four corners of your. U part I mean of your wig cap, so that your wig cap doesn't slide around while you're trying to sew the tracks on okay. So now that your wig cap is secured you're, going to take your needle and you're going to pierce it through the end of your first track, this is the only part that you're going to stick your needle through the track. I just like to do this because it makes it like more secure and you're just going to take it and stick it through the bottom of your wig cap and it'll. Hold it in place like super easy and will make it a lot easier to sew. So now you're just going to take the track and then run it across the bottom and then use a push, pin to hold it in place. This makes it a lot easier to sew. So when I saw the hair I like to you, put the needle like underneath the track and then put the thread over the needle to kind of form a knot, I don't know if I'm explaining that right but yeah, you can see me doing it and so You'Re just going to sew all the way across the track until you get to the push pin so now, it's time to flip your track over and start sewing again so you're just going to take it flip it over maybe put it like a half an inch Above the track that you already sewed and then push your push pin down into it, so it'll hold it in place. So it's easier to sew general, like disclaimer, like I, don't freaking struggle this much to make my you parts usually, but try to position this to where, like you guys, could see it in the video was difficult, so yeah once you do that you're just going to Take like press down the end of it and then try and tack down the part that you bent like as good as you can. So here's, like a closer view of what I do. I just like take the needle push it under the track and then I take the thread and then put it over like the extra thread and put it over my needle, so that I can create a knot and then I'm just going to do that. A couple times in the corner to make sure it's like flat as possible, so we don't have any like lumps and bumps and all that, even though I don't put this up in a ponytail, but I mean I just don't want it. There then you're gon na just do the same thing as you were doing before, just like keep pushing the needle through the bottom of the track. Until you get to the pushpin make sure you don't go through the track because it'll cause like shedding, and nobody once that, okay, so before we fold up the track over. But this time I'm going to take the track. All the way like up to the side of the wheat cap, it's like over the let's stop the elastic band part of the track. I'M just going to take my push, pin and push it down to the top of that, because I'm not going to go all the way up to the top. Where I have my leave out, I'm just going to go over that elastic band and when you're sewing over the elastic band, try not to like get it in, like the actual elastic band, just go through the holes because then, if you get it in the elastic Band um, you won't be able to like tighten it or loosen it up. So I guess, if you don't care about that, then just you know go for it, but if you want to be able to tighten and loosen up the way cap then make sure you just go through the holes. So at this point, um I'm going to create a knot since I got to the end of the track. So I'm just going to take my needle and push it through, like usual like through the bottom, then I'm going to take my thread and wrap it around. The needle three times and then I'm going to just run the needle through and that will create a knot to kind of like tack down the end, because now we're going to fold over the track like we did before now, you're just going to try and get That like in that you bent as flat as you possibly can and then you're just going to take it and sew it all the way around and just do the same thing. On the other side, you're going to sew up to the elastic band and then fold it down, so, as you can see, one side is like significantly larger than the other one, so you're just going to keep playing your tracks and kind of like that curved shape. That you were doing before, because you were laying the tracks by the elastic band you're just going to keep placing your tracks like in that same like set up until, like the curve kind of gets small, then you're just going to kind of like layer tracks to Where they fill up that curve like, instead of going all the way up to the top and then keeping up with the curve you're going to go to like the end of it and then like fold it over, so that, essentially, your tracks will lay straight. If that makes any sense at all, hopefully it does all right so by getting rid of that curve. I'M able to like lay my tracks down straight now, so I just kept laying them straight back and forth and just folding it over on each side like all the way up until I got to the marker, where my leave out would be so. I left like enough room for there to be able to put like one more track there, so I'm going to grab my smallest bundle and I'm gon na measure out where my leave out is and then I'm going to cut a track to fit it there and Then I'm going to sew it on so like if you don't want to cut your tracks, I'm not really sure how you would do this so yeah you're just going to do the same thing you did with the other tracks. Just take your needle and poke it through the end of the track and they're just going to go under the wig cap and sew it on all the way around you're just going to make another knot at the end by wrapping your third around three times and Pulling it through so now, you're going to start with your shortest bundle and you're going to go on the opposite side and start sewing your tracks around. Since the side with your part, is already filled up with hair you're just going to sell your track all the way up until you can't really even sew it anymore and then you're just going to fold your track over, and you know tack down the end. Try to get it as flat as possible, like usual and then you're just going to fold it over and then sew it back to the other end and you're just going to keep doing that back and forth until you fill in that space. Oh you're, just going to keep sewing until you completely fill up that gap. That'S left up. There then you're going to flip that top track back and cut off all the excess weaving cap, and you should be left with something like this um. You can go ahead and add clip to the top or you can sew it onto your head. Whatever you want to do. Usually, I add clips because I like to switch my wigs out often with this hair. It was not shedding like pretty much barely any. While I was making this new part and I'm used to a lot more shedding, so that was pretty cool, um yeah so I'll be giving you guys an update about this hair soon um. If you like, this video go ahead and give it a thumbs up and if you haven't already go ahead and subscribe, and I will see you in my next video
Comments
DreaMsFabulous: Thanks! I loved the way to explained it and demonstrated how to make it! I really learned a lot!! Keep up the good work!
Sasha Goodwin: Finally! A u-part hair tutorial that goes into detail for beginners as far as knots and explaining why you do things! Many u tubers just fast forward through the beginning. Thanks again!
Shay Chanel: This tutorial was very helpful, thanks for the video girl!
agodleygirl: Love it! Please show us how you install them and style your hair next :)
tantanisha spencer: Great tutorial
Aegon Targaryen: This is so good and detailed I cannot begin to even tell you thank you
Kimberly Cronie: This was really helpful thank youu xx
Miss Renee: Thank you for this video. I was just about to request you do a tutorial on this. Thanks :)
Dessy GT: Great tutorial, I need to make a u part my self my next install.
SIncerelyLaine: I've been waiting for this... Thank you so much.. I can't wait to order the hot beauty hair for Christmas and dye it in the midnight blue I sent you on IG
Quisha Black: hmm i've never used a wig cap like that one to sew my hair in, I'm gonna try that one out looks pretty easy
Breanna Dache: this hair
Taneta Hannaway: Hey brittany i absolutely love your videos ..my natural hair is just like yours and i want to wear a u part wig but i want to leave quite a lot of my natural hair out just like you so it looks more natural. Do you still leave a lot of your natural hair out and more importantly what is it like to wear your u parts, do they look similar to a sew in or are they bulky looking? Sorry for the essay please answer love u!
Cynthia Williams: How do you attach the clips to the cap?
Amber G: i cant wait to try my first U-Part wig.. on aliexspress, what is your favorite hair..?. im looking for something that will last a long time
AZ3: Love the video!
PUATE: Hey Brittany, how do you sew down your ear tabs? Do you attach them to the cornrow or let them hang when you install your u-part?
Sydney Byrd: Can you make a video on how you sew your clips on ? I struggle a lot with that.
American Doll: Is there a video of your installation of this?
14heartgirl: Do you double your wefts? Also do you think double wefts make it look bumpy?
Alley Catt: Nails on fleek !!!
Jess R.: Okay weird question lol, I have the same cap with the adjustable straps and everything. How does it fit your head before you make your Upart? Does it fit snug and like behind your ears or do the flaps come over your ears?
LondaB: Omg yaay! I've been waiting for this!
Deja Washington: I've been waiting on this video!!!!
Sasha Miles: So would you recommend the Sophia brand hair? I'm still afraid to order hair from ali express!
Jelise__Styles: what do you have to do to be provided with the hair to do reviews??
Xantanashay: How much would you charge to make this for me ?
Liz Smith: I'm new to the uparts so please forgive me lol but can you change your parting with uparts?
Tee X: what does sealing the wefts mean
Ashanti B: Do you the front of the cap off that you didn't sew any hair on?
Naffie dibba: how is the hair holding up? pls do an update
LovingKari: FINALLYYYY
Akashas Lair: BARELY.... sorry I had to say that when you were talking about the shedding. I like the hair :) I make my wigs the same way but I use a dome cap. I have a BIG head! D: Thanks for the video!
N Vee: I'm not quite familiar with wigs jst wanted to know what happens when you are doing " the deed " with your man? Doesn't the wig move around or completely come off? Lol, if not what keeps it in place?