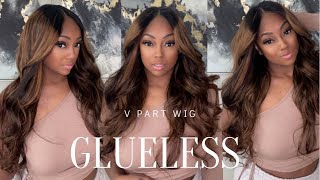
Thin-Part Wig Everything You Need To Know - Featuring "Kym" Wavy/Curly Texture
- Posted on 18 July, 2020
- U Part Wig
- By Anonymous
How to install the Thin-Part Wig with NO LEAVE-OUT using wig clips: https://m.youtube.com/watch?v=wPos2kpz...
How to install the Thin-Part Wig with NO LEAVE-OUT on STRAIGHT textures:
https://m.youtube.com/watch?v=9Nehi1St...
How to do a half/up half down style with the Thin-Part Wig
Thin-Part Wig installation techniques additional details:
Bobby Pin method: This method will give you the most natural appearing roots. It requires 2 anchor braids. If you are wearing it with no leave-out, your anchor braids should be re-braided weekly. If you are wearing a thin leave-out, you can go several weeks without having to re-braid your anchor braids. On average this technique takes 10 minutes to install. With no leave-out it takes practice and skill to tuck and hide your pins correctly. With a thin leave-out you don’t have to worry as much about your tucking technique because your own hair hides any imperfections.
Pros: it gives you the most natural roots possible. It is 100% undetectable when installed correctly.
Cons: for no lea e-our it requires skill and practice to perfect tucking your pins. You also need to rebrand your anchor braids weekly if wearing it with no leave-out.
Wig Clips: This method provides natural appearing roots for curly textures and kinky straight. For straight textures you must wear a leave-out. Your leave-out will need to be larger than the Bobby pin method leave-out in order to cover the bulkiness caused by the wig clip. Though you have to wear more hair out than the Bobby method, your leave-out will still be significantly less than you nedd to leave-out for a traditional upart wig.
Wig clips Pros: it requires no anchor braids And only takes 5 mins on average to install
Wig clip Cons: when doing the no leave-out method you have to have more volume in your roots area in order to hide the line of demarcation caused by the wig clips underneath.
Where to buy:
InnovativeWeaves.com
InnovativeWeavesandWigs.com
Instagram @innovativeweavesandwigs
Facebook: (hollywood 10 minute sew-in https://m.facebook.com/innovativeweave...
Music credit: bensound.com
I have a secret, not one strand of this is my hair. That'S right, i'm wearing my own real scalp, with no lace, no glue, no leave out whatsoever, and in this video i'm going to show you exactly how that's possible. So if you're like me and you've considered the lace thing or maybe you've tried it, but you just cannot get past the little lace holes that you notice on other people or perhaps the aggressive baby hair. Then this might be perfect for you, it's undetectable in pictures and up close in real life. It looks completely natural. I know it sounds too good to be true, but stick with me, i'm gon na show you exactly how it's possible. So let's talk about two products: the patent-pending true roots closure and the patented 10-minute sew-in. Now the true roots closure is a top piece closure, but the opening matches the roots of your hair. There'S no weft. There, there's no lace there. Now the 10-minute sew-in is similar to a u-part except the cap is 100 breathable. It allows your scalp to breathe so no sweating and no itching both of these products can be sewn in clipped in or pinned in now, when you combine the 10 minute sew in with the true roots closure, you come up with the thin part wig this product Is like a u-part except the true roots? Closure is at the top of it. Therefore, there is no weft that you have to cover up and there's no lace. Also. The cap is 100 breathable, just like the 10 minute sew in. So you don't have to deal with any sweating or itching whatsoever. So in this video i am going to install on myself the kim unit, which is a curly wavy texture. Let'S get started so the first thing that i'm going to do is pull up strands of hair around the top opening of the unit, and i'm going to tease the roots. Now i recommend that you use a small tooth comb when teasing the roots. This gives you more control and allows you to tease finer so that it's not overly bushy at the top. So you're going to pull up small sections of hair over direct the hair and tease on top you're going to do that on both sides of the unit. So that you are creating volume around the opening of the unit, so here you can see that you now have roots that look more natural compared to the before picture. So in the before picture, they're kind of straight - and here they have more volume similar to how your natural roots would be if you were wearing curly hair naturally, and it was coming from your own roots now. The next thing that you need to do is to have bobby pins. You want to make sure that you have matte bobby pins, matte bobby pins, do not have a shine, and the reason you don't want to have a shine is because you want it to match the luster, the natural luster of your roots. So let's get started. So i have an anchor braid on both sides of my parting area. One side is done the side, that's on the right side of the screen that looks completely natural. It looks like it's roots coming right from my head, so now i'm going to do the other side. Okay, so the first thing that you're going to do is take the bobby, pin and you're going to stick one prong into the edge of the unit. Now don't worry this, this material is durable, so it's not like lace and then you're going to tuck the pin under your anchor braid. So i'm going to do that one more time i'm going to stick one prong into the material again the material is durable. It will not tear like lace, wood and then you're going to tuck it under your anchor braid and that's it. So i have three bobby pins on each side of the parting area. Now i'm going to go back and tease again in the areas where i stuck the pins, just in case the pins may be showing which i know they're, not because i have perfected this technique. But just in case i like to go back and tease again once i'm done. This is the end result completely. Natural looking roots looks like it's growing right from my scalp, and i love it so again. This texture is the kim texture. It'S a wavy, curly texture. It'S absolutely gorgeous, i just kind of put some water in it off screen and i'm just shaking it to give it a little bit more volume, because i like a little bit of volume. So another thing i want to show. You, though, is that i went back and i changed my part area, so i want you to see that you can also have a thinner part. My part earlier was wider and i'm going to show you why it was wider, so that basically had to do with where i positioned the unit on my head in regards to my anchor braids. So if you want your part to be thin like this, then you need to stick to braids that are parallel to each other. They start in the same spot. So that's going to be typically your front braids or an off-center braid. So you can do a center part. You can do an off center part, and that will give you the thin thinner part that you just saw a few seconds ago. So again, stick with braids that start in similar areas of your head versus a braid. That starts further back like this one, if you're choosing braids that start further back and then you have one that starts further up on the other side, that's when you're going to have a wider part, so just stick with braids that are right next to each other, And you can have that thinner part that you just saw now. Here'S another thing you want to be careful of this is how terrible it can look if you do not install it correctly. Mainly, if you don't have your braids done correctly, then this is what you could end up with. So let me show you why again, you want to make sure that your braids are parallel to each other. You also want to make sure the roots are not showing, so that means they need to be small enough, that the roots of your own hair are not showing like this one. This one, the roots, are showing. So when you tuck the pins under your braids, that is what's going to be revealed and you're going to end up with this, which is showing the roots of your hair. That'S why you need to make sure you get your anchor braids redone every week, so that your parting area can look natural like this. Now, if you don't want to deal with bobby pins or anchor braids guess what it can be clipped in. Yes, it can with no leave out it can be clipped in. There is a detailed video in the description box so make sure you check that out now. If you want to wear it with straight hair with no leave out, then you will need to either have it sewn in or you will have to do. The bobby pin method that video on how to do the bobby pin method is in the description box as well. Of course, just like a u-part wig, you can wear it with a leave out now, i'm showing you how thin your leave out can be here. It can be completely see through because the top of the unit mimics real hair roots, so you are not having to cover up or weft so right here. This was the bobby pin method with a leave out. If you do wig clips, you'll have to leave out a little bit more hair in order to cover the bulkiness of the wick clips, but look how undetectable that is absolutely love it. You cannot tell that it's anything there, so that is everything. Please check out the description box. There are so many details in the description box. You'Ll be able to find out how to do the wig clip method you'll be able to find out how to do the straight method with the bobby pins. Thank you guys for watching. I hope this was helpful.
Comments
kennedy adams: Just wanted to say thank you again! I just received my bob. I love it! I wear it with a thin leave-out. I couldn't get the hair pin method on straight hair however. I have candice unit too, that one is easy with no leave-out and wig clips. My recomendation is if you want to pop on and go and wear no leave-out, get a curly unit with wig clips with the no leave-out option. For straight hair expect to wear a leave-out. My leave-out is extremely thin. But if it lifts up, nothing is noticeable, you can't beat that. Also, be prepared to feel like you have on nothing. It's literally more breathable than than a sew-in.
Innovative Weaves: The description box is filled with valuable information including videos to additional techniques as well as the pros and cons to each install method. Let us know if you have questions. Be sure to leave your review in our comments sections to assist others in determining which texture, density and technique might work best for them. Join us @innovativeweavesandwigs on IG for more picutres and videos InnovativeWeaves.com
MyNola Hokey: Can you show us how to do a half up/down hair style?
jayla reed: I have this texture. Do you know what she used to get definition in her curls? I love mine but I want more definition.
Ronni j: THIS IS A TOTAL GAME CHANGER.....NO NEED FOR SEWIN OR WIGS ITS OVER YAY!!!!
Yamou Jallow: Hi, what length is this wig? 18? Am trying figure out whether to get the 18 or 26inches. Thank you x
Nervgirl1: Where can I watch the other install video for straight textures with no leave out? The ones in the caption are all private.
alexis freeman: What products did she use? Just water? Her hair had a lot of definition.
Ruben Brouwer: Can this be done on fine hair?
Sydney Adams: Why did you post this? I already have two, now you want to take all my coins Love this texture! What length? 250% density?
chakai0509: Can you get curly units in light brown blonde colors.
Mrs. Anika Taylor: @InnovativeWeave So you're saying i'd have to do the teasing she is doing to the roots of the thin part to this unit everyday to wear it with no leave- out?
Camcamlady: On the website it says to leave out some hair but I see you didn’t. I’m just confused. I would like to not have to do leave out! Can you help :|
Kitti Moore: I know this is a year ago but can i purchase kym 150 density 22 inches?
Felisha Davis: Aggressive baby hair
Jules De Vos: Where to buy? Im sending this to people I know?