How To Wash And Style A Body Wave Wig And Add Layers
- Posted on 07 February, 2023
- U Part Wig
- By Anonymous
how to wash and style a body wave wig and add layers
Join this channel to get access to perks:
https://www.youtube.com/channel/UCe_sE...
SHOP BELOW
MY BOOKS: E-BOOKS – https://enlbeautyng.com/books
ON AMAZON (PAPERBACK): HOW TO START YOUR HAIR BUSINESS: https://www.amazon.com/HOW-START-YOUR-...
HOW TO START YOUR HAIR BUSINESS (EBOOK)- https://enlbeautyng.com/product/how-to...
Hair Extensions And How To Test Its Quality (EBOOK): https://enlbeautyng.com/product/hair-e...
ENLBEAUTY HAIR (WIGS): HAIR – https://enlbeautyng.com/hair/
WIG MAINTENANCE SERVICE IN LAGOS NIGERIA: https://enlbeautyng.com/wig-maintenanc...- services/
MAKEUP: ENLBEAUTY https://enlbeautyng.com/makeup)
MY HAIR VENDORS:
Vendor Plug – ENL BEAUTY https://enlbeautyng.com/vendor-plug/
1.Raw/ Donor Vietnamese Hair Vendor – https://enlbeautyng.com/vendor-plug/ra...
2.Virgin Vietnamese Hair Vendor – ENL BEAUTY - https://enlbeautyng.com/product/virgin...
3.Virgin Chinese Hair Vendor – ENL BEAUTY
https://enlbeautyng.com/product/virgin...
4.Raw Chinese Hair Vendor – ENL BEAUTY
https://enlbeautyng.com/product/raw-ch...
COURSES: Hair Colouring Course – ENL BEAUTY (enlbeautyng.com)
https://enlbeautyng.com/hair-colouring...
Wig Making Course –
https://enlbeautyng.com/wig-making-cou...
HOW TO ADD HIGHLIGHTS TO YOUR WIG COURSE: https://enlbeautyng.com/product/how-to...
HONEY BROWN HAIR COLOURING & STYLING COURSE: https://enlbeautyng.com/product/ honey-brown-hair-colouring-styling-course/ HONEY BROWN HAIR COLOURING & STYLING COURSE
SPEAK TO ME: https://enlbeautyng.com/one-on-one-bus...
SPEAK TO ME:
IN PERSON TRAINING: EMAIL ME [email protected]
#wigstyling
Birthday" by LiQWYD https://soundcloud.com/liqwyd
Creative Commons - Attribution 3.0 Unported - CC BY 3.0
Download / Stream: https://hypeddit.com/link/h150s6
---------------------------------------------------------------------------------------------------
Free download: https://hypeddit.com/link/h150s6
Stream/buy my music:
- Spotify: https://spoti.fi/2RPd66h
- Apple Music: https://apple.co/2TZtpeG
- Soundcloud: https://soundcloud.com/liqwyd
- Bandcamp: https://liqwyd.bandcamp.com
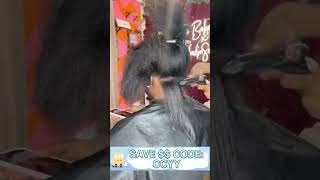
Foreign style, your body wave wig, or how you can even style, your natural straight wig to be body wave and also add layers to your wig. So this wig right here I used a long lens, like 22 inch, 18 inch and 16 inch in making a week. So I did it such that the longer lenses are the bottom part and the shorter length is at the old parts. Closure was long. I had to cut the closure a bit, so what I'm doing right now is, after I brush through the wig I'm trying to wash it right now, because of course, I want to ensure that by working with hair, that is very clean. So I'm gon na um completely wet the hair and wash it with this hydrating shampoo that I'm showing you, after washing your hair with the shampoo I'm going to proceed to conditioning the hair, just watch and see how I do it. Yes, wash wash wash wash the quality of this vitamins here is really really good. The plant that owns this week bought this hair from me about five years ago five years ago, and she has wanted such that she put the shorter length at the bottom part and right now she wants that layered looks. She asked me to reverse it back to the longer length being at the bottom part, and the shorter lens are the all parts. So that's what that's. The reason why I had to reread the hair for her and honestly, like the quality of the hair, is really really nice and I miss her actually so after scrubbing the hair, I'm rinsing off the soapy shampoo water from the hair rinse it off. You know the thing about living in lekki in Lagos. Nigeria is where I'm staying at this currently like water problem so most times. If it's not the issue of the water being dirty, it's the water not being available. That'S the reason why I'm literally taking water from a bucket, but honestly I can't just wait to just join my people and jackpot. I can't wait to Jackpot boy, the grace of God. So right now, I'm mixing up the shampoo from the hair. I want to just quickly brush through the hair beads to ensure that everything is fresh and, yes, everything is fresh. So next step is I'm going to start, I'm going to condition the hair and I'm using this Tresemme conditioner. I'M gon na pour the conditioner onto the hair just pour. This is a generous amount. Then I'm going to massage the conditioner into the hair, apply it apply. Generously perfect conditioner with my palm and I'll proceeding using the brush to walk the products into the hair. Just use the brush and brush through the hair. Next, I'm going to apply this Argan Oil creamy hair Max I'm going to apply it on the bivon, so all check out the description box of this video for the list of all the products that I use. I'M going to ensure that I put the names of the products that I use in the description box, so in case I didn't show it for long enough. When you check the description box, you can see the names of the products, and you can also check out my other resources that I have available for you, such as my books, my ebooks, my vendor information um. If you want to book a one-on-one session with me, it paid one-on-one session because man time is money foreign. If you want any of those resources in the description box, just check them out and um enjoy so right now I want to apply these castro oil to the hair, so serve as a moisturizer, so I'm gon na just massage it into the hair and next I'll. Just leave it leave all the product on the hair to stay there for about three hours and I'll proceed to rinse it off and dry it, and then I will start to style the hair. That'S what I'm going to do because, right now, I'm actually doing with the whole entire hair launching process you just rinse it off after a while. So now this is what the wig looks like after I have a dried, just see how beautiful it looks. Five years old will be still looking like it was it's brand new, so I'm going to use that razor blade comb to start adding layers to the front part of the wig. Like I said, my clients wants her wig to be layered. That'S the reason why she had me with wig it and what I'm doing right now is I'm cutting the layers, so I'm starting from the up parts. That'S like the closure area, the front part of the hair and I'm just cutting it in a downward Direction and taking it down towards the tip of the hair. That'S the bottom part of the hair, just watch the movement I'm making and the all parts taking it down, taking it down, slanting it downwards. Yes and the same thing I do on this side, I'm also going to do on the other side. So I just elevated it to ensure that by the time let's say, I call the Hair it's going to give that back flip so that the hair just rests on her shoulders. That'S this up part here, rest on our shoulder area, while the other one you can just fall backwards to her back or wherever she wants to place the hair. So right now we are done adding layers the front of the week. I'M gon na be starting the hand I'm using this Moroccan Argan Oil serum I'm applying it to my palm massaging it in and applying it directly to our wig, just applying a generous quantity to the front of the wig and I'm taking it to the back side. But I know the quantity of the serum on my palm is not going to be sufficient to really work on the hair on the back side. So after applying water, my palm to the front part of the wig I'm going to turn to the back and apply a little more of that serum to the back of the week. Yes, you can see that before applying to the back side the ends. Look, they beat Stripe Right now. It looks more refreshed with the let's see, I'm going to start sectioning away the up part of the head, so it enable me to start curling the hair, I'm gon na use that clipping that clipping, Peg or pink. I don't even know what to call you, but I'm going to use that clip to clip the up out of the hair away to allow me to start working on the back side of the hair. So after I've applied this serum, as I showed you earlier, what I'm going to spray on the hair now with my heat, protectant spray, this is going to prevent any hair damage as a result of excessive heat. I'M just massaging the heat protectant spray on the hair, while I comb through the hair. Next, I'm going to take a small section of the hair and start coiling it with my coiling one. So I took a small section of the hair I combed through with my tail comb and I'm reaching out for my coiling wand. Now so I'm using the coiling I want to sort of straighten the hair. Then I wrapped it. I started wrapping the hair around it. So I'm going in an upward Direction, I'm calling the hair upwards, some people curled your hair backwards. It'S I feel like this coiling hair thing. It'S all about preference people have different ways in which they do this, but you can see what I did. I called mine with the way because of um right-handed, it's sort of difficult for me to walk, walk when it comes towards the left side of my head my hand, rather that's the reason why I called it upwards, so I can easily just take it backwards so That it goes in the right direction and when I'm on the right side of the way, because I'm going to coily backwards so that it goes to the left Direction. So after I hold it, I used my Clips to hold the coil up. You want to always ensure that you clip your hair up or keep your hair so that the cold does not um become weak because you dropped it before you cooled down so clipping. The calls up allows the heat to cool off before you take off the clips. So when you're curling your hair, you want to ensure that you hold that coil in while, when you've called the hair on the coiling one. You want to hold the hair on the coating, one for at least 30 seconds to 45 seconds or even one minute, so that the hair really takes the heat. It depends on how hot the coiling one gets, but try and hold it up there for as long as possible, till the hair gets the heat sufficiently. If the hair is not hot, when it's up there, there's no point taking it off because it hasn't received the heat that will allow the hair. Take the coil pattern of that wand. So after I coil the hair clean it up, pin it up and you proceed to repeating the same process of coiling, the hair backwards for the next hair. This is the repetitive process. I'Ve showed you guys, like four of the hairs I've called, so I'm going to skip like the middle part of the hair and we'll move over to like the upper part of the hair, and so you can see here. I'Ve called most part of the hair. What I'm trying to call now is the opposite section of the hair. I know I still have some hair before the closure area, so you're just gon na watch and see how I call this sides of the hair which is like close to the closure area. So I'm going to cut a small section of the hair after I've parted the way this closure area. I just Clips the battery, so I cut a small section of this hair. I sprayed my heat protectant spray and I'm going to use my coiling one to sort of straighten the hair first and I start to wrap the hair around the coiling wand and I take it backwards. I take it backwards. I take it backwards, I'm calling it I'm trying to ensure that that coiling around pin sort of holds it or you don't have to do it. You can just wrap it all around it. Hurray Pizza, Rapids, Rapids and you hold it up there. So let the heat stay on the hair for at least at least 30 seconds before you take off the coiling wand and you repeat the process on the next hair. So now I believe the hair is hot. You can even see it steaming hot. So I'm going to clip that hair up there and coil the next hair foreign of this tutorial, so I'm gon na be coiling the hair on the closure area right here. This is the right side of the closure area. I just called it up. So it's going to be the other side of the closure that is left. You can see, I'm coiling it upwards. The reason why I called it upwards is so that it gives me that sort of um backward it goes in the backward Direction, so people want their hair to come facing forward. I prefer that backward. Look that reason why I coil is upwards so that when I drop the course it's going backwards, so I'm going to clip that hair up and curl the other side foreign process coiling your hair takes time coiling your hair takes time. I know that, but the beautiful review we're going to have the beautiful work of art we're going to have after the cut the heat on your hairs, cool off. It'S going to be so worth it. So I'm going to let the coals on the hair cool off! For about 30 minutes or some people, you can even leave it for about a day or two days. It'S all your choice. So when I take off the clip on the course I'm using my fingers separated I'm not going to be into this course, because I want the course to last longer. I just still wanted to have a bit of a bouncy. Look to it. That'S the reason why I'm using my fingers to separate it - I'm not combing through this hair and I'm going to do the same thing all through the entire hair. Remove the clip use my fingers to just part through the course part through the curls. I'M not convenient repeat the same process says all over just look at how beautiful this hair is look at how beautiful this hair is: God, huh? Okay, let me just keep busy removing the clips and placing the calls how I want them to be and see how beautiful the layers is just see. Just oh man, I love her so much. I don't know why. I just love her so much. I love her. So much I love seeing good hair. Oh okay, guys. I hope you are enjoying this tutorial so far. If you are getting value from this video, please make sure you smash the like button and share this video with your friends who are going to also learn a lot from it and please subscribe to my channel if you're not yet subscribed. Thank you so much for supporting me and make sure you check out the links in my description box, so you can purchase or have access to the resources that I have available there, such as the product I use for styling this hair and other products that I Have and Services I have available for sale on my websites, okay, guys so now, it's time to style the hair on the closure area and I'm going to use this wax styling wax here to lay these short hairs on the closure area down, and I'm also going To apply that styling mousse, The Styling mousse, I typically use when I'm styling my hair, I'm applying it to the honey closure area and I'm going to also spray my heat protectant spray on the hair. Then I'll use my hot coiling one to flatten the hair on the closure area. Just look at how shiny and beautiful this hair is. It looks so good, so just keep putting pressure on the hair on the closure area on all sides, from the left side to the back side and to the right side. Yes, until you are pleased with the results you have, or as it is right now, I'm really pleased with the result I have like this hair is so beautiful, so guys don't forget to give this video a huge thumbs up and share with your friends who are Also going to get value out of it remember to subscribe to my channel for more amazing content and um. Remember people would have courage if a positive life check out all my videos check out my shirts check out my live videos, and you know check out my website also and buy products and services from my website. Please support Eno Beauty. Yeah no beauty is my name. Actually enl is is like my full name. That'S what I derived my business name from so support. Enl, Beauty, www.enwtng.com and um I'll be glad to save you thanks so much for watching this video. So right now, I'm just styling the week, I'm just playing around with it, for what I'm going to do next is just park this week and send it over to my client thanks so much for watching guys. I love you bye!


Comments
Linda Ezemedolu: SHOP BELOW MY BOOKS: E-BOOKS – https://enlbeautyng.com/books ON AMAZON (PAPERBACK): HOW TO START YOUR HAIR BUSINESS: https://www.amazon.com/HOW-START-YOUR-HAIR-BUSINESS/dp/110022372X/ref=sr_1_4?crid=3007RCTZC29IT&keywords=HOW+TO+START+YOUR+HAIR+BUSINESS+LINDA+EZEMEDOLU&qid=1671548015&sprefix=how+to+start+your+hair+business+linda+e%2Caps%2C632&sr=8-4 HOW TO START YOUR HAIR BUSINESS (EBOOK)- https://enlbeautyng.com/product/how-to-start-your-hair-business/ Hair Extensions And How To Test Its Quality (EBOOK): https://enlbeautyng.com/product/hair-extensions-and-how-to-test-its-quality/ ENLBEAUTY HAIR (WIGS): HAIR – https://enlbeautyng.com/hair/ WIG MAINTENANCE SERVICE IN LAGOS NIGERIA: https://enlbeautyng.com/wig-maintenance- services/ MAKEUP: ENLBEAUTY https://enlbeautyng.com/makeup) MY HAIR VENDORS: Vendor Plug – ENL BEAUTY https://enlbeautyng.com/vendor-plug/ 1.Raw/ Donor Vietnamese Hair Vendor – https://enlbeautyng.com/vendor-plug/raw-donor-vietnamese-hair-vendor/ 2.Virgin Vietnamese Hair Vendor – ENL BEAUTY - https://enlbeautyng.com/product/virgin-vietnamese-hair-vendor/ 3.Virgin Chinese Hair Vendor – ENL BEAUTY https://enlbeautyng.com/product/virgin-chinese-hair-vendor/ 4.Raw Chinese Hair Vendor – ENL BEAUTY https://enlbeautyng.com/product/raw-chinese-hair-vendor/ COURSES: Hair Colouring Course – ENL BEAUTY (enlbeautyng.com) https://enlbeautyng.com/hair-colouring-course/ Wig Making Course – https://enlbeautyng.com/wig-making-course/ HOW TO ADD HIGHLIGHTS TO YOUR WIG COURSE: https://enlbeautyng.com/product/how-to-add-highlights-to-your-wigs/ HONEY BROWN HAIR COLOURING & STYLING COURSE: https://enlbeautyng.com/product/ honey-brown-hair-colouring-styling-course/ HONEY BROWN HAIR COLOURING & STYLING COURSE SPEAK TO ME: https://enlbeautyng.com/one-on-one-business-consultation/ SPEAK TO ME: IN PERSON TRAINING: EMAIL ME [email protected]