Sewing Down A U-Part Wig
- Posted on 25 January, 2021
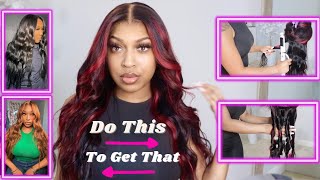
- U Part Wig
- By Anonymous
Plus how to make straight hair wavy with no direct heat using our Raw Indian Hair.
Follow us on IF and FB @mercycouturewigs
Shop with us @ http://www.mercycouturewigs.com
We'Re going to show you how i install this u-part wig check it out all right, so i have a youtube video on how i made this youth part wig, and i also showed you how i installed the u-part wig with um clips all right. However, i'm not going to install the wig with clips um. This is my third time installing this wig and i pretty much install it every two weeks because i take it out wash my hair and so forth condition my hair and everything. So what i did was yesterday, i showed you guys, here's the inside of the wig, and i showed you guys how i just washed braided it. This isn't going to be my first time testing it out. So we're going to see how it looks together, but pretty much i've braided wigs before i just wanted to see how it will come out with the straight wig without basically adding heat to it. Um well actually direct heat. So let me just clarify we put it in the you'll, see if you watch the video um and we dried it for, like probably like. I think it was like 10 15 minutes, and then i just air-dried it. I just wanted to lock this in, and i didn't add anything to this, because the hair is pretty much this shiny already, it's not too shiny, it's perfect, okay, so this is what i did and you'll see in the other videos. This is the final result of my braids all right, so i have this here. I do the connecting method. These are my anchor braids where the wig is going to be sewn to, and this is my leave out, so i'm trying um a center part all right. I didn't want to leave too much hair out. It looks pretty thick right now, because it's um pretty much stretched out. It'S not completely straight, but this part of my hair anyway is has some type of heat damage, especially the front of it. When i went and got it done in last octo august yeah so, but the new growth is obviously better alright, so i'm just going to braid this down. So that way, it's out of the way, all right and the way that i parted this okay, so reason why i, like you, parts as opposed to sew-ins one, you don't have to it's easier to just take out a hairstyle for me is a good hairstyle when It'S easy to dismantle as well: okay, yeah granted. It looks pretty and all that okay, exactly so my hair just did all that for nothing. It looks pretty and all that, but how is it going to be when it's time to take it out all right? So i did that so i can have the hair out of the way. So normally i would do this in the full mirror. So i can make sure that i line everything up because i wear glasses and i cannot see that so i have my trusty mirror and i will keep looking back and forth at my mirror, alright. So what i have right here excuse me. What i have right here is nylon thread and i have a needle oops and i have a needle. So i'm going to thread my needle now. I usually thread about arms length to avoid getting it um, tangled and stuff like that and knotted, but sometimes it doesn't even matter it's just getting knotted. I think it's also the nylon thread too, but so put the needle through the eye of sorry put the thread through the eye of the needle just like if you were, if you're not so close same thing, if you sew uh embroidery on something, it's the same Thing you're sewing something on to your hair, all right so, like i said last time in my youtube video, i showed you guys how to put the u-part wig on with clips okay and not combs. I first tried cones i'll, give you tell you the story, while i'm putting this on all right. Okay, so i'm just going to show you guys see how it's basically a? U, and this is basically a. U there's also this thing called a v part um. I guess a v part is just like this and this and it's not really like a? U it's just more like a v. It'S the same thing so interchangeably people say you part v part but yeah all right and we plop it on. Yes now this is uh if you're wondering um i'm going to. I don't put a stocking cap under this. This is no reason, no need to put a stocking cap, but before i do that what i'm actually going to do is be right back. So, oh, let me get my little cover. Um, oh gosh. I hope it wasn't bending over damn anyway, all right. So i'm just going to grease my scalp. This is 100 natural hair oil. It'S rose, hair oil does wonders it has properties that are known for stimulating hair growth, um helping with inflammation adding nutrients and vitamins to your hair um. Now it's very light oil very light. So it's not hopefully going to clog up your pores, you know, but it definitely what i would say eliminates itching for the two weeks because i have horrible, i'm gon na have to go to dermatologists or something, but i mean i mean i have horrible and then I'Ll just take the oil and i'm just going to actually put more on my hair, because i want my hair to be moisturized for the, because yeah so and i'll add some of that along the edges too, like throughout the week, not every day, because i don't Want it to get on the hair, if i was actually doing a full wig um that took on and off every day, i would be putting the oil in my scalp every day like every day, but i'm not doing that now. So so you can see i'm taking that braid and i'm just tucking it in now. You could also braid the braid up like braid. It put it up here and braid it and attach it. I'M not doing all that. Okay, all right make sure you wipe your hands dry, because you don't want to grease up the the wig all right. So all right! Okay! So let me click this on and i'm going to line it up all right. So it's pretty much lined up and you can pick and choose a side to start on, i'm going to start on the right side. Okay! Now this is the first time i'm doing this without looking, but please look and i'm just gon na look because i don't feel like doing this. You know what again line it up it's much easier to install when you have clips, but this is just me doing it. Um sewing it in okay. So let me get the hair out the way it's a lot easier now that the hair is braiding all right. So you wanted to cover the braid, so i'm bringing it all the way down, so it can cover the braid all right, yeah and the nails. Obviously don't make it any easier. So you just go in and out and i'm holding it because i want it to stay there and plus. I don't want um a lot of stress on my braids, so i'm putting it through the whole braid and i'm i'm not pulling tight like what you normally would do in a um sew in absolutely not absolutely not. I don't want any tension on my hair. So, oh i forgot yeah, so this is why i'm doing a u-part as opposed to a sew-in one. I can treat my hair a lot better with the um. You part, because i want to i'm trying to do retention right now. That'S my main focus growth. I'M happy with the growth it'll keep growing, i just got to make sure got ta trim. My ends got ta, make sure god i got ta make sure i add moisture to my head at all times. Um just got to make sure i maintain the health of my hair and my scalp. That was the one thing also that i thought. Oh you know you could put some grease in your hair. Yeah no and everybody's here is not the same. So one thing that i did that, oh my god, i will never ever ever ever - do that again, all right just keep braiding along the um and since i'm not using a mirror right now. I could probably use this, but i'd have to get up anyway. Gosh darn it i forgot what i was saying: um yeah, it's like i want to um. I don't want any tension pulled on my my hair. I i've had numerous amounts all right. Let me make sure i'm doing this right. All right see i've jacked it up. Already all right, i don't know how this is going to work. I don't know how this is going to work all right. I don't like that. Not the braids, the threads, that's jacked up for me, so i think this is as far as i'm gon na go with this hey all right. So i'm back all right and i am basically going to oh gosh all right, i'm back! So i'm basically going to explain what happened to me. I had to take this side out again because it didn't look right, because i couldn't see what i was doing and i was just blindly doing it and again, like i said i have to wear this outside. So i was like no, so we got everything to settle where they're settling so now i can just go about my business, which this part is usually the part that i do and i don't have to look at anything. But let me make sure i don't have any here all right, so we're just going to continue to sew this down and let me close this because there's some side, noise, all right and yeah. I have inappropriate pants on so um yeah. So if you're looking, you know if you're doing this at home by yourself and you know pretty much how to sew a track in or know how to sew, i would suggest just practice. It'S you're just sewing around that. Braid you're sewing the ends of this around the braid. Okay, it's really simple: um, i'm just gathering the end of the wig cap. Now i customized the heck out of this. So i cut the edges off. I measured it um, it's exactly fitting my head, so i know that some of the other wig you part wigs, they come, and yet this also takes time because i stop and i talk um, the other. You part wigs. They come full yeah but see i'm afraid that the factory wigs aren't gon na fit my head and it's gon na be a big gap in the middle. So i basically customized this. I put it on my head, drew it out, outlined it um. I originally was gon na. Have some leave out so do like a versatile kind of wig, but we'll leave the back out, at least just in case. I wanted to put it up, but i never ended up putting it up, because i never ended up going anywhere. So there was no need to put anything up um and this thread i made a lot longer and these i just kind of go. It'S like real big. Let me get the hair out of the way, so i just like you parts i'm really having fun. I cannot wait to do a kinky, curly style next, so that way i can give my hair an ultimate break and don't add any heat to it at all, all right guys. So so you can see what i'm doing back here. So this part, you just basically have to feel and make sure you're putting it through the braid, i'm just like, literally not through the braid but around the braid. So and i'm not pulling like super tight, though that thing came out and you want to make sure that your braids aren't like don't do too big. If you have super thick hair, don't do two big clunky braids, because it's straight here only do that. If you have some like big curly hair, big uh, kinky, curly, wavy hair - something like that is big here, but if you got straight hair, that's supposed to be flat like yeah, you don't want to have like a lump all right. So i'm just going to take this as far as i can take it and it's easier when you do one long thread because you don't have to keep like that was just ridiculous. I normally have two threads and that's it, but just because i wasn't standing up, i'm not in my normal position, when i usually do this. I'M trying to do this, so you guys can see it. I compromised sacrifice, but then i got it together and i was like all right. Let me fix this. That'S my damn threat. Okay, so we're almost done so you got to see the raw and uncut i'm going to have to get another thread for this. I don't think this is going to go. Oh shoot. I left everything in the other room, all right guys, all right. Let me just okay. Do it one more time normally go off with the one, but the thing wasn't: recording all right and make sure you get the roots. Oh and since i don't have my edges out, i don't have to straighten my edges. Yes, so excited okay, all right, but i put my bio soak on okay before i did all that all right. So now here comes the moment of truth. Where is my cold? Oh, there goes a needle, ah guys this is carpet so, and i don't walk with shoes in here all right. So taking this out and pretty much oh, i like i'm gon na re-braid it in two french braids with the hair in oh, not bad, not bad! At all now i don't know it may look bad because i can't see far, but it actually isn't that bad, okay, but yeah, it seems to be a lot, makes it a lot. Fuller. I like i like it. I like it. I get to go to the store, oh my gosh, and it's like super soft like. Ah i tell you. I do not sleep with any like a bonnet. This hair - i just sleep with a scarf, so i get my edges down and make sure i have friction on my natural hair, but i put that scarf. That hair is hanging outside of the scarf and the hair is popping popping like really popping. I love it and it blends in nicely with my hair. So it's not too shiny. It'S the right kind of brown. I love it. Oh, i don't know what this looks like guys. It just looks like black. I hope it looks. Okay, i'm gon na look at my mirror. Let me just take this out first, because i mean, of course this is more like an all-day process. I would give this if you're doing this in one day, so it took me on average about like 20 minutes to braid. So sorry, it takes 30 minutes to braid because you got to part everything and then it takes you another 20 minutes to sew it on um and yeah. So i guess at about like an hour or so, and then, if you got to braid your hair and stuff like that, yeah just think about it like an all-day event. Okay, now i might curl this, but i think if i crimp the rest of the hair um braid up the rest of the hair, then it should be in business. Despite my hair, not matching the texture. This hair came out really nice when it's crimped. Just look at it. I can even do like one of these things that you see. Girls do all the time. Let me try that, since i don't have the rest of my hair pinned up well, maybe not i'm gon na have to braid it up, but oh okay! So if it was straight, it would be like really popping, though i'm gon na end up straightening, it curling it, but look at it. Okay and what i'm gon na do is just wet it, so it just has some crimp, i'm gon na put some gel in my hair. Let me see how that will look minus my edges. Oh get some edge control and you're straight, oh okay! Well, anyway, i'm gon na come back and i'm gon na show you guys what it looks like with everything braided. But oh, i got one more, oh, no, but all in all it took the crimp. So my point was just to show you the u-part wig and how to install it and stuff. So look how nicely this is straight. Hair, look how it took the crimps. Oh my gosh. Let me get my hair out the way. Okay, let me get my hair out the way. Look, how nicely okay, i'm feeling it! I'M really feeling the waves all right. So let me braid my hair and we'll get back to you. Okay, so i wanted to show you the final results. I actually braided my hair sprayed a little bit. I had a spray bottle, just spread some water and started braiding, spread some more water and started braiding braided, two french braids going back. So this is how it looks. It'S like super super full. This is only two bundles. I like it, i'm just going to continue the french braided going back, trying to figure out if i burn my forehead, yes got enough of the leave out out. So that's good. What i'm gon na do is kind of run. The pressing comb, the um flat iron on my edges, or just put some grease to just let me put some grease just to put my edges back just in case if the wind blows, my edges, don't show anyway yeah. So i hope you like it. I, like it it's full. This was basically no direct heat. Just you saw my other video you'll see oh dang it. I didn't tell you guys, okay, so what i did was you have to go to my ig and watch my ig story, so you can see what i did. Okay, that's my little secret anyway. Thank you for watching my channel. Don'T forget to like and subscribe and comment below, and let me know what other videos you'd like to see all right so turn on your notifications. So you can see any time that i post a video all right later, post the video. So you can see anytime. I post a video
Comments
NailsBySimone: Beautiful sis