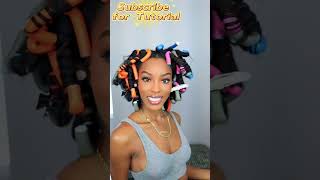
Installing & Blending Curly Clip Ins Twist Method | Ft @Hergivenhair
- Posted on 19 February, 2023
- U Part Wig
- By Anonymous
HerGivenHair has the best natural looking clip ins and it was SUPER EASY blending them. I blended them using the twist method with my leave out.
Hope that you enjoy it! Be sure to like comment and subscribe!
Hair Link:
https://www.hergivenhair.com/curly-tex...
Coupon Code: hghytb (Up to $50 off)
Curly textured clip in hair || 20" x 2 Bundles
See more pre-style wigs: https://www.hergivenhair.com/all-wigs-...
Hergivenhair Contact Info.:
Website: https://www.hergivenhair.com/?y=ytbgp
Instagram: https://www.instagram.com/hergivenhair...
YouTube: https://www.youtube.com/channel/UCu5eX...
#naturalhair #hergivenhair #lacewig #upartwigs #upartwig
Foreign, hey guys, welcome back to part two of my hergiven hair, clip-in extension video. I am jumping right into the installation of these clip-ins. I basically made a whole little braid pattern and I am going to show you how I ended up braiding the back now, where I'm braiding right now. You won't be seeing at all anyway, because this is where the clip pants are going to be attached. So I'm taking some light: leave-in conditioner, I let my hair air dry a little bit and I'm taking this OU dad oil to seal in the moisture and I'm kind of just combing it out, and I ended up making eight braids now when I make two braids Out of this one section, I am combining it into one braid, so that's basically what I'm doing right now, splitting that section into two and by the way I made four sections in the back. So, starting with this braid, I'm going to braid down halfway and then I'm going to stop and make another braid and then, after I'm done with that, braid I'm going to connect both of those braids. So I thought now for my leave out. This is how much leave out I'm actually leaving out, so I basically just parted um down the edges and then the middle since I decided to do a middle part so yeah. This is how much I left out, which is kind of a lot so keep in mind. I am definitely winging it. I think my necks go around. I won't leave as much out on the edges part, but I did the same process to this um section of hair, just moisturizing it with the leave-in and then sealing it with some oil and then I'm gon na twist that out the way and move on to The next part now I'm taking some bobby pins, and I am pinning my hair up out the way you can see right here. I ended up taking it down only because I wanted to make sure the braids were braided to the very end. I didn't want any hair poking out and I'm making sure I make all the braids um as flat as possible to my head, so the braids in the far back, I ended up pinning in the middle and then the braids on the outside. I ended up kind of tucking it under and pinning it up as well, and oh my gosh, please excuse my kitchen. I know it looks atrocious, but yeah so make sure you pin it down as like flat as possible, because you don't want it to be too bulky. I think the next go around. I will also make smaller braids, but I guess you can say this pattern is definitely for um people who are lazy or just at least winging it. This is probably the easiest thing I've I've done as far as like braiding it down for some clippings, I'm totally just learning. Okay. Now, as far as adding in the clip-ins, I started off by putting the three clip ones in the back, because your head is smaller in the back and now those are on the shorter um clip-ins. As far as how many Clips were on it, they're all the same length, they're all 20 inches - I just put the smaller ones well as far as three clip ones in the back and then in the middle of my head, I moved on to putting the fork Off the forklift ones in the middle, then, as I worked my way up to the top, I put the five clip clip in then after that I made sure I started to put some products in it. As you see it right now, there's no product in it. This is just freshly co-washed we're going to end up adding the same products um to this hair, as I did to my hair. So once you get to the top, I also kind of curved it a little bit just to make sure that it's just um placed on there very comfortably, and once you snap these in they're on there like it's super secure, these clippings aren't going anywhere. So that's something I definitely love about this already. When I added the products to the clip-ins, I made sure that I kind of re-wet it um just so the products will go through it a little better. So I also use the light to leave-in conditioner on my hair on these clip-ins and it's my cream of Nature and it's liquid based and then I took some Eco Styler gel the Argan Oil con and I kind of wrecked it and smooth it through the um Strand so I made sure all of them were defined and I'm also working in sections. Because again, this is a lot of hair and if you feel like one of the clips are placed a little funny make sure you go ahead and fix that as you go along, because if you're gon na put this much effort into, you want to make sure It'S comfortable and it's perfect, so that's what I'm doing to the remaining the remainder of the clip-ins and then I'm going to move on to my leave out now. Moving on to blending the leave out, as you can see, one side of my hair is definitely heat damaged way more than the other side, so I am going to basically apply the exact same products and try to blend it. The best I can now. I did think about twisting flat twisting all of it down, but I was like now. Let me see how it looks once I apply the gel, because sometimes my hair can be a little deceiving, especially as you can see as I kind of wet it wants to start curling up a little bit, but one side is just completely fried so that side. I definitely ended up twisting into the actual clip-ins because um I wanted it to mimic the curl pattern of the clip-ins. So that's how I ended up blending it and some of them I didn't even have to twist, especially the leave out that was on the back portion. It actually Blended in very well. So this is the next day I just take some um Pomade, some Carol's Daughter, honey, Mimosa Pomade and I did tie down the front of the edges. I kind of wanted, like a slick, a slickback look, I guess and um. I ended up twisting the hair in the front, like I said, to kind of blend the curl pattern and with the clip-ins and I'm just making sure that I coat all the hair. So it's shiny and moisturized, I'm taking the oh, you Dad oil again and I'm spritzing it throughout my hair. By the way I love this oil very lightweight and smells pretty good and also leaves like a really good shine, and so I'm making sure I was crunch. It in the hair get that gel cast out and then I'm taking my twist down and as you can see as I take it down, it is mimicking the clipping pad pattern, which is exactly what I wanted. So, by the way this is 3B 3C uh clipping through 20 inches. And one thing I will say it's slightly lighter than my my natural hair. My natural hair is a little bit darker, but I mean it still Blends in pretty well and once I get to the top, I try not to separate my hair from the clip-ins too much because you want it to be uniform from your root to the tip Of the clip-ins, so I just continue to take um all the twists out and that's basically, all I did to blend in my hair with the clip-ins. I absolutely love these. I swear this is going to be like my new go-to thing, I'm going to be baking a wash and go tricking people, because I absolutely think that these blend in so well with my natural hair already - and I am just so in love with these - so shout Out to her giving hair I'm going to leave all their information in the description box below you guys need to definitely check them out. This is perfect for transitioning hair. So let me tell you guys: this is the hair. Seven days later only one touch up and of course I wanted to style it a little bit. So I added a little braid and some hair charms, but it's blending in perfectly still, seven days later, I love this hair. Like I absolutely love it, so everything will be in the description box below you guys need to go check them out, because these clip-ins are bomb but I'll talk to you guys later bye,

Comments
Elena Michel: She has beautiful hair.