Kinky U-Part Wig Tutorial Ft Queen Weave Beauty Ltd
- Posted on 08 August, 2020
- U Part Wig
- By Anonymous
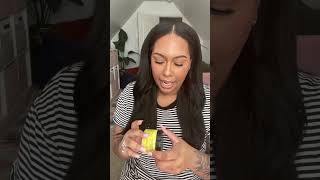
Hey everyone! My name is LaToya the founder and creator of FREEDOM IN MOVEMENT! If you have not already, be sure to subscribe and join our family! Also, please like and comment on the video! In this video I am showing you how I construct and style my U-Part wig using my Queen Weave Beauty Kinky Hair extensions. If you are interested in a detailed review of this hair comment below and let me know! THANK SO MUCH FOR YOUR SUPPORT
Instagram:
https://www.instagram.com/_lovetoya/
Email | [email protected]
#upartwig #kinkyhair #queenweavebeautyltd
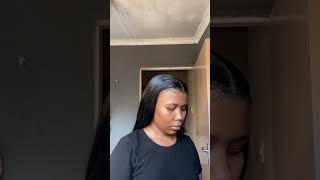
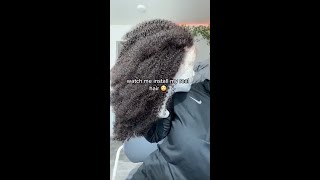
Hey freedom, family, if you'd like to see how i create this curly look, please stay tuned, alright. So to achieve this, look there's going to be a few things that you need a dome cap needle and thread wig head or mannequin head t, pins and clips. I also have a wig stand where i can be able to place everything on, but that's optional, so right now, what i'm doing is sizing up my tracks to the back of the dome cap, to see exactly where i want my tracks to lay and exactly how I want it to go a tip that you can use is you can take a white eyeliner or mark or anything, and you can just draw lines across the the dome cap to see exactly what you want. Okay, so now i know exactly where i want my tracks to be: i'm just going to go ahead and take two t-pins and pin my very first weft to the back, so i know exactly where to start sewing. So this is a personal preference. You can do it any way you choose, i prefer not to sew through my wefts. I go over and pull through. The only time i sew through is when i'm actually starting the row. So so so as i continue, i'm not cutting the wefts either. I do the flip over method, so each row you're just flipping just we're just gon na flip - just keep flipping. So all right. So now we are about halfway through. So what i'm going to do is i'm taking a it's actually a highlight pencil, whatever i don't use it, i'm taking that and i'm marking out my part. This takes a little while because i just want to make sure i'm getting the correct size part. You don't want it too big, you don't want it too small, something i forgot to mention in the beginning of the video. I did use a tape measure to measure the dome cap to my head and also what i'm doing now is measuring the part to the part that i would usually put in my head, because we just i want to make sure this wig has no excuses. So here is where i actually cut the wefts. What i'm doing is i'm lining it up to the gold marks that i've made and i'm sewing around that perimeter after that, then i'm going to clip it and then fill in the parts behind it. So i know y'all noticed that little piece on the side where i'm sewing it's okay, don't come for me. I just clipped it off, but now i'm going through everything and i'm just filling in gaps with any extra hair that i have all right now. So, after filling in all the gaps, the top the back wherever i felt the need she's all done, look at her. What should i name her all right, y'all, we're close to that final stretch, so i'm just taking it off, so you guys can see what it looks like um before i cut it. That'S how it looks nice, i'm gon na just flip it. Yes, that's how it looks so now we're gon na cut, so it may look like i'm cutting a little bit fast, but no, i cut in the middle right cut in the middle and then once that's cut and it's split open. I then work around it. Slowly. Just cutting because you have to be careful not to cut any of the thread, or else all your hard work is. It'S just gone so use sharper scissors than i did because these scissors suck, but you know i had to make them work with what i had so yeah. Now, i'm gon na use the clips from the beauty supply store. They were a dollar and just sew on the areas that i want to hold the wig. So now my hair is already braided and i have my two anchor braids everything's ready to go so i'm just gon na grab the wig, and you know me personally. I prefer to spray the wig before i put it on with some water. You know don't come from my bottle. Okay, i prefer to spray it with some water. Before i put it on, and usually i have a cap to put over my head, but you know your girl can find it so we're gon na do what i do so i just clip it. That'S one clip use, it fluffy make sure it's around on the back and then i clip it on the other end and from here we just adjust to our liking. That'S all i'm doing i'm just adjusting to my liking. If i want a um hairpin, then you know i get a hairpin all right now, it's time to blend, because this this isn't cute not at all, so i'm gon na grab my water bottle and i'm just gon na spray. My leave out the reason why i got this hair after doing so much research on it is because it matches my hair texture to a tee you'll, see so we're going to spray spray spray. Get all that goodness wet into. First of all, y'all saw that so get all the wetness, the goodness in there and then now we need to define some curls. So you definitely want to comb out your leave out and then now, i'm just parting it to my liking. I, like a little bang type vibe, so i just part it that way, and now i'm going to use some eco styler gel now. This is a new trick that i started to use because i've always used cantu, coconut curling, cream or the define and shine custard. But gel has been really doing it to me because, as my hair has been growing, certain things don't work the way i need it to work. No more so i use a gel just smooth it through do what i got to do and again to my liking. You know what i mean, so it comes on a little bit white as you can see with all of the product and all of that stuff, but once it dries y'all, it's gon na be good all right. So, just to add that final little razzle dazzle i'm gon na, take my water bottle again and just spray everywhere everywhere. Yes, gel everything is in there, but spray everywhere, just to get it nice and soft and good, hey everyone. So i hope you enjoyed that video of me making this beautiful u-part wig - and this is the final look yeah so hope you guys enjoyed bye.
Comments
Beyond Style With Q: I love this. First thing I need to do is learn how to sew . I love your texture btw
Robianne Alyssa: Placing my order neoww loved this ima try one
Shawnelle: This is beautiful! What lengths did you get?
dd sarah: beautiful~~
Boo James: Would u recommend this hair?
Rachel Does Life: Did you but longest length at the bottom and shortest on top? Did you use all three bundles?
Her Hair Fetish 1: