U-Part Wig Step By Step Tutorial - (Part 3 Of 6)
- Posted on 10 June, 2015
- U Part Wig
- By Anonymous
Virgin Hair From: http://www.MrsRutters.com
Instagram: http://www.Instagram.com/MrsRutters
Facebook: http://www.facebook.com/MrsRutters
In this step of the U Part Wig Tutorial, Breanna Rutter will teach you step by step how to sew in your hair extensions to create your u part wig.
After placing your markers onto your dome cap while its positioned on the canvas block head, you can then begin sewing your extensions. Make sure to always go through the edge of the cap whenever you are on the edge so that you can wear your u part into a ponytail if you want to!
While you are sewing in your extensions, Breanna will teach you to incorporate the infamous Fold Over Method to prevent you from cutting through the wefts of your extensions. The longest length of hair will be sewn in the very back and following that, you will sew in increasing lengths. Doing this allows for your hair to look layered if you have different lengths of extensions.
PRODUCTS FOR THE U PART WIG;
3 Mrs. Rutter’s Bundles Lengths: 24 in, 22 in and 20 in http://www.MrsRutters.com
Black Nylon Sewing Thread http://goo.gl/rr36p4
Weaving Needles (Curved C-Needle) http://goo.gl/cugnQi
Rat Tail Comb http://goo.gl/NTJJnC
Wide Tooth Comb http://goo.gl/mkXsZC
Dry Towel http://goo.gl/JN0XQP
Hair Cutting Scissors http://goo.gl/rYH7BX
(4) Wig Combs http://goo.gl/ZvDKzx
Bobby Pins http://goo.gl/M6997x
Edge Control (Design Essentials) http://goo.gl/2ibYgw
Hair Holding Spray (Garnier Fructis Style Flexible Control) http://goo.gl/dKC7ni
Duck Bill Clips http://goo.gl/SQ5SNn
Measuring Tape http://goo.gl/MmeI9V
Flat Iron (Nano Titanium Babybliss PRO) http://goo.gl/TbgJFv
1 inch Curling Wand (HSI Curling Tool) http://goo.gl/maV8uy
Block Canvas Head http://goo.gl/UPqHWx
Spandex Dome Wig Cap http://goo.gl/MCa4Rw
Makeup Pencil (Maybeline Wear ‘n Go) http://goo.gl/3DuwlL
Heat Protectant (Garnier Fructis Marvelous Oil Frizz Defy) http://goo.gl/NaspXv
How To Dye Hair Extensions Black HERE https://youtu.be/y93K9gZiBww
How To Dye A Lace Closure Black HERE https://youtu.be/f0F7FWrgnPY
U PART WIG TUTORIAL STEPS
Step 1 http://goo.gl/gGvdVI
Step 2 http://goo.gl/4jbK6N
Step 3 http://goo.gl/cHTJSD
Step 4 http://goo.gl/6S5diw
Step 5 http://goo.gl/6le0ZR
Step 6 http://goo.gl/gzMryd
Thanks For Watching!
----------------------------------------------------------------------------------------------------------------------------------------------------------------------------------------------------
Free Giveaways & Weekly Updates By Email! http://eepurl.com/bN6ddr
Buy My Books, DVDs, and T-Shirts at http://www.howtoblackhairstore.com
My Website: http://www.howtoblackhair.com
Twitter: http://www.twitter.com/BreannaRutter
Facebook: https://www.facebook.com/OfficialBrean...
Instagram: http://www.instagram.com/breannarutter...
Google +: bit.ly/15gNK3M
Got Hair Questions? Email Me!
Email for Business Inquiries
----------------------------------------------------------------------------------------------------------------------------------------------------------------------------------------------------
DISCLAIMER: All suggestions, tips, prizes, techniques and advice given are for informational purposes only and should be used at your discretion and best judgment. I highly recommend conducting strand tests when trying or using new products, hair appliances and product mixes. I am not responsible or liable for adverse or undesirable effects including hair loss, hair breakage or other hair/scalp/skin/body damage as a direct or indirect result of the suggestions, tips, prizes, techniques and/or advice given.
FTC: I am not representing, being paid by, or endorsing any of the product brands in this video & I purchased everything with my own money - UNLESS OTHERWISE STATED in video/blog content. There are links to products that might be helpful based on the content of this video/blog. Each of your purchases via our Amazon affiliate links supports our cause at no additional cost to you.
Music Used
“Easy Lemon”
Kevin MacLeod
Incompetech.com
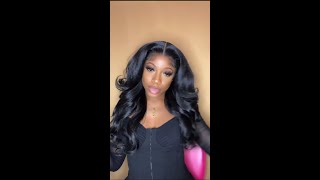
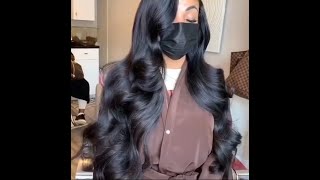
Here we are in step number three of the: u part wig tutorial using Mrs. Rutter's hair extensions from MrsRutters.com in this step, I'm going to be teaching you how you need to sew your hair extensions once your dome cap to create your? U part, wig! So here we are in our: u part wig tutorial, where I'm going to be teaching you how to sew your extensions. But first I want to show you how you want to create your markers on your wig cap so that you know exactly where you want to stop so there's three red marks on the cap there’s two on both sides, and there is also one at the top. Now, when you're measuring the width of where you want your markers to be, it has to be the width of your leave out. So in a previous step, I've stated the width. You want your hair to be as well as how far back you want your braids to be so. The width of my leave out is 3 inches, and that's how far I have mine measured now the length back will consist of how long your actual braid is. That'S next to your leave out the length of my braid is 4 inches to match my wig clip, so I measured back 4 inches with a measuring tape and I made a marker there to show what you want to stop now. We are at the point where I'm going to be also teaching you how to sew your extensions, but, right before I do that, I am going to show you really quick how you want to thread a needle threading. A needle is simply connecting thread onto your needle. So that you can sew your extensions onto your dome cap now, if you have multiple needles, this will help the process continue to go on, instead of always rethreading one needle at a time as your sewing, your extensions so, for example, I’m going to show you how You want to thread your needle, so I have my needle here, and this is a c needle also called a curved needle because of the shape, so you want to do is grab one end of your thread and you want to put it through the eye of The needle, when you do this, you gather the two ends together and your create a knot. Now after you create your knot, you are going to grab your scissors and you are going to snip off the thread right above the knot. The reason why is because, when you create your first knot, you don't want a lot of thread hanging through because it will show through your extensions so that simply how you thread a needle so now that you understand that I'm going to go ahead and teach you. How you want to sew your extensions now when you’re sewing extensions? You have to do so in a U-shaped fashion, meaning that the direction of your extensions, as is being sewn on your wig cap, is going in a U-shape when you’re sewing make sure that every time you reach the edges of your actually wig cap that you go Through the edge here so that if you ever do decide to wear your, u part into a ponytail or anything like that, there is no cap showing or any weft showing whatsoever. So now, at this point, I've left my needle and thread intact, and I am going to teach you how to sew your extensions through this point here and we are going to go through the cap and I’m also going to teach you the fold-over method. With the end of the extensions here so to create your knot, you are going to go through your cap. You are Going to go under your weft, come back out from under your weft, and you want to create a knot in this area. So through the cap under the weft and when you pull through, you are going to do a knot. Technique that I like to teach now this knot technique consists of you wrapping the needle around the string twice and pulling through to create a knot. This is the same process. You are going to do throughout all of your extensions. So now you are just a little bit of space and you repeat, process through your spandex cap right, underneath the weft of your extension wrap the string around little twice and pull through to create your knot. So you are going to continue to sew on until you reach the edge, and you are also going to do that when you reach the edge as well. When you reach the edge, you make sure to put your needle directly through the edge of the cap, so that way it's very flat right against the perimeter of it. So we go right to the edge of the cap. You are going to go underneath your weft and do the same thing. Do that once again, going over just a little bit of space through the edge of the cap and create another knot, and when you run out of string, you simply can just cut off the thread and then continue with the rest of your threaded needles o just Open up your thread to tighten the knot, cut the string off and then continue sewing and then do your flip over, which is what I'm going to teach you. So now we are at the tail end of our bundle of hair of the 24 inches when you’re sewing your extensions, make sure you start with the longest extensions in the back and then work your way up to the shortest length. So at the back will be 24 inches and then 22 inches and then 20. So now we are at the point where I am going to teach you that infamous fold-over method and what the fold-over method simply means. Is you fold your weft back over so that you can begin sewing in the other direction, so they can keep following your U-shaped fashion? The reason why the fold-over method is so important when sewing on your extensions is because it prevents you from actually needing to cut your extensions, so the entire time. You will continue to do fold-over methods to sew in all of your extensions without cutting through the weft. Every time you cut through the weft of your extensions, you increase the risk of shedding in that cut area. So that's why the fold-over method is preventing, so you fold-over and then what you are going to do was you are going to go through the cap and then, when you go under the weft, you are going to go under both of these weft to create that Knot once you do that you are going to wrap the string around twice around the needle and pull through to create your knot now every fold. I suggest that you secure your fold with 2 knots before you move on by stitching, so now that your fold is secured, you are going to begin stitching up to finish off the 24 inches and then you are just going to continue with your next the length Of hair, so, as you can see, this is a finished results of the. U part wig with all of the bundles sewn in all three bundles are included of 24 inches 22 inches and 20 inches of Mrs. Rutter's hair extensions from MrsRutters.com, as you can see with the very last track that was sewn on you want to make sure they Each knot is as close as possible to one another because, as you are wearing your wig, this is the area that has the most friction from your comb and styling, and things like that so to prevent the threads from wearing and tearing and beginning to unravel. It'S very helpful to make sure that the knots are extremely close to one another. Now that you have finished creating and sewing all of your extensions onto your dome cap now in the very next step step number four, I'm going to be teaching you how to sew on your wig clips.

Comments
Breanna Rutter: YOUTUBE HASN'T Been Showing You All My New Videos?? CLICK THE BELL ICON Next To The Subscribe Button to Turn on Channel Notifications To Never Miss A New Video Again!
Natural Since Birth: Thanks for this vid. I never considered wearing a wig but to minimize style time while in school I decide this would be my best option. Now I can't wait to make one (skeptical of my skill, but not my determination) so that styling while at my university is minimal and protective ^-^
AetherDreamSeeker: This is so cool. Not only could this be done for personal fashion but for special events and cosplay. Your tutorial is very easy to follow and professional. keep up the good work. :)
Tammy Lee: Thank you for this! I made a upart wig and now my cap is too tight. Well it was super tight before I sewed on my traxks. How should the cap fit? I'm gonna make a new one that fits.
Lael Mitchell: Yas where have you been all my life? so smooth and well put just like butter!
MizTBeauty: this is totally off topic but what nail color is that? so pretty! thanks for the video tutorials Breanna!
joannamagicaltouchsalon God: what can I use on my human hair to give it that shine?
LaLa LaLa: Great tutorial. Would you be willing to sell this u-part?
Breanna Rutter: Video To Long? If So Watch The Shorter Condensed Version of This Whole Look By Clicking Here https://www.youtube.com/watch?v=jbze0Xv_z8Y
Taylor Danae': You should have shown how to sew the first track on. To see how not to show the track or the cap when to put your hair up
TheJazzie6: I need to see you put it on that where i mass up it was so big my u-part did like it at all LOL!!
Sugar Sukari: My head measure 21.5...I can't find a u part base that measures that. So I made a wig on u part 22" and it doesn't fit right