How To Wash & Style Upart Wigs | Make It Last Forevaaaaaa! | Luvme Hair
- Posted on 30 April, 2020
- U Part Wig
- By Anonymous
#luvmehair #howto #wigstyling #wigtutorial
Hey beauties! Here’s a quick video on how I wash, deep condition and style my upart wig from LuvMe Hair. This process restored SO much luster and shine into this hair, y’all. And I’ve tried it on a few other wigs of mine- it works!
Let me know what you think, and don’t forget to LIKE, SUBSCRIBE & SHARE the love ❤️
Keep staying safe!
____________________
CHECK OUT THESE VIDEOS:
• How I Install My Upart Wigs:
• LuvMe Hair Silk Bob Review:
• How I Dress My 20 lb. Weight Gain:
____________________
HAIR: LuvMe Hair 18 inch Body Wave U-Part Wig- Natural Black
Use discount code JEN20 to save 20% off
https://shop.luvmehair.com/collections...
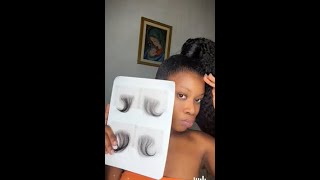
Products Used are in the video.
____________________
Instrumental Music:
“90’s Spring” by Rob Bledsoe. Courtesy of La Smoove Productions.
____________________
DISCLAIMER:
This is NOT a sponsored video.
**Keep in mind that we may receive commissions when you click our links and make purchases. However, this does not impact our reviews and comparisons. We try our best to keep things fair and balanced, in order to help you make the best choice for you.**
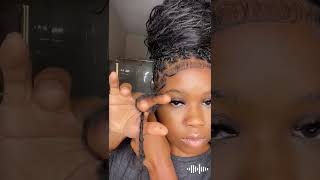
Felt like training with my Nana, hey guys, welcome back to my channel. It'S your girl, Jim Rodriguez, and today I am showing you how I wash condition, treat and style this beautiful love me here you partly now. If you want to see how I fully install my you part, wigs make sure you check out my installation, video, I will put the link in the description box, but if you want to see how to take care of these wigs, so if you were like me, Ok, because we're brothers, don't judge myself if you were like me, and your hairs was starting to stick together when it shook, keep watching this video, because I've got some tips and tricks for you and boy does it feel and look good? So this is your fifth or sixth time watching make sure you subscribe to my channel join the family, hit that notifications Bella sees do what I have coming up next, because I've got some good things coming up since I'm just saying ex, but first ok keep watching. I hope you enjoy this video first, I'm gon na fill my tub with hot water. You could do warm, but you definitely want to make sure it's a little bit more on the hot side. Next, I'm gon na gently dip the wig into the water and gently press along to watch the wig, I'm gon na use. Oh G X, argan oil of Morocco, shampoo, I'm gon na use about a pea size. Obviously I'll use a little bit more, but I am going to just manipulate it into the way really focusing on the areas that touch my scalp so at the very very top a little bit down using whatever is left on my hands and just running it gently Down the wig, but that first wash the shampoo is really just attaching itself to the oil and dirt. So don't expect too much of a suds or soapy type of feel. It'S not gon na feel that way at all, just keep manipulating and then I am dipping the wig into the water, as you can see, whoo look at all of that dirt and just yuckiness. So I'm gon na repeat this shampoo stop, maybe once or twice, but just really paying attention to how the wig feels after each time. So once the wig rinse is mostly clear, I'm gon na detangle it using a nice detangling brush. Now, if you have a comb like a wide toothed comb, that works even better, but this brush definitely does the trick. I start at the bottom and try to get as much tangles out as possible while holding the base of the wig as to not pull too much, and then I work my way to the top to condition the wig I'm gon na use. Oh G X, coconut curls conditioner, it's one of my favorites, I'm pouring a little bit into the water swirling it around and then I'm going to dip that wig in and just leave it in for about 10 minutes. Once the week is done, conditioning I'm just going to dry it really with my hands as much as possible. I did use a towel every now and then, but really I'm first is trying to squeeze as much moisture out with my hands as possible, because this wig is human here, I'm going to give it a little bit of a treatment, so I'm using Lanza's healing oil Serum I'm just using a couple drops in my hands and I'm going to smooth it onto the hair to really infuse the moisture into the wig. I'M gon na place the wig into a ziploc bag. Now some people put their wig in the microwave, I'm not that type of girl, maybe one day I'll, try it, but for me I'm gon na put this actually inside of a heating pad. So I have the heating pad on medium, just to make sure it's not too hot, I'm placing the wig inside and then I'll snap it closed and just kind of lay it up against that heating pad. So every few minutes I come back and check on it turn it over just make sure that it's doing good nothing's burning, but I leave it in there for about 20 minutes once my 20 minutes is up, I remove the wig from the bag and I'm just Going to detangle with my fingers and use a scrunching method at the ends to really encourage that natural body wave curl as I'm working the ends once I feel like the ends are all good. I work my way up to the top and, as you can see, it's getting some nice illustrious shiny, curls. Well, I am going to go ahead and get out of these set it off. Braids that I had so before I install my wig, I'm just going to go through and blow-dry the top section of my hair. So now that I have my hair blowdried at the top - and I have my wig I am going to and right now - I'm just moving out the hair. So I promise you guys if you can't see you're, not missing anything GHD flat iron. I like this planner because it doesn't get too hot. I still love my baby list, but this gets plenty hot, but it adjusts the temperature to your hair tight. So I'm just going to go through and just smooth out my natural hair and really try to avoid straightening out the wig. This is a live successfully salon. Honestly, I've got it tomorrow, y'all, it's a nice small rod iron. I wish I have one like a little bit smaller. I think this is like a quarter of an inch. I could be wrong, but if I had any bigger, I probably won't even do this, so I need to keep the curls somewhat tight just so that it matches with it. So I'm just gon na start by taking a small section from the top. I am going to then lay the wand on the top of the section and bring the hair back away from the face and wind it around, leaving the ends out alright. So the second piece is a little bit closer to the wicked self. So I'm able to have my natural hair and pick up some of the wig hair here and the wig hair is nice and dry. So I'm just going to wand it up to where my natural hair ends. It might take a little bit more, but I like to leave the ends out, so I'm just gon na keep moving around taking them each in the same direction. So I'm bringing them all back away from the face. That'S a pretty one! That'S a pretty one that wouldn't work talk here. Sectioning is everything the smaller the sections, the more bounce and the more curl you're gon na get. So you want to make sure that you take the appropriate amount of hair in each section in order for everything to blend. If I have lipstick on my teeth, Josh cuz, I didn't check okay, so you can judge me only well. I never gon na be mad. I'M gon na save, like this middle part that lays on top I'm gon na, save that for last right now, I really want to try to get around and blend in as much of the hair as possible now this time, because I'm on this side of the Face I'm going to place the wand underneath the section not on top, but underneath the section so that I can bring it around the bottom and around the top and wind it up that way and the curl can go away from the face and I always try To position my want in my hand, so that the most narrow part of the one is facing down, it makes it so much easier to take the hair out of the curl when the wand is in the appropriate position. Alright. So now we are at the top section. I'M just gon na break this off into two pieces. Again with this side, I'm gon na bring the hair underneath and take it away from my face. I got really get a good tension with it and there's my way. I'M gon na now place the wand on top bring it around town, see that the top is nice and wanted very Shirley Temple type of curls, so to get it to match, I'm gon na lightly lightly, spritz it with a little hairspray, less Trias hairspray, and hopefully You can see it just use my comb to break up some of those curls and make it lay a little bit more beachy wavy, just to break them up using the wide tooth comb, starting in the mid shaft of the hair and using it to stretch the Curl out not necessarily calm the curl out, so reality that I am gon na still go through in one a little bit of the ends, but I'm not gon na spend a whole lot of time doing the whole thing I just want to do a few so That the texture of here matches the texture or the shape of the curl down here it creates this undone beachy wavy, look, which is what I'm going for right now. If you're going for something else, your process will be different all right, so I am all Sun honey. This feels and looks so good. I hope you enjoyed this video on how to take care of your human hair. Wigs particularly this, you partly thank you so much for watching hope. You have an awesome day and I will chat with you again soon.


Comments
Katherine Rivera: First and foremost your videos really guided me with this u part wig. From installation, styling and now how to care for it! Love it! I will be subscribing. Also you video on weight gain and how to dress it .....girl kudos cause my 20 pounds had me feeling so blah. Your tips help me revive my wardrobe a bit. Thanks Jen!
Lee Nacola - Mental Health : Wow this is amazing. Thanks for sharing. I enjoyed your video!Thanks for the instruction.
Jenn Rodriguez: Who else does their hair while they’re still “baking“ that FACE?! I’m such a multitasker y’all. Anywho, I appreciate all y’all, especially my NEW SUBSCRIBERS! Welcome to the family ❤️
Naomi T: Ok I have to ask. Your hair is long. Why do you use wigs? I started getting extensions a couple years back to make it a little longer and fuller. Thank you for the helpful tutorial. I put my first Luvme wig on today with your help virtually!