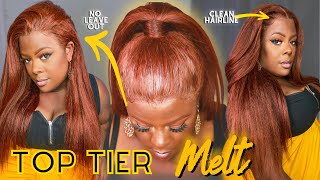
Diy Frontal Sew In On Myself || Kinky Straight Hair *Low Hairline Method*
- Posted on 05 August, 2022
- U Part Wig
- By Anonymous
Hey Guysss,
In this video, im doing a frontal service for the first time. It was pretty easy but also hard, but I love the outcome, and this is something I might do from now on, instead of closures. But if you enjoy the video, don't forget to like, comment and subscribeee #roadto1k
♡Hair Details:
Odir Kinky Straight Bundles:
♡Social media:
Instagram: Beyonce.kellly
Tiktok: Beyonce.kelly
Hair business insta: Alluretexturesb.bar
TikTok Hair Page: Alluretexturesbeautybar
♡ About me:
how old am I? 21
when is my Bday? May 24th
where do I live? Maryland
zodiac sign? Gemini
what do I film with? Imovie and Capcut
camera? Canon m50
favorite color? pink
Current subscriber Count: 175
The subscriber goal: 1000
♡ Business Inquiries: [email protected]
♡ Keywords
kinky straight wig,kinky straight hair,kinky straight,kinky straight lace front wig,lace frontal sew in,realistic kinky straight wig,sew in,best kinky straight wig,frontal wig install on low hairline,kinky straight hd frontal,kinky straight frontal wig,how to do lace frontal sew in,how to install frontal sew in weave glue less,how to do lace frontal sew in weave,how to sew in a frontal,frontal sew in,vixen sew in on natural hair,sew in on thin edges
Hey guys welcome or welcome back to my channel, my name is beyonce kelly and you are watching the life of bkk. This is three days later. I forgot to make an intro, but that's not the case in this video, i'm just gon na i'm, showing you guys how i do my lace front sewing. This is my first time doing a lace front seller, so i might be a little lost when you're watching the video, but you know i did it because look what it looks natural. It looks like my real hair like this, and this is the same kinky straight bundles. If you are a turning dealer, these are the same kinky straight bundles i had in my hair in my large video. You could check the video out, but the only thing that is different is that i bought a lace front instead of a closure, because i was like um, i kind of lace front, because you know i hate closures like unless it's like a 6x6, but i could Not find a six place, kinky straight hair that could match the hair, because you know the closure only do one part, and now you want to know you know, switch parts and all that and stuff and the closure you want. You could do a little part or a side part unless you need a big closure and you could do like a 6x6, and you know you could do both but anyways i'm running too much. But in this video i'll show you guys how i do fun to sew in so yeah. So all the hair details will be down in the description box. Hey guys, so i'm going to do the ball cap method, but like the low hairline method. That makes sense. So obviously you see my edges pulled out the ones that, like you know, goes almost like my eyebrows yeah, so yeah i'm coming those out and you know just leaving the bag just and then just do like your ball. Kit mat ball cap method. You know. Stick your edges put the ball cap on spray. It dry it, you know, cut cut the cap, all of that on that, but make sure if you're doing the low hairline method try not to get the got to be glue or spray or whatever you're, using to paste your little. No ball cap, not on the like, not on the edges. You know now, i'm about to go in with the ghost bomb platinum, not the ghost ball right here. This is one up. This is one up from the regular, and you know i'm just gon na spread the glue all over the cap and the part that don't have my edges left out. I'M gon na put it on my skin too. So you know when you um put the lace on like it's, not just on the ball cap, it's also on the skin. So so they have like extra, like you know, security or whatever so yeah, and now you can see me blow drying, you know dry, it make sure it's clear and i do let me loosen it. I'Ve been doing two layers, two layers of glue, so yeah just do it two times or how many times do you want to do it? You could do it one time, but i did too just because i wanted this to last. You know now i'm going in with the lace, and this is where i get lost, because this is my first time doing like a lace. Frontal piece like install like i did like wig front tools, but not like only a frontal piece. So, like you know, i was getting lost, you know and then some parts of like the cap wasn't getting like. You know paste it onto the skin, so i was putting glue on areas where you know the laces didn't receive the glue. If that makes sense, i don't make any sense, but you know y'all know what i mean in this parts where i i had to put some of the glue on the um on my little baby hairs. But look i got enough baby hairs, so it doesn't. Don'T really bother me and plus i could get it out with some oil whatever, but don't but don't, but don't do what i do if you want the edges. Um yeah, but me, like i, don't know now: i'm cutting my ear tabs and stuff this little pillow and make sure you correct because sometimes like, if you cut it and it's like a little bit too long like it's rubbing against your ear. Oh, my goodness, the irritation is real, like my ears, be itching and then put the elastic band right back on and now you see me sewing on the front tool. So i start from the middle and work my way down on each side. So i'll do my left side. Then i'll do my right side, so it can be all nice and even because i think if you would start from one side and then sew all the way around. I feel like there's gon na be some unevenness going on. Like a shift or something so this is like you know to be safe and i could put it in the prime and i could put it in the plane now. You see me put it on the tracks yeah. This is why i get i'm not lost, but like this took me the longest, because if you doing the frontal sewing like you have to sew the tracks on in a certain way, you know like you can't just you know, i don't know, but basically you have To go back and forth back and forth back and forth and make sure you know it's kind of hard because you got to make sure you know it's not bulky and stuff or you know so yeah. So that's what it's looking like! That'S what looking like! Oh yeah, i cut the ball cap in the back because it's summer and i don't need that extra cap on my head, making me hot oh, so this is the next day you know next day, because i was tired and you know i take my stuff out. The ponytail - and this is the finished result not the finished resort but, like i finished, sewing in the hair. So you know i want to sleep with the thing on and everything you know um, so i guess i'm doing the baby. Now. Okay, i'm doing the babies. You know, comment down hold me down before get the curling iron curl it and then get some got to be blue, gel or whatever you use, and you know soup it up, and i don't like too much baby hair because i like to have my like. You know installs to be very natural, like i don't like all that edges and stuff can actually get. In my opinion, don't come at me but in my opinion it gets crusty and stuff after a while, with all that, you know edges and stuff and there's too much like my two little swoops yeah do me right and then i take that middle piece and i Brush it back cuz, i was thinking about putting baby hairs there, but i changed my mind. So you know you just see me brushing it back, brushing the back. Now i'm getting a headband or a scarf or whatever to just lay my edges, let it sit while i style my hair. Now you see me blow drying it. I forgot to tell y'all, but i washed the bundles in the back, because i didn't like how like the bundles was feeling because those are used bundles, like i used those bundles like earlier this year and i forgot to wash it so. You know i washed the back of like the bundles real quick before i went to bed so now, um now, i'm just flying out right now, because i'm not doing too much, but i kind of rushed it because i was running late, so it wasn't as flat As i could get it as i would like like it to be - oh, my goodness, i'm stuttering, but you know, but that's okay, and also don't ask me where this flat iron it was from because this flat iron sucks like it don't even get like you know. You make the hair like nice, silky straight like if you want a nice silky straight, you better get a flat iron that has like titanium plates, because this right here, i'm telling you i stepped outside my hair puffed right back up. Well, man didn't put no product in it, but i don't like putting product on straight head because it start it. It looks way down. You know what i'm saying. Y'All probably know what i'm saying, i'm probably just talking too much anyway. Yeah, look at me pressing it up pressing it up. Now i'm getting a wax stick and um yeah, i'm gon na get elastic and then get the hot comb to um press the edges around and make sure everything, nice and sleek on top and on the sides. And if you want to know where i get that pink hot comb, i got it off amazon. I think it was like 20 something dollars and it's real good. It'S real good! I like it. I like it. Okay, now i'm crisping my part, because i thought my part was straight, but apparently it wasn't straight. So i went back in to crisp my part up and get that hot comb to like you know, lay down those heads now, i'm getting some concealer to define my part, you know make sure it match my skin tone. I recommend getting like a blue base blue tone type concealer, because this was like a warmer concealer and you know it turned orange a little bit, but that was okay. No one noticed no one's up that close to my head and also i don't do sideburns well. I do sideburns, but i don't lay my sideburns down like you know, like baby haze. You know because i just do a little swoop a little swoop but, like you know, a little press on the side because mind you, i like mine's, very natural and when you get let's be real, let's be real. When y'all get your head done, get a slip. Sleep like a little silk press or whatever is the hairstylist glowing down your side burns with some gel and stuff? No like so i like yeah, i like mine's natural, but look at me. I look cute. This is the fitness product. The finished finished product finished results, hey guys, so if you made it this far into the video now she subscribed, because if you really talk to the video that means you like my video so now go subscribe or give a like. I don't know what little comment, because you know no but yeah. So that's the video and being that is three days later. I think it still looked good being that the the lace is cheap. I mean it wasn't really cheap. It was 85 dollars, but like based on hd, laces and stuff. This is considered cheap because you know that'd be like 200.00, but yeah. So i think it's still hell up good, even though you can kind of see the lace but like you can see the lace in certain lightings and stuff like that. But you know that's okay, though so yeah, so hopefully you guys enjoy. Don'T forget to like comment and subscribe, and i see you guys in the next one, bye-bye angels,


Comments
The Life of ALL: Honey, you be having me rrrolllinnnn laughing. Love your energy so much! Thank the Most High for spirits like yours!! Keep staying true to you.
Caitlyn Bobb: I actually can’t with you