Quick Easy Braid Pattern For U Part Wig
- Posted on 01 October, 2018
- U Part Wig
- By Anonymous
Everything you need to know is right here …
Quick Easy Braid Pattern For U Part Wig
Hey Everyone,
So today I'm showing you how I do my quick and easy braid pattern for whenever I'm either in a rush or I decide last minute that I want to wear my u part wig and I don't have a lot of time to do my full braid pattern. I hope it's helpful. And Yes my wig stays secure for at least a week! xx
Social Media:
Instagram: miminexo - https://www.instagram.com/miminexo/
Twitter: miminexo - https://twitter.com/miminexo
Snapchat: miminexo
Song:
Beat Your Competition - Vibe Tracks from the YouTube Audio Library
Email for business and Inquiries ONLY: [email protected]
Disclaimer:
This video is not sponsored. Everything mentioned in the video was bought with my own money.
Thanks for watching. Please comment, rate and subscribe.
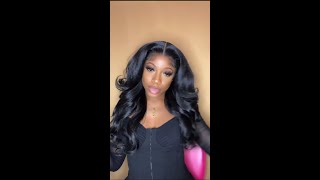
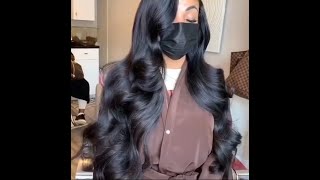
Hello, everyone welcome back to my channel so today, I'm gon na show you how to go from this. Look to this look. So it's basically my quick and easy braid pattern, whatever, like I'm in a quick rush pen last minute I just want to put on my wig, make sure it's secure. So what you're gon na do first is brush out your hair out to cut all of you. Do not comb it out whatever you need to do so. First, I thought I was gon na do a middle part, so I'm gon na do it as if I'm doing the middle part. So what you want to trace the line in the middle. So now we're gon na separate our leaf out from the rest. So it's really up to you how much you want to leave out your lines doesn't have to be straight. Like me, it's just. I have a little bit of OCD, so my lines always have to be somehow straight. So this is why I go back and make sure everything is nice, so it should look something like this, so what you want to do next is just call my throat make sure there's, no, not I'm just gon na separate it clip it up. So we can concentrate on the rest of the hair, so next I'm gon na do trace out my to anchor braids for the top. So basically I do to anchor braids at the top of my head. Just so. When I put on my wig, I have a secure attachment for my clips. For my: u part, wig, it's really up to you! How much you want the debris, how big you want debris to be! For me, I pray as small as possible. Just so it doesn't leave a bump, and then I decided to put a leave out at the front too. You don't have to honestly. I don't see a difference this time. So it's really up to you. If you want to leave it out or not, and then I'm gon na do my another anchor braid at the bottom of my neck, but I'm on my head, sorry and basically all the rest. You can just clip it because we're not gon na use this part for now. So this is how much I'm taking to do my parade. So now I can start braiding, so I'm gon na do just a normal brain. So you want to go all the way across from one side of your head to the other side, and you want to make sure you braid your you braid it all the way down. So next I'm taking the 2 anchor braids. I'M gon na go to anchor braids that I had at the top. So you just wan na release them so you're gon na do one side. First, just call me to make sure there's no knot and then we're just going to braid it really quickly and all of your braces make sure you break them all the way through. Just so like it doesn't release during the week or whatever. Just like that, and now we're going to do the other side, honestly braiding with nails like this, it's not optimal. Like honestly, I used to braid so much better than this, but with my nails now it's like, I can't even braid, but I make it work. I push it through and I make it work so again. I'M just gon na braid, my hair, all the way so now we're gon na take the biggest part at the bag. We'Re just gon na trace a part in the middle, so we're gon na. Do two big braids honestly, if your hair is a bit more take than me, you can always take this part that I'm coming right now and separate it in two like that. You won't have a big bump like it won't be too bumpy I'll, be like more flat, but three, my hair is really fine, so I'm just gon na take. Do one big braid like this, so you want to take your anchor braid and braid it with the rest of the hair. So now I'm just taking whatever I have, I'm just spreading it all together and this one you want to braid it all the way. Just so it doesn't release if you have elastic, so you can always put it last six. For me, my haircut stays pretty well, so I don't have to put anything just make sure that I braid it all the way down, so I'm gon na do the other part. Now again, you just want to take your anchor braid and put it with the bigger the bigger braid all together, like that. You won't have to too many plates to clip down after, and also remember that you have your anchor braid at the bottom, your head, so just make sure you could put it all together in the end like that, are you gon na only gon na be left With two big braids that were you, gon na, have to clip so now, you're left with two braids that you're gon na have to clip what I'm gon na do I'm gon na cross down. So whatever is on the level and put it on the right. If your hair is really long, can always just fold up the braid in two and then take a bobby pin and just clip it down, and now I'm taking the other braid and put it up on the other side, the opposite side again, I'm gon na take The length of the braid fold it and then clip it with a bobby pin - and this is always should look like so you see everything is crossed, and then you have your anchor braid at the bottom and it's laying pretty flat. So now you want to take your wig, your? U part, wig, so you see all the clips that I have. I don't use all of them, it's just for whatever style. I'M doing so now, I'm gon na take the top clip. I'M gon na put it on my first anchor braid on that side. Take the other clip put it on the other anchor brain, and then I have a clip at the at the back, so I'm just gon na clip it, and then I have a clip at the bottom. I'M gon na clip it on my anchor Bri that we did before and on my wig is secure. I don't know I have more clothes, but I don't use them because I don't really need them for this hairstyle. So now my hair is like thought, so I'm gon na do my leave out honestly. I have a lot of leave out right now. I don't usually leave that much out just because I just did my relaxer, so my hair is like a bit more fine. So at first I thought I was gon na. Do a middle part like I said before, so I'm pushing it down and just checking how I like it. I didn't end up liking it that's what I'm gon na change it in a second you'll see. So I'm just tracing another part, since I have a lot to leave out like it's easy for me to just trace another part and and do a side part instead of a middle part. But for you guys, you have to make sure that whatever part you do like most of the time, you can't really change it. So now I'm just gon na start on it, because I just took my my hands were a bit frizzy just to make it more smooth. But like I was saying like as I go, when my hair is like the relaxer kind of wears down, sometimes like wherever I do my part, it's like it. I can't really change it it. Just when my relaxed it's pretty fresh, I can really change it and move it around, because my hair is really fine and I have much more leave out and yeah you guys. This is always she look like, so I'm just pushing it down just make sure everything is smooth, there's no track showing or anything, and this is basically it guys. I hope you enjoyed the video. I have any questions couldn't not below. I forget to like comment and subscribe and I'll see you next time guys bye,


Comments
Brisa Costera: Excellent and easy video! Deserves more views for sure
Lifestyle by Kam: This was a really great tutorial
Moonlight Babe: Lovely hair, please where is the wig from?