How To Make A Wig | Lace Closure And Bundles
- Posted on 26 January, 2018
- Lace Closure
- By Anonymous
Please open me
- This is how I make my wigs
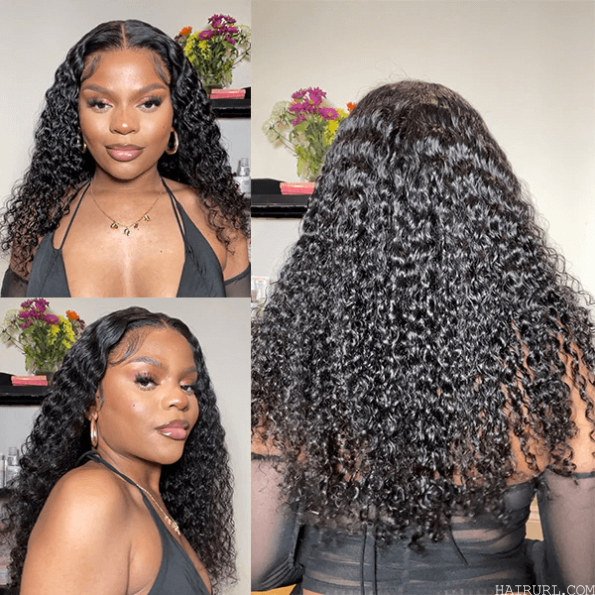
Specs of the hair I am wearing:
3 Bundles (20 inches) 1 closure (18 inches)
The colour of the hair is a 1b - 2 (Dark brown) / “natural black”
Link to store
https://alipeerless.aliexpress.com/st...
Link to hair
https://www.aliexpress.com/store/prod...
Closure
https://www.aliexpress.com/store/prod...
I also discovered that they have an actual website outside of aliexpress
https://www.peerlessvirginhair.com/
Mannequin/Foam head:
http://www.pakcosmetics.com/wigs/wig-a...
Don't forget to thumbs up and subscribe
Feel free to comment down below
Follow me on my social media:
• Instagram: https://www.instagram.com/vannymdm/
For business inquiries please email me at: [email protected]
Hi guys and welcome to my channel, my name is funny if you're new here and then welcome and if you've been subscribed for a while, then welcome back so today I thought I would just do reupload a video that I have already uploaded on my channel before And it's how I made my wigs as you guys know, if you follow me on my channel, I am natural, but I mostly protect them, so I definitely find it really. I find a lot easier to actually protective style and at the moment I'm actually suffering from hair loss on my edges, because I'm breastfeeding my son, so I mean I rather have my wig on that actually have my edges show and they're in this condition that they're In at the moment, but my hair has grown quite a lot and I find that my hair grows a lot better when I keep it moisturized and I just keep it and protective style. So what I have underneath my wigs are like mini braids, that I've made and I redo them every week, and I wash my hair once a week as well. I do all of my wigs the same way and I've done it for quite a long time now. Lately, I've gotten my hair from like Aliexpress and it has worked fine. If you want to see a review of this hair that I'm wearing right now, you can just click on the I above, but you can get to that. Video and I'll also link it down in the description box, and I find it a lot easier for me to make my wigs by using a closure and three bundles of hair. That'S usually what I use and I do have one wig with a lace front row from another Aliexpress company, which is alley gray. So I'll probably do a review on that hair as well and like for me and like the whole thing, with customizing, wigs and stuff. Like that, it's just not my thing, I find it really it's too tedious and I just don't have the patience to do it. I mean I've tried, but it never really turned out the way that I wanted to. So if I do click here now, I've noticed that I could just I might as well just do it with my was my Elise closure instead of doing it with my lace front. Oh so, for me like, I just really don't care that much and I don't care much for putting my hair up when I have my wigs on and stuff like that and do different styles. So you know it's not that big of a deal for me. If you want to see how I make my wigs, then just keep on watching this video thumbs up. If you liked the video and don't forget to subscribe to my channel I'll, see you guys in my next video. I hope that you like this one bye so guys, I'm gon na show you how I made this wig. I made this take the complete years ago, and I basically used 1 closure and 3 bundles to complete this hairstyle. So you're gon na need a couple of things to make awake. I always use a mesh wig cap because it helps you're gon na need a couple of combs a couple of clips and the scissors to be able to cut around the tracks and obviously, some thread as the needles to make it work. This wig cap is actually the wig cap that I prefer. I either use this mesh wig cap or I have like a dome cap and I feel, like those are the most comfortable ones, actually have the hair that I'm using in this video is from well African. So I'm using one closure and 3 bundles in total to make this wait. Besides all the other things that you're gon na use to make the wig you also, you should have some kind of mannequin head to use so that you can actually make your wake. It make some things a lot easier. So that's the first thing I do is I work on attaching the closure to the wig cap and, as you guys can see here, I'm gon na just sew around the closure. But before I sew around the closure, I'm gon na need to put some of the hair away so that I can see the closure possibly and just start sewing it on. As you may see here, I try to make sure that I sew it on as flat as possible and I usually start on one side and then I go to the other side, and I actually do the back of the closure last ways to make sure that Everything is the way that it should be, so that is pretty much it for sewing around the closure. So I'm gon na make sure that I put that here away so that I thought in the way when I actually start sewing on the bundles. So what I do after this is actually start sewing hair around the perimeter of the ways. First, before I start filling it in now that I've finished showing the hair around the perimeter, I'm gon na fill in the rest of the wig cap by just sewing on the rest of the hair that I have so. This hair is hair that I passionately used as a Solon and obviously that I didn't want to throw away. So what I do with the rest of the hair is, I just continue to sew it on and without trying to cut any wess or so and when I get to the other end of the hair, I just fold it and then start all over again and Sew it on to the other side of the head, so you basically just repeat the same process until you get to the top of the head of where the culture is. So what I'm going to be showing you guys now is pretty much the same thing until I get to the top of the closure. So when you get to the top close to the closure, you make sure that you sew on the weft as close to the closure as possible set so that it doesn't leave any like space in between, because that way it just looks a lot neater and nicer. When you do it - and I forgot to tell you guys that when I actually sew on the hair, I actually make an extra loop. So this year that I use was hair. That was like 20 inches long, but I decided to cut it and make it a bit shorter. I'M no professional! I just cut it the way that I like it. It was a pretty blunt cut that I made, but yeah you guys could just wash the rest of it. The most important part was actually on how to make a wig. You can style the hair and whatever way that you want to sell the hair but yeah. This is basically how I make my wig oh, this is what the inside of the wig actually looks like it's very simple, and I used a little bit of elastic band just to tighten up the front. But here is the completed look of this week and, as I told you guys all of my wigs, I make them the same way. The easiest way for me to make my wigs and I love the way that they turn out. So, thank you so much guys for watching this video don't forget to thumbs up and subscribe. If you like to and I'll see you guys in my next video bye,


Comments
FD BROWN: You did a great job. Thank you for sharing.
Cheryl Sampson: Thank you this was helpful
Barby Banks: That mannequin is rather cute lol loved the video ❤️
Kris Marx jr: Cool vid as usual❤
Johan Ekdal: ❤️❤️❤️
Marinilsa Augusto Ferreira: Vanny l love you