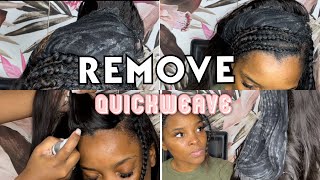
Middle Part Closure Sew In No Glue How To Do A Sew In With Lace Front Closure
- Posted on 29 March, 2021
- Lace Closure
- By Anonymous
Social Media
* Facebook : londoncurlstyles
* Instagram: @thelondontayy
* Business only email : [email protected]
Location: US -Columbia, SC
————————————-
Link to hair : local hair “Bellatique”
It took me 3 hours to complete the style
————————————
Products used :
Hot tools used :
Hot comb
Blow dryer
Babybliss nano pro flat iron
————————————
Music by Ari Chi - Save Time - https://thmatc.co/?l=62B50BBB
———————————-
keywords
closure sew in middle part,closure sew in no glue,lace closure sew in,ericka j,middle part sew in,middle part sew in no edges,sew in with closure,sew in weave tutorial,detailed closure sew in,middle part closure sew in,middle part lace closure sew in ,glueless closure sew in,how to sew in a lace closure,how to do a sew in with lace front closure,lace closure sew in tutorial
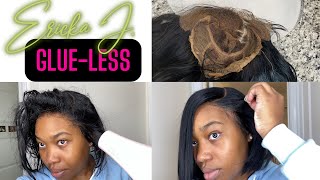
Hey: hey: hey y'all! What'S up welcome back to my channel, this is lunate coming to you today with another video girl in today's video, i'm gon na show you guys how to do a glueless middle part, sew enclosure, sew in okay on yourself or a client or whoever. Here you are doing girl. I know everybody is still wearing wigs and stuff like that, but everybody does want a good little sew-in, sometimes just for that security all right. So i'm going to show you guys how to do a glueless closure sew in and also i'm going to show you guys how to blend in two textures. So the closure sew in is a deep wave and the the bundles are a body wave. So if you guys are interested in seeing how i transformed that then go ahead and continue watching girl, so, as you can see, her hair is fire red. She is natural, all the good stuff. Okay, it's beautiful! It'S thick! It is flourishing all right, so we're just going to go ahead and braid the hair down. I parted down the middle if i'm going to do a middle part for the closure a lot of times i'll part in the middle. If it's glueless and i'm not using a cap, you know i want to have it line up the way it's supposed to be lined up all right. So one of the key things i like to do when it comes to closure sew-ins, especially middle part, is when i do part the hair. I like to start, i like to part right above the nose, the middle of the nose. That gives me a good reference on having a exact middle part. I hate middle parts or where it's like off center. You know what i'm saying it just does not look good, so that's one trick that i like to do in order to get that middle part straight and bust down all right, a bus down a bus down little part, that's what they call it apart, girl, the Bus downs, all right so yeah girl, so i'm just going to go ahead and braid towards the ear and then braid back. Basically, you connect all the braids together. So that way, you don't have a big gazillion billion gazillion braids to sew down when you're done. All right, like i said, connect them as you are going from braid to braid all right and then, whenever you are done with that, last braid make sure you crochet that braid to the rest of the head, just to make sure it has a seamless finish now. You can sew a net on top of this to have more sewing room and more security, and more longevity, however, just be advised and be aware that nets do it's really bad, sometimes under the sew-in. So it would encourage people to loosen the sew-in by scratching. So much and just kind of feel uncomfortable. You know because the scalp can't breathe the scalp is pretty covered with those nets and also the nets can be a little tight. However, it does increase the longevity of the sew-in, so you got ta. Take the you know. The good with the bad and the pros, with the cons, all right, all right girl. So now that everything is braided down, i did moisturize her her scalp with the do grow, oil, okay and then i went ahead and sewed one bundle. So the hair is about 20 20 to 24 inches. So it's pretty long. It'S pretty thick! This hair came from the beauty supply store. The brand was bellatique um. I don't think they're selling online guys, i'm in columbia, south carolina and that's where a lot of people get their trusted bundles from that brand. From that specific store. Okay, so i don't think they have this online. I'Ve been doing. I'Ve been using bellati care for a couple years from different clients, and i always tell people that ask me in the youtube videos baby. I don't know, i don't know where this hair is like i'm gon na be honest, i don't know, but the hair is pretty good. I'M gon na be honest. The hair is pretty good. Their closures in their frontals are pretty pretty good as well. Okay, so they make this, you know they get the job done, comparing to other things, other stores and other brands, it being beauty, supply, store, hair right so, like i said so when i do this okay. So, in order for me to kind of have time management, i like to bleach your closure, while, while i braid down and sew some bundles in okay, it just cuts the time out really really well. So, while the closure is bleaching and processing. Like i said i like to do the braid down the oil in at least so a bundle in sometimes the closure is ready by then so yeah so give or take the closure wasn't ready. So i was able to sew two bundles and basically have the closure left to sew down. So here i am going to use the ruby kisses, a color that is matching matches her color for the most part, if you have problem with color matching just smear. Some of the color on the client's forehead to see if the color matches and blends in well. Okay, that's a trick! I like to do so. I'M going to use a brush, put it on the other side underside and on top of the lace on the closure and just to make sure that the lace is basically blending in with her skin and i'm going to cut the lace off the closure. Just to make sure i know exactly where the closure is going to lay, especially if it's not glued down, it's going to be so down so you're going you're going to want to know where everything is going to be laid all right. So, with my non-dominant hand, that's the one i'm going to use to guide and hold the closure down. Okay, this prevents the closure from wrinkling and keeping the closure in the spot. Where you are sewing down now the closure will shift. The closure will um. The closure will shift back a little bit so you're going to want to make sure that you put in enough space from the hairline to you know a little bit in front of the closure, because my problem was like. I do sometimes - and i have to redo the closure, and sometimes i put the closure exactly where i want it to try to sew it down, and then it ends up shifting backwards. Okay, so make sure that the closure is a little bit in front of where you want it so that way when it does shift backwards, you have enough room and it's not showing any type of hair under it. Okay, so you're going to want to put the closure in front of the hairline and yeah. That'S how you're going to want to do it and make sure you sew the edges, the front edges of the closure, even if there's no space or nowhere to sew it down, because you're going to want to make sure you still sew your needle and thread through The parts of the closure where there's no braid under because, like i said, you're, going to want to anchor it down all right, so i'm just going to sew both sides down um, so the side sew all the way to the back of the closure and then Sew all the way to the front, but do not sew the very back of the closure. Quite yet until you are finished with the front okay, so i like to sew on both sides and then sew from the from on one side, the back to the front and the other side, the back to the front, and then i like to part right here, Part where the front braid lies under the closure, you may have to feel for it with your finger. That is perfectly fine. Whenever you find it you're going to want to make sure that you sew on that braid all right so up towards the part, do not reach the part, turn around sew back down all right. That is going to want to make sure that the closure is not shifting too far back and it's going to make sure that the closure is not flapping everywhere and flapping off girl, okay, so yeah once you do that you're going to want to sew the back. The size of the closure towards the back okay, however, do not sew the back kit. Well at this point, if both sides are sewed at the front, then you can sew on the back. But if it's not just wait, i like to wait whenever i'm basically about to close close. The whole sewing in that is when i sew the back down and just repeat on the other side, you're gon na you're gon na see that i did have some shifting of the closure backwards because, like i said i just didn't, you know um. I thought i had it, but i did it. I didn't um have the closure far enough in the front, so i did undo it a little bit. Um you're not going to see that part though, but i did undo it a little bit and just re-sew the closure down to make sure that it was seamless. Okay, so just prevent doing that. Just go ahead and make sure you put the closure a little bit ahead of the hairline where you want it. Okay is way while looking at this video, i do want to add, make sure that when you're sewing that under that front braid or on top of that front braid, you see guys, i am pulling her hair at the front, making sure that the front of the Closure is flat, so that's giving me that space and that security, when i am gripping the hair and pulling it towards her face, that's just going to make sure that everything is not bunched together and everything is flat and seamless. I am so glad you make it clear that you love me that you trust me is all right y'all, so now that everything is sold down, the key to having a flat seamless install is to make sure that the closure roots are flat. So make sure you get a good old white stick, i'm using the white set from love me hair that they sent me in my wig packet and then i'm going to get a typical little hot comb and it goes up to 500 degrees and it works really. Really well, it is electric all right, so yeah just make sure that you smooth the roots down and make sure everything is more seamless again. This is a closure that is a deep curly closure. It does not does not does not match the texture of the rest of the hair, so just be mindful of that. It may still have a little bit of wave in it, but it's okay, because it still flowed in really really well. So i'm just getting it! You know getting the flat iron in it: good partnering the stations having the flat iron go over that deep curly closure and then i'm going to start to curl the hair. Okay, the hair is super long. You guys, i think, i'm about to just really invest in some real curlers, all right but yeah, and i'm just going to do some barrel curls with the flat iron and yeah. I think it's going to be super super cute, so just go ahead and continue watching. I love you guys so much make sure you like comment and subscribe, and your girl will talk to y'all in the next video love y'all bye, but i still wish that you were here. I am so glad you make it clear that you love me that you trust yeah, i'm counting, i know i know you want me to is is for me is i am so glad you make it clear.


Comments
London Tayy: Girl!!! This sewin with the curls framed her face so well ❤️❤️
ro ma: Beautiful, how long does this last
Redd Bone: VERY nice work‼️
Liyah B: I can't find anyone who does closures like this Everybody wants to melt the lace on their forehead with glue these days and I don't want all dat
Real Ralph & Meka Boo: Heyyy London and Tanisha. This is so Dope I met her at the Circle K now she on a video. Love it. We're also in Columbia so I had to show love. Tanisha told me about your channel so hear we are . We fam now lol. You do some beautiful work. Enjoyed your video have a blessed day
Mariah B: You Did THAT!
Cedric Grant: I heard you say you were in Columbia SC. I am looking for someone to do my sew-in. Where can I find you? (I'm on my husband's youtube account)
deseraymiles87: