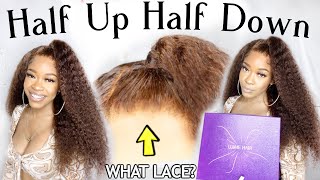
No Glue, No Got2Be, No Spray Flat Closure Sew In. Elastic Band Method.
- Posted on 08 December, 2018
- Lace Closure
- By Anonymous
Closure sew in tutorial
Featuring Ivy's Legacy Hair Collection
"Frosted Storm" brazilian straight bundles
18', 16', 14' + 12' closure
Www.ivyslegacyhair.bigcartel.com
Use my 20% discount code: KITA
FOLLOW ME ON:
FB: Kita MUA
Ig: www.instagram.com/kita_mua
Pinterest: Kitamua
Hello, you guys I am Keita MUA, I'm coming to you with my first ever YouTube tutorial, so I hope you guys enjoy it. If you do, please leave me a thumbs up, go ahead and leave your questions and comments in the in the question box below. I will also pin all of the materials that I used and links to websites in the in the in the bar up under the video. So let's go ahead and get started today. I am going to be doing a closure wig, I'm going to show you how I sew a closure wave onto my own head. So you can use this to do your own hair or you can use the techniques to style someone else. So I'm going to be featuring these gray, these gray straightest Brazilian bundles that I received from IEDs Ikeys legacy, hair collection and the website will be pinned in the description bar of the video. So these bundles, I got three bundles and a closure in 18, 16, 14 and 12 inch. So I will be sewing these into my hair and then also sewing on the closure. So let me go ahead and show you this hair. It is great Brazilian straight and again, this is from Ivy's legacy, hair collection and the website will be in the description bar of the video. So I have three bundles of this, and the bunnies are really nice. This is really nice hair. If the bundles are really thick, I did not weigh them and see how much they are, but I'm pretty sure it's got to be more than a hundred grams per bundle, because it's quite quite a bit of hair from an inch bundle. The bundles are really soft. They came very soft, they don't have any kind of chemical or texturizing smell to them. They are very soft, they're, very flexible. They move a lot fluid, should I say, they're very fluid. So let's go ahead and get started I'll show you guys the process. So I have this great closure that also came from Ivy's legacy: hair collection, it's a four by four closure. What I love about this closure is that it's gray, so the the mattes don't need to be bleached, because the knots on the closure is great. Just like the hair is so I've already plucks the frontal, I'm sorry the front of my closure to make it look more natural. I'Ve already done that I may have to do a little bit of plucking more down the middle. Where my part is I like a side part, so I may have to do a little bit of further right there, but for now the front of my closure has been hooked to my life, alright. So before I place the closure on my head, what I want to do is I want to secure an elastic band to it to make sure that once I'm done stop sewing my closure. My closure fit is tightly on my head as possible, so if that it lays as possible so the way that I'm gon na do that is I'm gon na take just a regular, thin headband and stretching the elastic headband. I'M gon na take the headband and place it on my head and I'm gon na make sure that the headband is laying on my head exactly where the closure is gon na lay in the front and all the way around. Now. While I have this thing on my head, like that, I'm gon na take my fingers and I'm gon na pull the band to stretch it. So what I, what I want to do is I want to stretch it as far as I can to hold it in the back. So what you're doing with this is you want to stretch it as tight as you can without creating like you, don't want to make it so tight that it gives you a headache, but you want it to be tight enough. So what you want to do is stretch it as tight, as you can hold that hold it with your fingers and whatever's left of it. You want to take the band off and cut right eye liner. Just because it's easy to see you could use anything. You need, but the white eyeliner is gon na. Be easy for me to see so come take. Take my closure once again and I'm gon na sit it on my head, all right where I want it and I'm just going to mark where the end of the closures are. This will, let me know how far my elastic band needs to go, so I'm holding my closure where I want it and I'm going to take this white pencil and Mark the area right there and on under it, and then I'm going to take the other side And you want to kind of stretch your closure so that it lays wet kind of stretch it out when you do this stretch it out and I'm going to mark this area where my closure stops on that side. Okay, so now I have just this amount of elastic, and that looks about right to me. My head is very small. So now I'm just going to stretch it out again and make sure that it meets in those two areas where the white is so it does. It does very tightly so now. I'M gon na take this elastic band and I'm gon na sew it on to my closure so where you want to sew it at is right at the front part of the closure and on the sides where the thickness of the closure is so I'm gon na Sew it so right here and you want to leave just a little bit of space for where the closure starts. So like say, your hair starts right here you want the closer to start a little bit like right there, so I'm gon na take that part of my closure and I'm going to sew that elastic band on to my closure. Alright. So now that I have my elastic secured on that side, I'm just going to make sure that my elastic is black and I'm gon na secure it. On the other side, the same exactly okay to my closure, I'm gon na show you how you want some place. Elastic band and the closure on your head, so first let me show you the construction. What you did was you just fold both ends of the elastic band onto your closure right on the inside and right behind, where your closure line starts so probably are out this threads. This far back on the closure and this elastic band looks really really small, but when you stretch it out, it should be the perfect length of your head. So it should be full just enough tension, but not so much that it gives you a headache. Okay. So now what you want to do is you want to hold your closure forward? You want to hold it toward you so that the front part where the lace is mom that goes right here is pointing towards you, and then you want to hold it in upside down like this, and you want to stretch your elastic and pull the elastic over. Your head, so you won't be elastic to fit right up under your braids in the back, and you want it to just sit on your head like this. So you'll flip your closure back and adjust the closure where you want it to sit on your head. So you want the closure to be right in front of your hairline and you want to make sure that the elastic sits right in front of your very first braid. So right in front of your very first braid on both sides. You see how top that this closure is onto my head. It is laying flat - and it's very tight onto my head - that's what you want so now that I have the closure sitting exactly how I want it slash on my head. I'M gon na take the hair from the closure and pull it up. So now that I have it secured in the back, I'm gon na take this and just put it into a ponytail so that the hair is out of my way. While I am sewing my closure down and this hair is new, so I might have to fight with a little bit so now that I have the closure sitting on my head exactly how I want it to stay. What I'm gon na do is I'm going to take my my my needle and thread and I'm going to sew the closure down onto my head. So what I'm gon na do is. I am going to thread two needles and I'll show you the reason for that. Just a second, I have both of my thread, my needle threaded, so I'm gon na take both of them and I'm gon na use them. At the same time. This will help to secure that my closure lays flat and that there's no lumps or space in my closure, because you want it to be flat from the front to the back and on both sides as well all right. So what I'm gon na do with my first needle is, I am going to take that needle and I am going to sew one side of my closure go into my launch of my cap now. What I want to do with the very first part of my thread is I want to take my needle and I'm going to thread from underneath of the closure, and I am going to poke a hole through the thick part of my closure right here. Right on the very side - and I'm gon na drive, bring that through and I'm going to make a knot, and this is going to secure that the very first part of your sewing is not going to move. So you want to secure that knot and I'm gon na. Do it one more time make two knots so anytime, you start with a track or in with the track. We want to do this. We want to make sure there's two dots they are in that area. It'S tight to the head, as you can get it okay, so now that I've secured not secured at the very first part I'm going to so this second one, the other way downward. So I'm going to come from the top of my closure and so in and I'm going to take this part of the thread and make sure that it goes through the elastin or so through the elastic, as well as the knitted cap and then also while I'm Doing that I'm going to be shorter, so through the braid as well. So this is going to secure that elastic into your braid to make sure that the elastic itself it's staying in place and then I'm going to take my needle and thread and sew about two or three more dots from just sewing. My elastic basically into my braid. Alright, so now that I've done that on that side, I'm also gon na take my thread and do the same exactly on the other side. So I'm going to take my other thread. Do the same thing on the other side. So now that I have both sides of my elastic sewn down, I have it sewn down about this far on both sides, the elastic one, if you want to just make sure that your sewing is as secure as possible. But if it's really tight or you just don't want that, I want it to be that tight. You can cut it actually now that I've moved it up a little bit. I think I'm just gon na leave it on just so that way. I can have that extra security, so that may work for you as well. You may be able to just adjust the elastic so that it's not so tight on your head and leave it on and so over it just to have an extra security and know that your frontal is gon na, be as flat as possible, which was the point Of sewing the elastic one, so I'm just adjusting mine so that it fits in a way that I can move my head and not have a headache. So I'm so I'm gon na keep my elastic so now that I have that part done. What I'm gon na do is I'm gon na take this thread and you can either cut it or sew it back up. But since I have so much thread left on both needles, I'm just gon na keep sewing it back up because I don't want to cut it in, didn't, have to tie it again. So what I'm gon na do is I'm just gon na take this thread and I'm going to sew back on this time I'm going under because it really doesn't matter. The elastic is already secure. So what we're doing is we're just making our way back up to the closure with the needle, so I'm just gon na sew up under the braid and the elastic just to get my thread and needle back over to my closure and I'm gon na. Do this one side at a time, so now that I have my thread after this last one now that I have my thread in my needle back up to my closure now, what I am going to do is: I am going to sell the closure down now. What I want to do is I want to sell the closure down only on one side down to right before you have to curve it. So I'm gon na hold my closure and make sure that it's flat, you want it to be flat. Take my finger and I'm just gon na lay my closure flat. I'M gon na make sure that it's laying flat and I want to make sure that swing flat on both sides, so kind of like hold it down just to make sure it's flat. Okay! So now that I know it's flat, I am going to take my thread and just sew the inner part of my closure down now when I saw the inner part of my closure down, I want to make sure it's flat the whole time, and I also want To make sure that I'm sewing at the very end of my closure into my hair so and continue go back to the other side and continue to sew this part half weight onto the middle. So now my closure is so it's going to take this rubber band out. Just so you guys can see it. My closure is sewn on first, I've got hair still coming out, so I looked it as I took a bath before, but I'm just showing you guys how my closure is Alain so and, like I said, I still got it's like a little bit on the side Where my heart is, but so, as you can see, my closure is very, very flat. So now that I have my closure sewn down, what I'm gon na do is I'm gon na take my scissors and I'm gon na cut the front the lace off of the front you so now what I'm going to do is. I am going to start to sew my my tracks in so I'm just gon na take this, and I am going to put it into a console again and, as you can see, this little part right here is lifting up. That'S fine! This part right here is not gon na lift up at all. This right here is lifting up, because I left a little bit of it still there. If you want to, you can cut yours off, I would rather lay down or something sprays, actually, what I'm going to be using. So now, I'm gon na take this part, and I'm just going to tie it up again so that I can sew in my tracks. Alright, so my closure part is done and now I'm gon na begin to sew my tracks, so there's so much less. I'M gon na make sure that I put the longest track in the back, so this is my 18 inch. These are my 18 inch bundles, and this is in the color frosted storm from legacy. I'M sorry from Ivy's legacy, hair collection - this is my classic storm thunder. I am gon na keep them double wefted. I sew my double width, so you want to take the end. That is not connected, and this is what you want to start your. So anyway, I have my thread. My needle threaded, I'm gon na take the end of my hair. That is not next to each other, and I'm gon na take my thread through both of them might pick the left on this hair because it's so it's thin enough that it isn't hard or hurtful to go through the weft. But it's thick enough that the needle is not going to slide straight through the way so now that I've got ready both wets I'm gon na. Take the hair, I'm gon na connect it to the bottom part of my hair. By taking the thread and at the very corner, the very end corner of sunny and lunches so into my braids and bring that thread through and it will drag over straight, it will drag that hair. Sorry, I usually have the hair. I usually have my hand behind. So like this, so it will drag the hair too. That'S that spot once you have the hair on that spot really tightly. You will tie your two nuts and this is going to secure the first part of your hair onto your head. What I'm doing is I'm taking the thread taking the whip in two minutes, ready I'll kick things up a bit the needle under the whip, Thunder Thunder under the braid, but it doesn't have to do that. So this is the first bundle install. Oh, this is the 18 inch, and so I have the first bundle all installed. It comes up to about right at the top of my ear, when I work really hard to try to stretch all three bundles and took fits them all onto my head now. One thing I did do was the elastic was pretty tight and it was giving me a headache, so I did cut the elastic on one side. I just cut from the area where I sewed down and cut this right here. It did loosen it up. Just a little bit but as you can tell, my frontal is still flush on my hand. It'S not lifting or anything like that. So I did that, and I lifted this up just a little bit to kind of take some of the tension off of my head. So that I don't get it further headache, so it is still connected on this side. I just clicked it on this side to make it loose now this, of course it looks like it's standing up, but it's just because how the tracks were wrapped in that gold. Wrapping so once I straighten that it's gon na lay down flat um, but this is the first bundle, which was the 18 inch. I'Ve got about two mama bundles to go so I'm gon na sew in those last two bundles and then I will come back and show you the full, install and we'll go ahead and cut and continue to slow. So, as you guys can see, the merit of the hair is very soft, silky shiny on and very nice okay. So now I have the second set of tracks. The second bundle in my hair, so I've got the 18 and the sixteen in my hair with the closure and I've got about this much space of law, so my 14 inch bundle definitely is going to cover up that amount of state. So what I did was, I sold all of the tracks in as double west, and I did the fold-over method, so you guys can look that up if you've never heard of that, look it up on YouTube. But now what I'm going to do is I'm gon na take this fourteen inch, which is the shortest you go longest to shortest. So you start with the longest. You do the middle length in the middle and then you do the shortest on the top. So I'm gon na take the fourteen inch and I am going to sew this one in a single track. So, instead of folding the tracks over to where it's two and I'm sewing it in together, like that, I'm just gon na undo it and so in where it's just one track at a time, come back. I'M gon na cut the track of this 14 and that's just to help. It lay a little bit flatter at the top. So I'm going to um I'm going to lay one track cut. It lay another track cut. It lay another track until I am as close to my as close to my closure as I can get, but I don't want to be right up on it, because I want the hair for my closer to lay flat over that hair. So you see how my closure stops right here, I'm going to stop my track, that's before it like right there. So that way, the hair that closes to it can fold over it with a seamless look. So right now I did go ahead and cut that that front part of my cap off. I cut it off all around. I am now going to sew in the last of the tracks and then I'll come back and we'll go ahead and adjust the baby hairs. If we're gon na do that and we'll do the final look on the on the sewing, and that will be all my closure and my three bundles are some. I actually could only get to a little bit less than two and a half on those in my hair. My head is very small, so this is what I have left of the 14 inch bundle. I did try to use as much hair as I could, but my hair is small. My head is small and the hair they are, it all came with a lot of hair. I have not put baby hairs or anything like that, and so I really don't like to cut baby hair, so I'm trying to find a way that I can without cutting. However, my natural baby hairs come down really really far, so it's hard for me to brush them and hide them up under this grave here. So I may have to put some of the gray hair to make baby hairs that will match my own so that it will kind of blend together. I haven't styled it or anything. I did take a flat iron, it kind of just I'm sorry. I took my curling one and kind of just went over the top of the hair to lay it flat because, as you guys know, from being rolled up in the role the hair wasn't laying flat like it should have been. So I did take my curling wand and just go down and touch my hair to make it lay down. So, as you can see, this is my frontal. I'M sorry about my closure. I am going to have to plug my part a little bit more. So that looks a little bit more natural and I'm going to have to lay this hair down right here so that it blends in with my natural hair. But now I am going to find a way to kind of just jelly. Actually, a little bit of the hair from the French underneath, if you want these bundles, they are Ivy's legacy, hair collection, bundles. I will end the website in the description bar there's, also a promo code that you can use. I will make sure to pin down at the bottom of the screen as well. Thank you guys so much for tuning in, like I said before, if you loved the video, please give me a thumbs up comment on how I will keep on my toes. So, thank you guys so much


Comments
Jordan Williams: How long does the elastic band last
HildaZ Campos: That hair is cute...looks like hard work but practice makes perfect