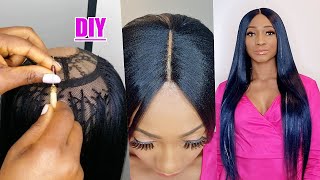
How To Make A Wig Without A Sewing Machine | Very Detailed & Beginner Friendly
- Posted on 13 November, 2021
- Lace Closure
- By Anonymous
Heyyyy y’all welcome back to my channel✨
So in today’s video I will be showing you guys how to make a wig without a sewing machine. This wig making technique Is beginner friendly!
Comment down below any questions you have in regards to making a wig
Be sure to like comment and subscribe to my channel and turn on your notifications so that you can be alerted whenever I upload a video
Follow me on the gram'
Business IG @wifeymaterialbeaute
Support my business
Website: www.wifeymaterialbeaute.com
Need more help reaching success in your business?
Hair Game Playbook
https://jakiauniquedigitalpr.gumroad.c...
10 Keys To Business Success eBook
https://jakiauniquedigitalpr.gumroad.c...
What'S up beauties welcome back to my channel, so in today's video i will be teaching you guys how to hand stitch a wig from scratch right here, i'm just showing you how i make my guidelines so that you can know exactly how many tracks you'll be laying Down and also just to service guides, to help you sew your tracks on better now, this step is optional, but it will help you in the long run, if you are new to wig making now once you're all done with your lines. This is what it should. Look like don't worry about it being perfect, it does not have to be perfect so now here i'm just going to go ahead and align my tracks um, i hold it with the t-pin, so it can stay in place. As i sew once you are sewing, you want to start off your track by making a double knot. Um thereafter, you can, you can single knot and you can go under the track and oh inside of the cap, so that it can stay in place. You don't have to go through the weft once you make that first initial knot. Now you want to make sure that, as you are laying your tracks, you want to make sure that you are following those guidelines that we made in the beginning of this video, so that you can make sure that your tracks are laying straight and also so that Everything falls um on top of each other. You don't want it to be all over the place, which is why the guidelines serve, but um, i'm not going through the tracks, i'm actually just going underneath the track and going through the actual cap. You don't have to stitch directly through the rough when you're once you make that initial knot in the beginning, like stated um, just because it's it's time consuming and also just doing it. This way, it'll still be snug and secure as well. So you don't have to go directly through the um wealth, so so all right and once you're done you're going to go ahead and continue the process throughout the head. Once i get to the top, i will come back and show you guys how i finish off the wig, so so so so now, when i get to the top of the head, i only have between two and three lines left up to just to finish. The wig off i single track um the webs from this point, which means basically, instead of doubling um the tracks up. I just sing put it singly because at the top you don't want it to be bulky. You want it to be as flat as possible. So, by single tracking up when you get basically to the top of the head um it just you know, makes it more seamless and it makes the wig lathe more flatter. So so so so all right, so my camera did die in the end of this video. But this is the final touches i want to thank you guys so much for watching


Comments
MIRAM WILLIAM: Please show me in your next video how you sewed your closure thanks
Kashoutt Vu: I’m glad I saw this cause I don’t wanna buy no sewing machine