Closure Wig Tutorial (Brief)
- Posted on 08 September, 2021
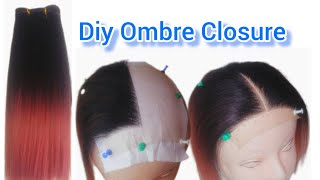
- Lace Closure
- By Anonymous
making a glueless closure wig from start to finish, briefly explained www.thegvohaircollection.com
#wigs #gluelesswig #closurewig #comedy #explore #funny #sewingmachine #hair #wigmaker
Hello people so today we're gon na do a brief tutorial on how to make a wig from start to finish. If you want a more detailed tutorial, take my class, the link will be in the bio, so i always start with a mesh breathable cap, the one. That'S regular size, not the large one, unless the customer has a larger head, i'm using a 22 size canvas head today that was the size of the customer's head. Usually that's everybody's size, honestly. So we're going to start off by placing the cap on the head. You always want to make sure you put those two lines up front, because it will help guide you on how to put your closure. Oh yeah, we're making a closure wig today, you know what i'm saying: that's what we doing so we're going to pull that cap. Like this right there to that line, now i do have another tutorial coming on how to mark your canvas head to make it easier for you. As you can see, mine is already pre-marked with those lines you're gon na need t-pins. You can get that from the dollar store amazon. I advise that you use amazon because you can get more for cheaper, so we're just going to go ahead and pull that cap, so it doesn't have any wrinkles put it to our line where i've already had marked we're going to make sure that's on there. Nice and flat yes stretch it out. You just want to get rid of those wrinkles as much as possible. That'S how it should look. You know what i'm saying: yeah right there yeah right there just like that, so we put it yo, quick, look! Um! You know get down right, you know just because i pregnant don't mean i can't get y'all yo yo butterfly come on now, stop playing that's what we do. I had to do that real, quick. I had to get that out of my system. So next we're going to take our closure. This hair is from gvo hair collection. The link will be below we're going to go ahead and place that on the cap, you always want to make sure you pull it up about a half an inch for a closure. So that it don't be exactly on the closure, because that's going to make it look weird and it's going to make it have like a wiggy, look to it so you're going to go ahead and pull that right down. Yo t pin it down, i'm always very picky about this part, because placement is very important, so you got to make sure it's equal and even on both sides, you can use those lines on the canvas head to make sure that it is even so. I just want y'all to see how it should look once you do. It use those lines as a guide on where to place your t-pins, so we're going to go ahead and turn that around and put our t-pins in the back. The most important thing that you should remember is to make sure that it is flat that that closure is laying flat on all ends, the back and both sides. You don't want it to be bulky. That'S this is what i'm making sure of right here. So you're. Just going to pull back a little bit, not a lot, because you don't want to rip your closure, although gd or hair collection closures do not rip baby quality, so you want to lay that down make sure it is flat. Yes, like that, excuse my nail that is so ghetto but whatever period, that's why i wear long nails anyway, so you're gon na do the same thing to the other side. Lay that right there flat like so ye. You see how it's up. I don't like that. So i'm gon na take that little t-pin right already i'ma pull it. You feel me lay it down flat, just like so now, yes thumbs up baby flat on all sides. Do you see the flatness? I say: do you see the flat in the wrist? You know what whatever the flatness. Yes do. You see it flat all right so next period. That'S that's that on it. So next you're gon na go ahead and do the outline period yeah again period on these hoes, and that's that sorry, i'm not supposed to be cursing. I'M trying to stop cursing so that little pen, crayon thing i get them from walmart. I'M not going to tell you to steal it, but um some of them just so happen to end up in my purse. While i was at walmart, but you get them from walmart. I prefer those because instead of the marker, because it doesn't leave like um, i don't know how to explain it. Just get those okay, so you're gon na outline your funnel on all um one, two, three on all three sides: you outline your frontal. Yes, like that, and then you're gon na start with your lines so that it can it yeah belly work belly work, so it can work as a guide when you're gon na start sewing on your tracks on your sewing machine, so you're, just gon na do straight Lines, it should always be about 10 to 11 lines. I don't care what dome head canvas head. Sorry that you're using it should always be about 10 to 11 lines, even if you're gon na make it full, you can still put tracks in between those lines. It don't have to be like straight, and you know whatever just as long as it's good enough to guide you while you're sewing on your sewing machine. Like i said i am going to make a tutorial on exactly how to put these lines on your canvas heads. I'M going to give you guys exact measurements, but this is just a brief tutorial. I felt like doing you know what i'm saying and you can always take my class. That'S that on that, because ain't, nothing like a one-on-one class baby, huh ain't, nothing like a one-on-one class sweetie. You know what i'm saying like: hey yeah, so yeah we're gon na go ahead and close those lines out on the side like so. Oh, this pregnancy gave me back acne y'all. I don't know why, but i got back at me, but it is what it is, i'm still fabulous and does that on that, so we're going to go ahead and outline the lines like soap. You know what i'm saying a heat like that yeah yeah. It should look like this you're just gon na bring it around and you're gon na. Do it to both sides keep outlining those lines for some reason when i skip those two lines in the middle and go to the bottom, it just works better for me when i don't do it like that. The lines end up like overlapping and i don't know this is how i always done it. So i'm counting that should be about 10 to 11 lines. You know what i'm saying it should always be about 10 to 11 lines from where your closure is sitting. So i'm just showing y'all again how i'm outlining the cap closing out those lines doesn't have to be perfect. Just do it, so it can guide you while you're sewing on your sewing machine, even if you're sewing by hand. I still used to do this method. When i used to sew by hand but baby sewing with a sewing machine - which i also have a tutorial coming on, will save you so much time like, i literally make each wig in like 20 minutes honestly, depending on, if i'm taking breaks or not so this Is how it should look when you're done and that what you're going to do next honey you're going to go ahead and remove those t-pins and then you're going to sit your frontal to the side? I'M sorry! Your closure, it's a kind of a similar process for a frontal, but i'll show y'all that in another video, so yeah you're just going to remove those t-pins put your closure to the side and then you're going to remove those t-pens from the back. Remember we had t-pinned it down in the back, that's how it should look that space for your closure and then your lines, that's exactly how it should look. Okay, do this method! I promise you you're gon na come out with a flat wig and a wig. That'S going to fit most head sizes all right, so that's how it should look once you take it out. Those lines are going to curve just like that, so i'm going to go ahead and start sewing, but i'm not showing y'all that in this video pal black out, just like that, wig done in 20 minutes now we're gon na take our wig put it back on Our canvas head, i do, pin t, pin the back just like we did before and then now it's time to sew on our closure. I can sew it on by the sewing machine, but i just wanted y'all to see that for beginners it's usually easier to sew. The closure on by hand instead of using the sewing machine. So that's why i'm doing this step, but usually i do a by sewing machine and um. I would have been done with this wig already, so we're just gon na follow our line. Our tracing that we made earlier of our closure. We'Re gon na pin that closure back down don't be alarmed if it's a little off from the line that you did. That'S because the the cap has now stretched because you sewed on it, so it might not be exactly on the line, but it should be like exactly right next to it. So we're going to do the same process. Pin that closure down we're going to pin down the back remember we want to make sure it's nice and flat. We don't want any lumps or bumps because that's not going to work and it's not going to work when you put it on your head, y'all, i'm so fat and pregnant. Look at my nose! Oh no! Oh! That nose is biggest hair, big big old child anyway. So yeah you see it should be, it's not exactly on the live. Well, i'm a professional, so it is kind of exactly on the line, but for don't be alarmed like i said if it doesn't end up exactly on the line. That'S okay! As long as it's very very close to the line that you drew, that's fine as long as you make sure it's flat on all sides and then the middle, even that's fine! I was listening to gospel y'all i'll, be listening to the best gospel songs. Baby trust i'mma send y'all. My gospel is because everybody asked me for a gospel list, so yeah we're gon na use that type of needle that little u-shaped needle as you all should already know so. Um, that's what we're doing we're gon na thread, our needle. I hope i can get it right on the first. Try because i don't know if pregnancy made me blind, but it would be taking me so long to thread these needles, so we're gon na thread that needle we gon na do that child yeah. You see my face because i don't know how long it's gon na take me to thread it, but we're gon na go ahead and try it out like so because, oh i don't got it yeah yo pull that thing in now, yo make sure your thread is Even do your little knot at the end, this is all stuff that you guys should already know. It'S not rocket science, we're gon na do our little uh knot at the end to make sure our needle is secure and then we're gon na get the sewing. I'M going to skip all of that because you should know how to do it already so boom, just like that done with our closure. Now we're going to cut off that excess lace in the middle be careful on how you cut this lace? Okay, because i don't talk to class and this girl done cut the darn thread and we had to literally, we had to start the wig over, because i know how to fix that. But if she were by herself, she would have had to start that whole wig. Over and you don't want that all right so yeah make sure you cut it. You know so that there's not so much excess lace on there, but make sure that you're not accidentally cutting the thread. So i'm just getting rid of some more of that lace. That'S there or that cap to be exact and boom. It should look just like this, so this is the sewing machine that i use. I just wanted to briefly show y'all that and a little clip of me sewing the track on. I really recommend that you use the brother um brand because this always works for me. I also add clips and bands to each wig, but that is to be coming in a later video or you can take my class. So, as you all can see, this is the finished product don't come for me. Do not come for the sleigh. You can always learn by taking my class again. I will put the link in the comments below thank you for watching subscribe like and comment now.


Comments
The Innocent 6 Family: The voiceover had me great tutorial & the wig was super cute !
Destiny Gordon: That part been fab
Destiny Gordon: Quality
Destiny Gordon: Girl bye I’m logging out fucking 4:16